
[img]

Description [/img]

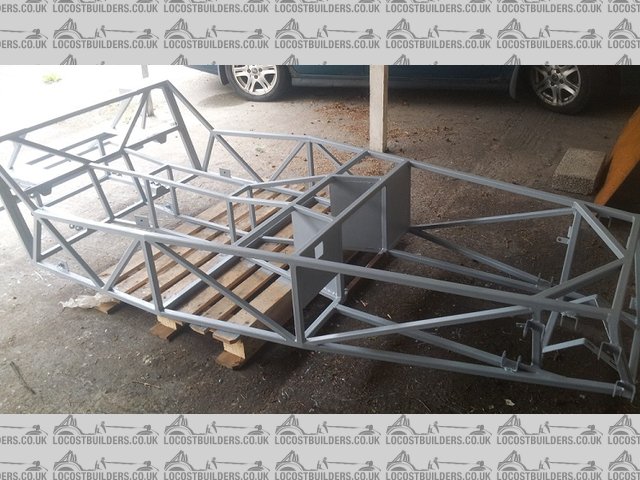
well here we have some progress at last, round 1 saw my lill car being claimed as an asset in my divorce so now I have a new wife and started on a new
car !!! Haynes roadster, mx5 based 
[img]


Description
[/img]
[img]

Description
[/img]
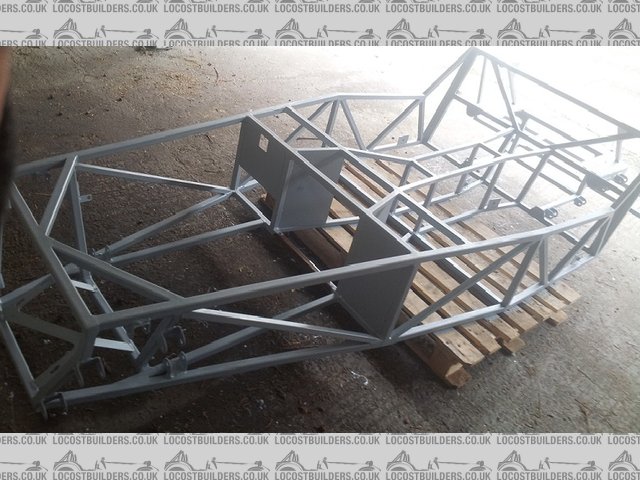
floor and back panel ready to go on tomorrow, make up column mounts, then start on the wishbones
bye the bye got all the mx5 wishbone plates cut by craig at plazcutz for £45 posted no interest just satisfied customer, plates from 5mm plate as per
Saturn drawings will add pic of these if anyone wants.
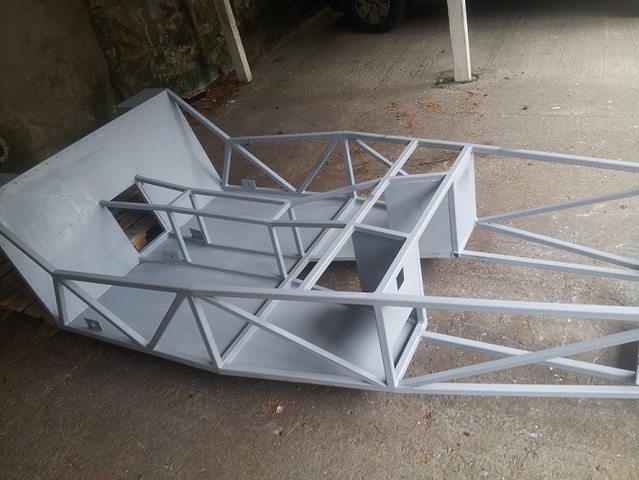
ha ha, floor and back panel on , 
[img]http://

Description
[/img]
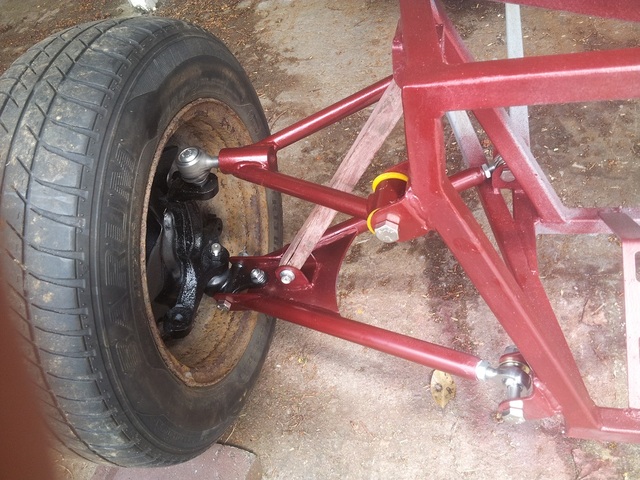
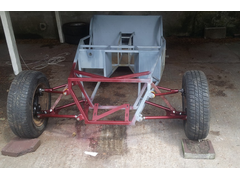
front wishbones made couldn't resist putting her on her feet  (front ones anyway) now for the other end... anyone have the measurement rear top
wishbone mount hole centreline to upright mounting hole centreline Saturn / mx5 mk1
regards Gary (' '
'
[img]

Description
[/img]
pg]105555[/pg]
[Edited on 8/6/14 by garyt]
[Edited on 8/6/14 by garyt]
another pic 
[img]

Description
[/img]
quote:
Originally posted by garyt
anyone have the measurement rear top wishbone mount hole centreline to upright mounting hole centreline Saturn / mx5 mk1
Hi Thanks , I had planned to do much the same put diff ,driveshafts, bottom wishbones (made), hub together then measure up.
I got craig at plazcutz to do the plates as per drawings and on the dry run I found the difference in the rear upright top mount so welded the U
bracket to suit. I also put inserts/ rosejoints onto the outboard end of the rear lowers , neater and gives the camber adjustment.
thanks again gary
[img]

Description
[/img]
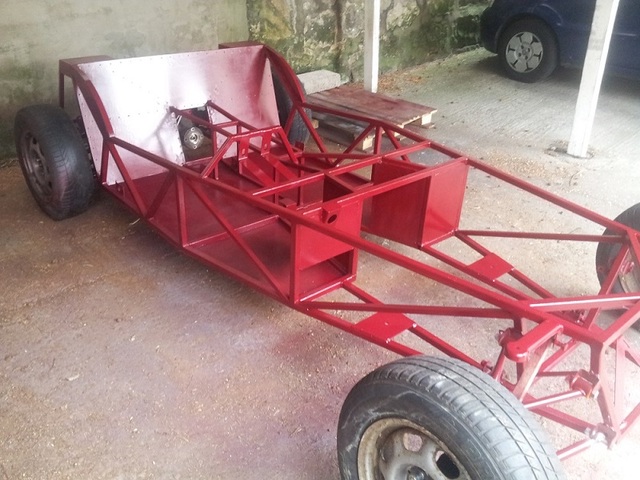
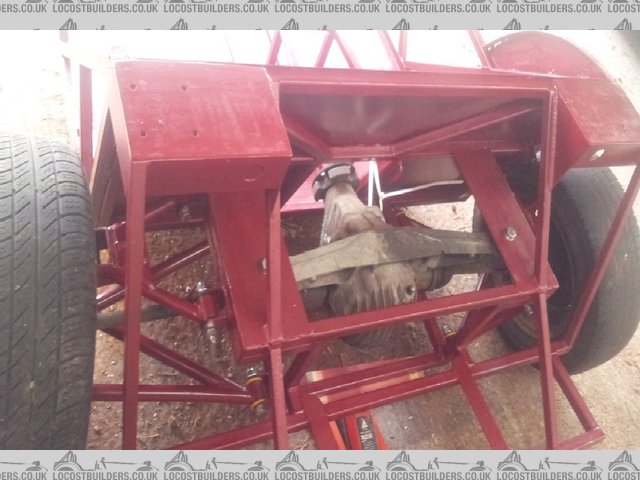
so here are a couple of pics , she's now on 4 feet not after some panic popped the diff driveshafts in and built up the back end to discover
about 15 deg camber... don't panic... measure and re measure , modify the lower wishbones and put back together.. breathe and 0 deg with the
adjusters all the way in 
Also splashed some paint on to keep the rust bug away. must admit felt real chuffed seeing her sat there 
[img]

Description
[/img]
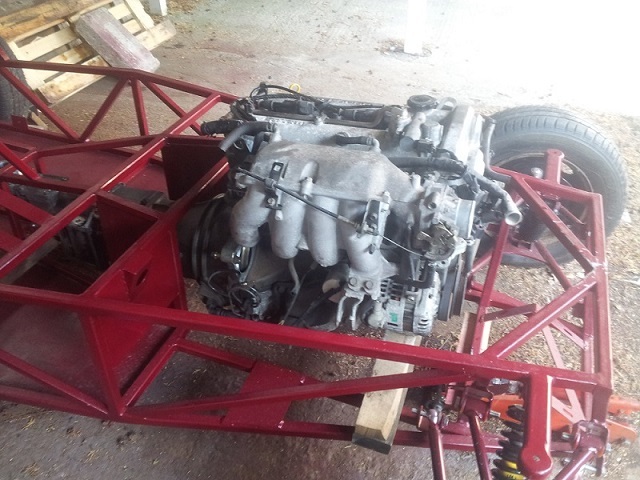
well been doing a bit as I can, and tonight got the heavy mob from work (Trina fed them) and they put my engine and box in for me  seriously they
picked it up and said where about !! well chuffed now to get on and make up the mounts oh yes and some stiffer front springs .
  it sure feels good
to make progress
[img]

Description
[/img]
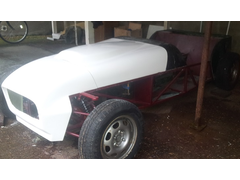
well made some progress fuel / brake lines in , m/c's in, pedal box in, got some bodywork so couldn't help myself had to try it on ???? the
car.. 
oops engine will have to go down and over a "wee tadge" (flexible Scottish measurement) as hitting bonnet, will have to redo the engine
mounts, not a big job though.
[img]

Description
[/img]
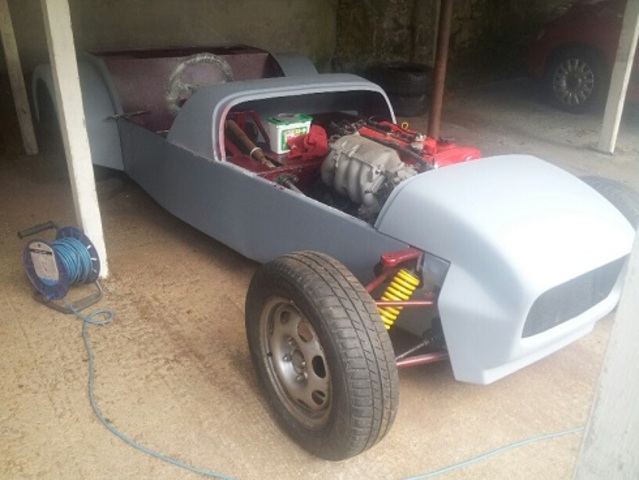
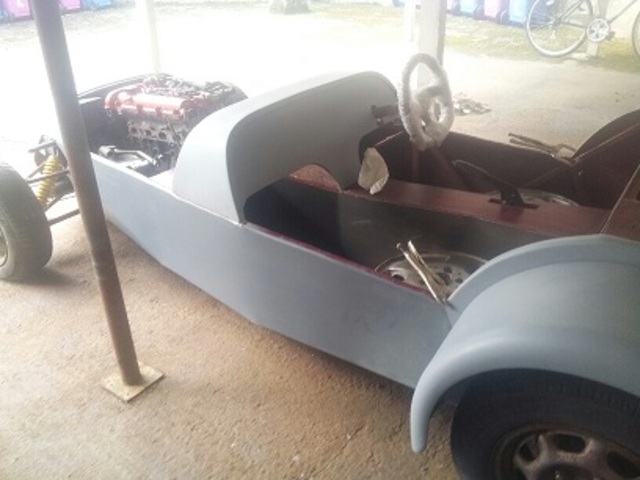
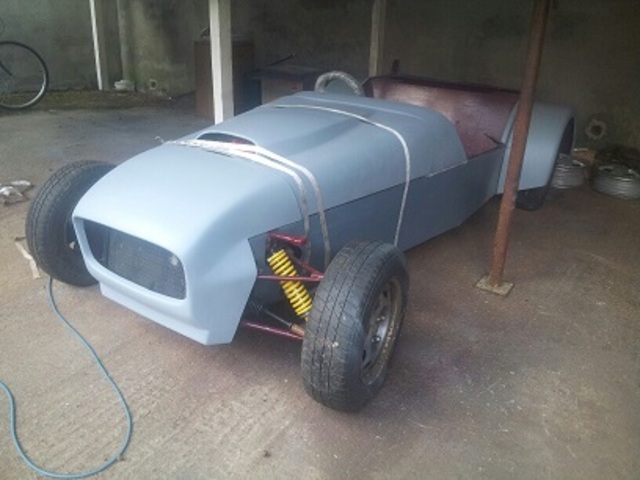
here some pics of the progress, sides are made and fitted and I shortened the headlight brackets made the trans tunnel sides and despite measuring and
remeasuring goofed the drivers side so will redo next week 
need to sort out bonnet catches carry on plumbing in the supercharger and redo the trans side .
at least she is looking proper now. also got my vin from dvla starting to be official aswell. lol.
[img]

Description
[/img]
[img]

Description
[/img]
[img]

Description
[/img]
Looks good fella, keep up the good work and keep us posted
cheers, its starting to get real dark early up here and a bit colder now too, the cold I can handle , up the coffee intake but dark ? guess I
don't eat enuff carrots. lol. so need to sort some lighting out also got a massive tarp so can rig around to keep the weather out and me in ?

gary
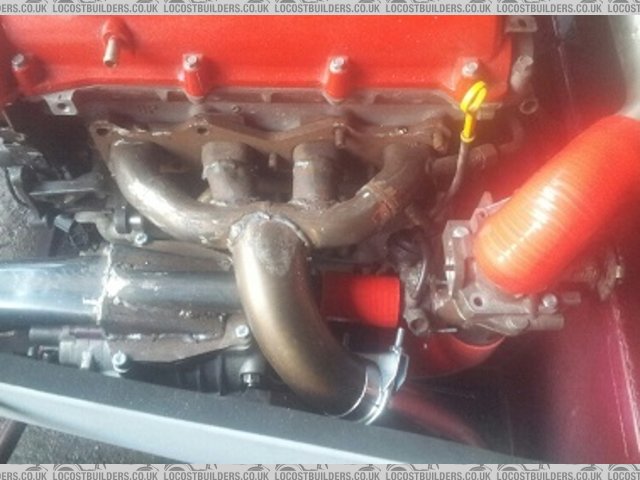
ok so out int cold and damp but got the sc install moving forward sorted out the inlet side and exhaust manifold / downpipe so next mount the
intercooler and pipework then going to play with the wiring........
gary

Description
[img]


Description
[/img]
Looking good Gary, whats your plans for the SC, is it an eaton mini cooper charger?
I've read a bit about double throttles for the mx5 charger, are you going down this route?
hi , thanks for the comments , yes its an eaton m45 cooper s charger with the mini by pass valve running dual throttle bodies although the second one
has no electronics on it , you can use only 1 but using 2 gives smoother idling , it is set slightly advanced from the "normal" one.
the bypass takes its vacuum from the plenum. As you can see its a bit of a "quart into a pint pot" job , and certainly gets the old grey
matter going !
the air filter I've routed to the inlet side at the rear along with the afm, and the air temp will go between the intercooler and main throttle
body thus giving a more accurate reading.
the exhaust was the next problem , there was no way the mk2 manifold would fit past the charger, bypass and pipework, so I set to and copied the Miata
turbo manifold to a 2.5" down pipe, not the best manifold design in the world but space was at a premium it will be wrapped as well to try and
reduce the heat transfer a little.
Next is to mount the intercooler and work out the pipework for it and make and mount a belt tensioner if anyone is considering going this route there
are some great write-ups on mx5nutz site
Really cant wait till I get it running.
how about yourself any progress yet?
Gary
quote:
Originally posted by garyt
hi , thanks for the comments , yes its an eaton m45 cooper s charger with the mini by pass valve running dual throttle bodies although the second one has no electronics on it , you can use only 1 but using 2 gives smoother idling , it is set slightly advanced from the "normal" one.
the bypass takes its vacuum from the plenum. As you can see its a bit of a "quart into a pint pot" job , and certainly gets the old grey matter going !
the air filter I've routed to the inlet side at the rear along with the afm, and the air temp will go between the intercooler and main throttle body thus giving a more accurate reading.
the exhaust was the next problem , there was no way the mk2 manifold would fit past the charger, bypass and pipework, so I set to and copied the Miata turbo manifold to a 2.5" down pipe, not the best manifold design in the world but space was at a premium it will be wrapped as well to try and reduce the heat transfer a little.
Next is to mount the intercooler and work out the pipework for it and make and mount a belt tensioner if anyone is considering going this route there are some great write-ups on mx5nutz site
Really cant wait till I get it running.
how about yourself any progress yet?
Gary
hi , your more than welcome any time .
the talon stuff is really good quality and I'm sure you will be happy with it. Yes its best if you can source a donor and strip it,
unfortunately I do not have the space for that so merrily shop as I go!! does make it interesting sometimes researching what fits what in the end I
opted for the mk2.5 vvt engine with a mk2 5 spd box as I read that the 6 spd had some weak points and questioned the use-ability of the ratios given
the lightness of the finished car .
good luck and just shout if I can be of any help
gary
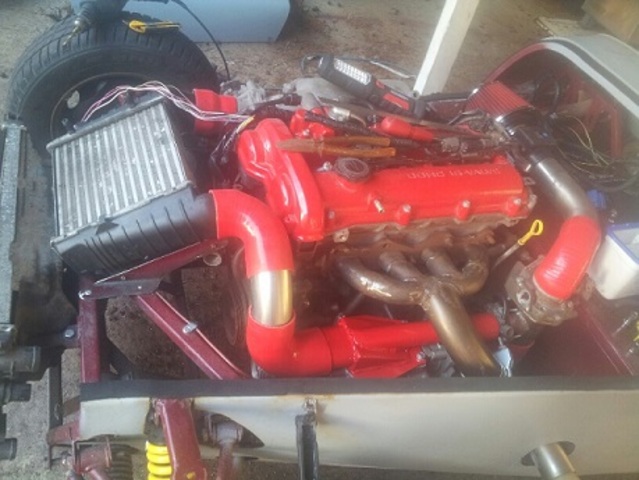
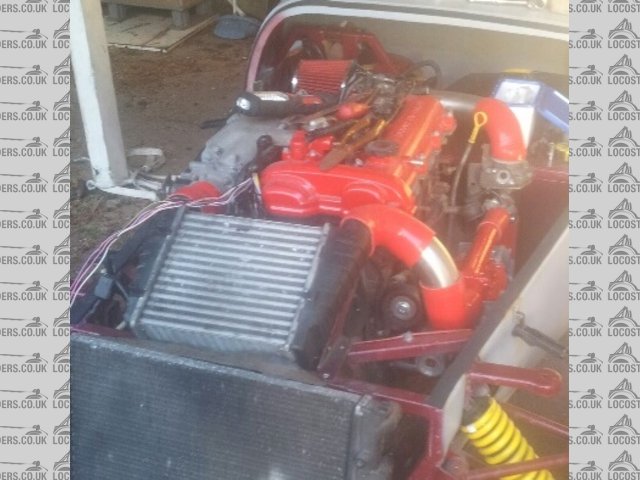
well got a bit done this weekend, got the fuel filter and lines in and done, made and mounted the s/c tensioner,mounted and plumbed the intercooler
and mounted the boost sensor, and put some paint on the s/c outlet.
then started stripping back the engine loom to move a couple of things, working back towards the scuttle wiring ... oh fun.... so next weekend is
shortening moving and retaping the engine loom 
[img]

Description
[/img]
[img]

Description
[/img]
it will look neater once I get the exhaust manifold wrapped, but happy moving forward a wee bit at a time 
Gary
looking good indeed, so is your SC mounted under the exhaust manifold? the mx5 installs I've see all seem to be mounted at the level of the rocker cover.
yes it is down under the manifold on the mx5 they mount it over the exhaust manifold, where they have room to do it, If following this route a large
clearance hole would be required in the bonnet ( there is an example on a locost usa site ). They also have heat exchange issues despite wrapping the
manifold and using reflective sheet between the two, being mounted lower just above the chassis rails means that I have more air space between the
heat source and the s/c body it does mean that you have to be quite creative with the pipe work and redesign the ex manifold. The intercooler is vw
Passat and lined up with the t/b nicely also just cleared under the nose, re. airflow through the intercooler, the airflow through the rad and fan
should give negative pressure behind the I/c (also will "dam" the edges) so should work ok as with most things room is at a premium... so
there are always compromises to be made.
With the airflow meter being at the rear of the engine I will retrace the wires back shorten and rewrap, the air temp sensor will now live on the I/c
outlet giving the most accurate reading again the wires will be retraced shortened to keep it all tidy.
The radiator return will need some thought as to its new route and I turned the front rad outlet to point to the nearside thus giving a neater run to
the rad top hose.
Next problem is where and how to plumb the header, as the scuttle area is getting full with battery, heater etc living there.
It is a challenge but hey if it was easy ............
gary 
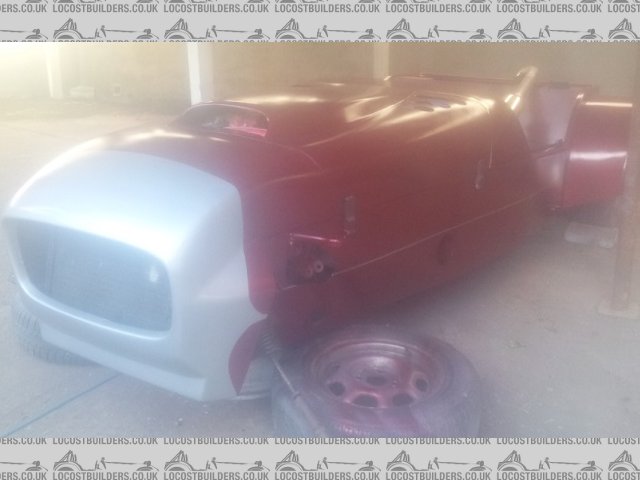
ok so the weathers warming nicely , days are stretching, suns out and trina is away for a few weeks visiting family , soooo put some paint on and
hopefully get a bit of a push these next few weeks .
and no that's not the new exhaust position 
[img]

Description
[/img]
another pic
[img]

Description
[/img]
well absolutely frozen but happy messed about finishing the manifold and got some alterations to the wiring (but nae finished that one yet...)
firewall made battery in a tempory earth , connected the instruments turned the key and ............ nothing. 
went over and over it, had coffee and more coffee. so went and rechecked it all and found 1 connecter off the back of the main fuse block, took it off
to put through the firewall. reconnected it and the battery ..... BINGO lights on the dash and engine turns over. so T time. with a big smile 
so hopefully tomorrow will run some tempory wiring to the pump and add a couple gallons of petrol and see if we can get fuel pressure and if so we
will go for a start up 
ok so after working out ive fuel engine cranking but nothing else panicking that its an ammobiliser fault , I found 2 wires that should be connected
so joined them and away she went a splutter and died an adjustment on the throttle cable to the 2nd tb and she is running. 
absolutely awesome to hear it now I need to finish the cooling system and tidy all the tempory wiring.
https://www.youtube.com/watch?feature=player_detailpage&v=ZkL9IioRExQ
if this link disnae work go to you tube and enter "its alive Haynes first start up "
very very happy
I love the sound 
quote:
Originally posted by garyt
ok so after working out ive fuel engine cranking but nothing else panicking that its an ammobiliser fault , I found 2 wires that should be connected so joined them and away she went a splutter and died an adjustment on the throttle cable to the 2nd tb and she is running.
absolutely awesome to hear it now I need to finish the cooling system and tidy all the tempory wiring.
https://www.youtube.com/watch?feature=player_detailpage&v=ZkL9IioRExQ
if this link disnae work go to you tube and enter "its alive Haynes first start up "
very very happy
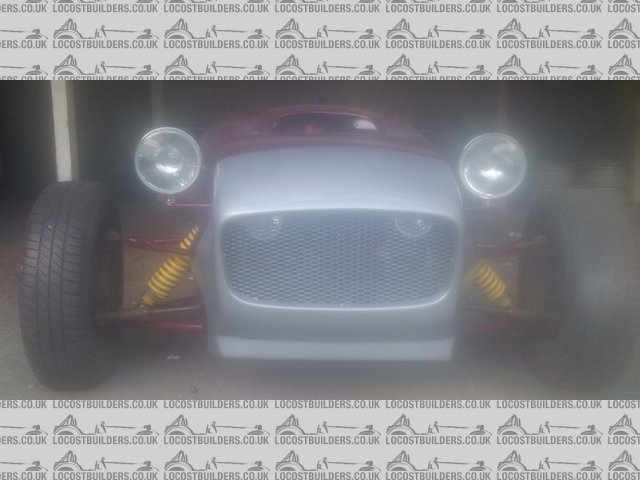
well spent the day doing wiring and headlights up front , been busy most all day but not a lot to see.
just need to figure out mazdas headlight wiring now.
day off tomorrow so hope to get the rear lights wired up and headlights working got side and flash but dip/main are awol somewhere. 
[img]

Description
[/img]
HA HA lights working thought I was going crazy , I mean how hard can 4 wires be.................. eventually discovered I had stalks that were wired
differently  oh the joy
  and that mx5 stalk changes the earth not the feed any way got side dip main n flash now so happy.. and result got a pair
of westy leather seats n runners for a bargin £, so these should be here end of the week
  so onto the indicators next...... wonder what lies ahead
there lol
just looking back next weekend is a year since I started ,, how time flies when your having fun 
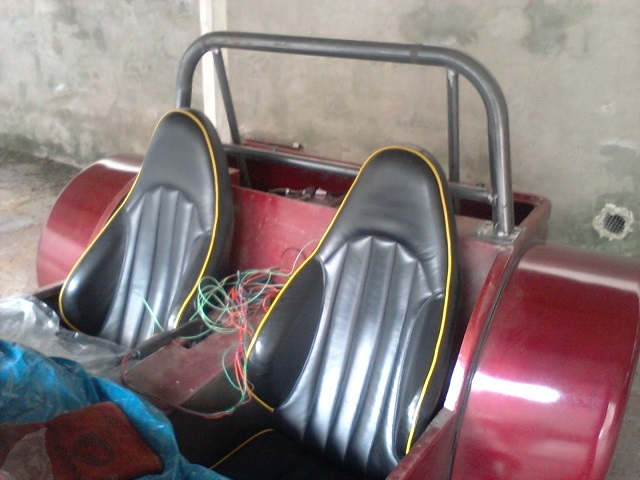
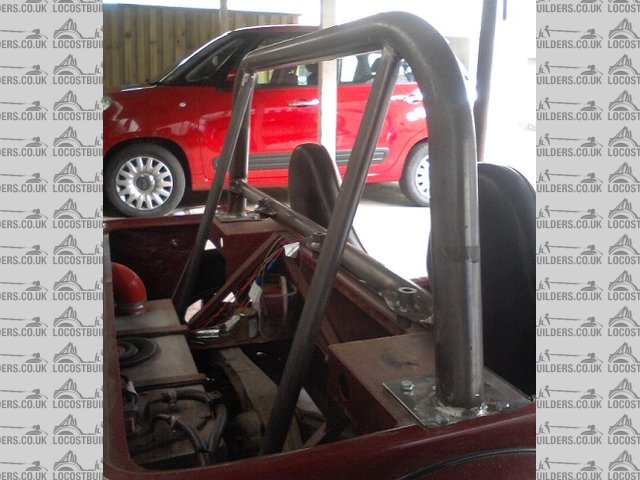
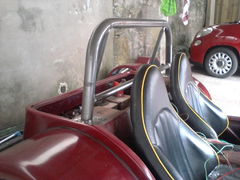
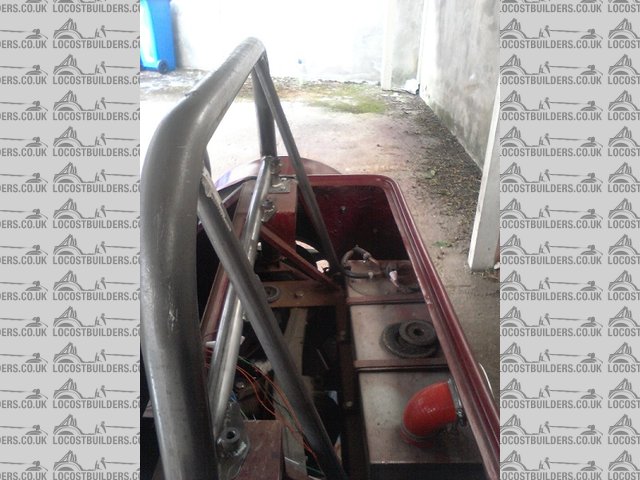
had a good day , got the roll bar done and seats in , they will have to come out but couldn't resist putting them in, leather westie seats 
[img]

Description
[/img]
[img]

Description
[/img]
[img]

Description
[/img]
[img]

Description
[/img]
[Edited on 2/5/15 by garyt]
[img]

Description
[/img]
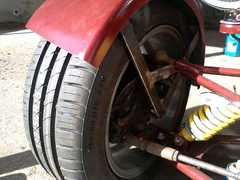
well we had sun, rain, sun, hailstones and sun today, but got my wing stays made up and attached fixed the wings on with tiger seal and will glass
over this once dry, wasn't happy with my rad mounts so going to redo them tomorrow and hopefully some wiring
used 30 x 6 ms so hopefully shouldn't flex... too much  picked up on the top and bottom ball joints and on the top caliper bolt... so we will
see.
Gary
excuse the mess....
[img]

Description
[/img]
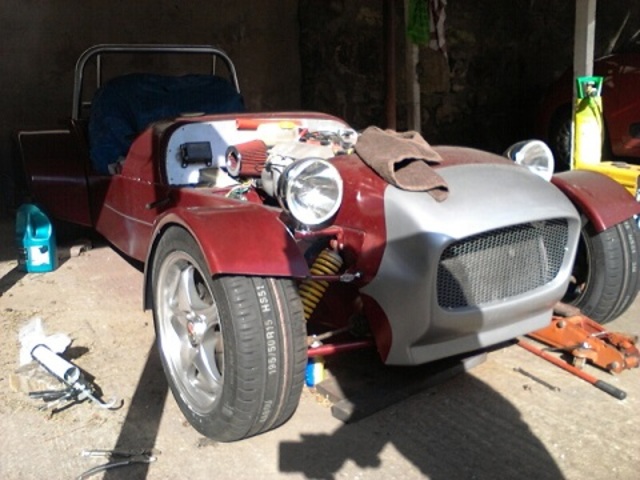
got rad mounts redone and fan wired up , got the front wing stays made, painted, fitted ran the engine up properly to working temps, a small drip
from a hose joint, tightened, and then discovered I had a rather large hairdryer the fan was blowing not sucking, swapped wires round temps were
centre of the gauge , happy and I love that supercharger noise  next some more wiring, got some rdx switches today need to get their flasher unit as
it lets you mix n match bulbs/leds , ran out of connectors so will nip into town tomorrow , hopefully try and get the wiring tidied in the next week
or so. and do some work on the dash/ trim.
Ordered a westie wide screen , so when it arrives will report back on any mods / fit etc, got a pair of uprights/ mirrors as well.
Gary
Nice build - are you using ms pnp?
Thanks. Probably will do once completed ive got it running but will need to get it set up mapped properly once finished may piggy back for now. Tbh
spending money on everything else just now lol so will way up the benefits later
[Edited on 23/5/15 by garyt]
Hey Gary did your donor come with an OBD port? If so are you intending on keeping it?
Hi Yes it had one on the loom most of it is cut out now down to 6 wires, shortened those as far as possible I've left the plug for now... the
donor switches were proving a pain to use that's the problem of not having 1 donor, so bought new rdx ones got those wired in, I resorted to
cutting most of the wires out and then wiring in new circuits for what I needed !!!! so at least i'm moving forward with the wiring, got all the
wires down the tunnel tidied , taped and fastened, finished the rear tub area wiring the same, incidentally I used the rdx relay which sees normal and
led bulbs so don't need ballast resistors ( so got 4 new ones if anyone wants them ) .
still waiting for my screen so, went and got some thin sheet and lined the inside of the outside if that makes sense trimmed it with some maroon
leathercloth and some rubber matting , pass side done so tomorrow will do the drivers side and rear panel behind the seats, ordered some harness so
waiting on them aswell
How are you getting on?
Gary
quote:
Originally posted by garyt
Hi Yes it had one on the loom most of it is cut out now down to 6 wires, shortened those as far as possible I've left the plug for now... the donor switches were proving a pain to use that's the problem of not having 1 donor, so bought new rdx ones got those wired in, I resorted to cutting most of the wires out and then wiring in new circuits for what I needed !!!! so at least i'm moving forward with the wiring, got all the wires down the tunnel tidied , taped and fastened, finished the rear tub area wiring the same, incidentally I used the rdx relay which sees normal and led bulbs so don't need ballast resistors ( so got 4 new ones if anyone wants them ) .
still waiting for my screen so, went and got some thin sheet and lined the inside of the outside if that makes sense trimmed it with some maroon leathercloth and some rubber matting , pass side done so tomorrow will do the drivers side and rear panel behind the seats, ordered some harness so waiting on them aswell
How are you getting on?
Gary
nothing to be ashamed of family comes first , the weathers just warming nicely so plenty of time to get on 
Yes Im making some headway, the wiring had me in knots at times, really need to get the screen so that I can get on there.
by the way for future reference if doing a screen and wipers an mgb '72 - 73 wiper motor has the flexi drive and with an extra earth lead
attached and the clip cut off the mx5 plug, it is plug n play so 2 speed intermittent and wash wipe .
72 british to 03 Japanese I was impressed  just need to find a gap for the washer bottle.... oh the challenges
Hope the family settles soon , I'm sure she will.
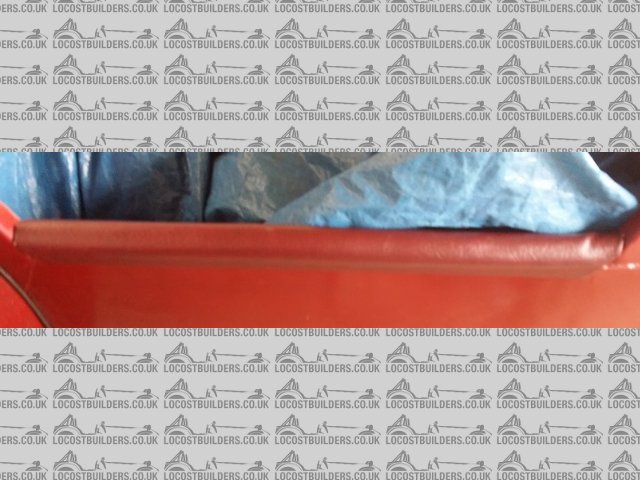
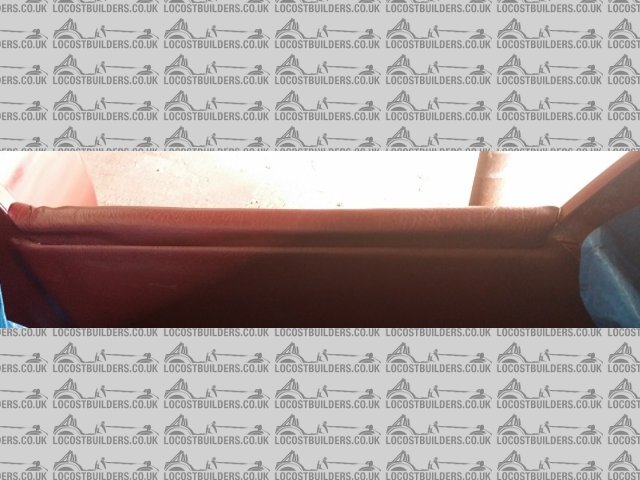
Hi , I made these "arm rests" to finish off the top edge of the sides. I used some U aluminium section, a length of pipe insulation cut in
half lengthways, and some leathercloth to match the trimming .
Quite pleased with how it turned out and finishes off the edge nicely
[img]

Description
[/img]
[img]

Description
[/img]
[Edited on 9/6/15 by garyt]
so its warm and sunny so went out and got some more wiring done all switches in. and the symbols light up when lights are on but no instrument lights
grrrrrrr... afte much faffing about they will only work when the dimmer switch is connected, then I had dim instruments and bright switches or vice
versa so swap a couple of wires ... sorted padded and trimmed the tunnel top just need to add gaiters to finish then i'll post a pic.
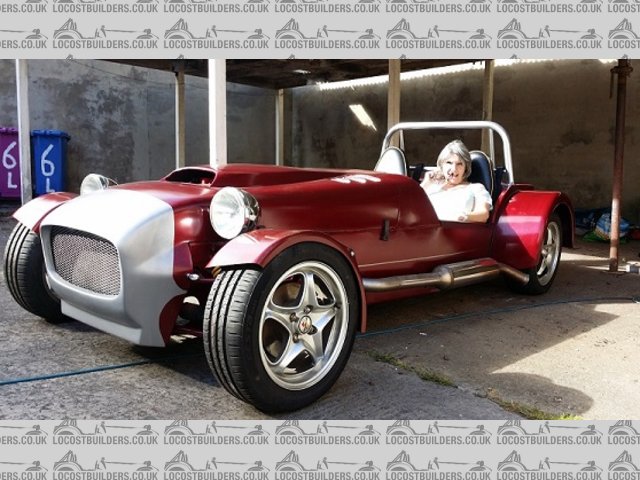
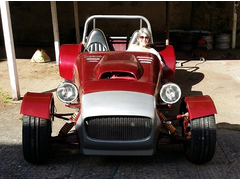
Trina decided that as it was nice she would come and help...... although her idea of help was to try it for size, sit in it have her photo taken, make
some supportive noises and then go make tea..... still she doesn't complain when I disappear for hours or when boxes arrive 
[img]

Description
[/img]
[img]

Description
[/img]
[Edited on 14/6/15 by garyt]
[img]

Description
[/img]
[Edited on 14/6/15 by garyt]
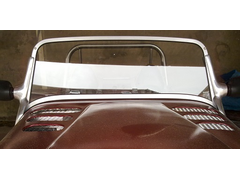
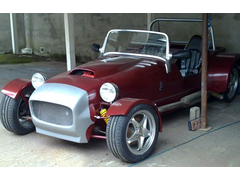
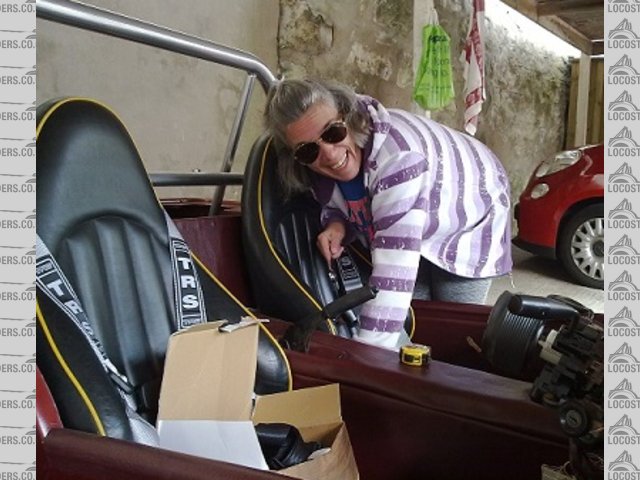
Just a wee update, got my screen delivered yesterday so out tonight and after a little reshaping of the lower corners and inside edge of the uprights
it was done , Trina helped while we fitted it , really happy with the fit to scuttle, no need to make up a fillet just some rubber T shape seal and a
small filler on the inside front edge of the uprights 
also we put the silver trs harnesses in really brings the whole colour scheme together.
next wipers washers and demist vents 
[img]

Description
[/img]
[Edited on 23/6/15 by garyt]
[img]

Description
[/img]
[Edited on 23/6/15 by garyt]
[img]

Description
[/img]
[Edited on 23/6/15 by garyt]
should have said but if any one was wondering I used a wide westfield screen and uprights / mirrors onto a Gillham / Saturn scuttle.
Looks good, I have the westfield screen uprights to go on mine, I also have a westfield screen fillet that looks like a very good fit on my scuttle
:-)
Keep the updates coming
Saw the photos on roadster builders looking good
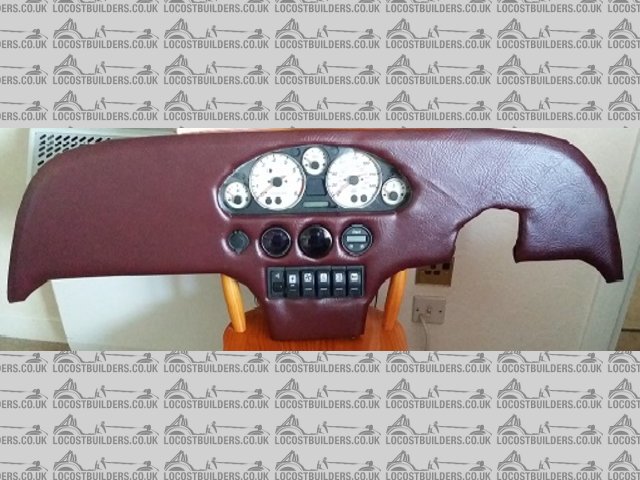
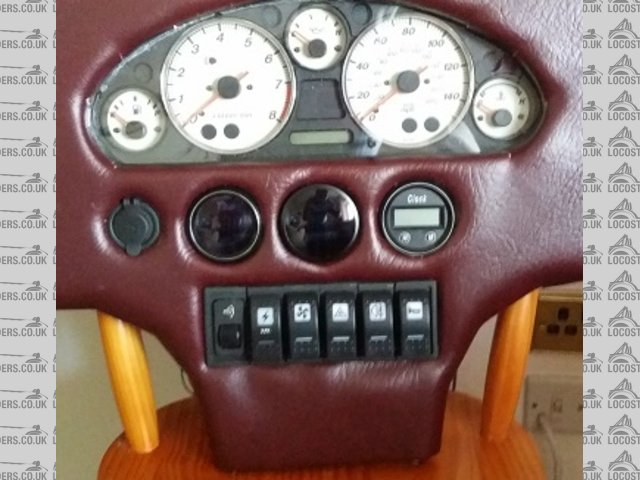
so while I wait for more bits to arrive I attacked the dash  mdf shaped and cut out, layer of campmat rolled double thickness on lower edge to give
a soft iva radii finished in the same leathercloth as the interior.
[img]

Description
[/img]
[img]

Description
[/img]
[Edited on 1/7/15 by garyt]
so temporarily fitted the dash today , tidied up the scuttle paintwork from fitting the screen etc, will need to lift the screen to add the rubber
seal when it comes, still a wee bit of wiring behind the dash to do and finish the heater installation. next is to sort out the column cover, and
steering wheel / boss. lots of small jobs just now but still moving forward 
[img]


Description
[/img]
ok so not updated for a wee while..... cos the brakes were doing my head in to put it mildly. days spent fiddling and pumping and it felt like it
would never get there
so I got a focus reservoir made a bracket piped it into some adapters on the mx5 m/c filled with fluid and 30 mins later had brakes filled , bled and
working 
so today sorted out rear camber / toe settings went for -1 on camber we'll see how that goes and 0 toe in, had to do the nearside twice as first
time round did +1 deg duhh , put on new hub nuts and spacers to fill out the arches. looks a lot better  finished off the heater screen ducting not
a great amount of air but enough to show demisting
Hopefully I'll get my prop back Tuesday then I can get that in and the g/box , turret oils in and checked.
The handbrake is doing my head in at the moment but I'll get there.
ordered some rack stops and gland covers for the steering arms and top drag links, prop catchers (just in case ) and a wideband o2 kit
still need a connector plug for a focus brake reservoir with some wire on ,if anyone has one.....
so after a brain dead exercise I have 2 pairs of LARGE rear hub nuts (mx5) if anyone needs them , (yes I did it twice for some reason unknown to
mankind ) think these are the mk1 size nuts.
so a list of jobs to do at work... ahem.... bend handbrake brackets, shorten front hand brake actuater and cut out boot lid, I made the template and
marked the ali out today, that should keep me busy for a few days over the hols.
also started to sort out invoices and paperwork as hoping to be ready to apply for my iva before long 

got a couple of hours today , I got my propshaft back and after a scare as to why it wont go into the gearbox except with the assistance of a big
hammer, I gave the tail a quick clean up and an oil and in it went ... relieved or what , so then started putting the handbrake back together.
getting small jobs done and the list is coming down quickly now 
next few days I will have to do the "Christmas" thing then I can get back to it 
merry Christmas everyone
well its cold but nae wooly hat cold so.... out I went fastened down the rear handbrake cables so they don't touch anything .
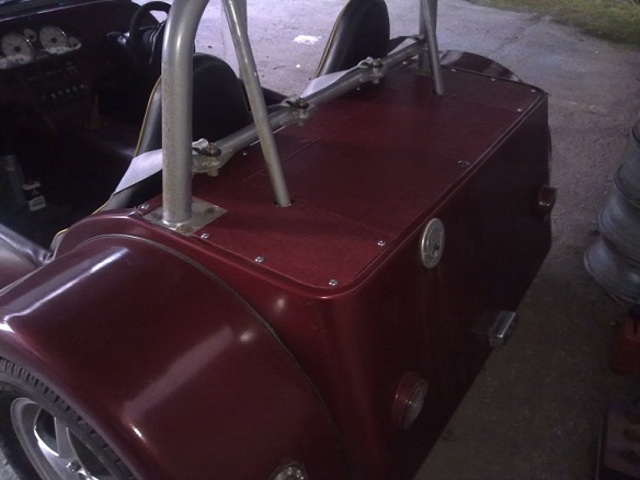
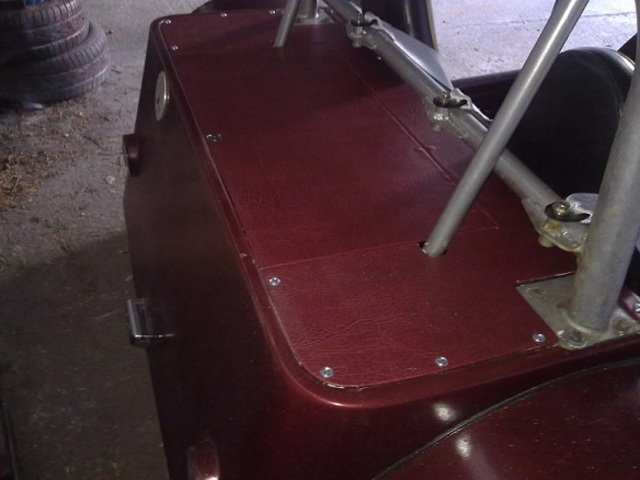
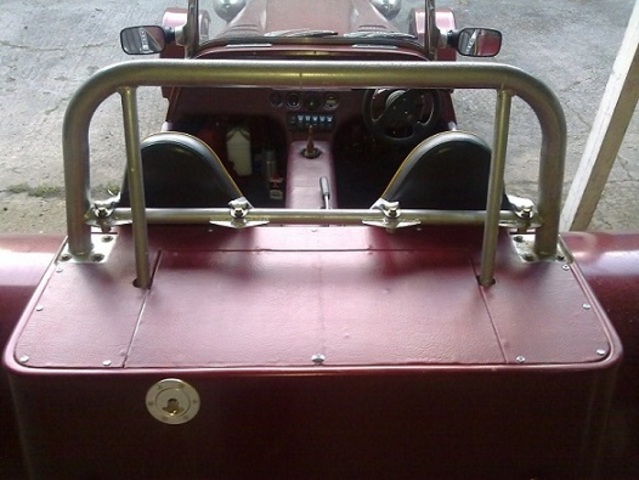
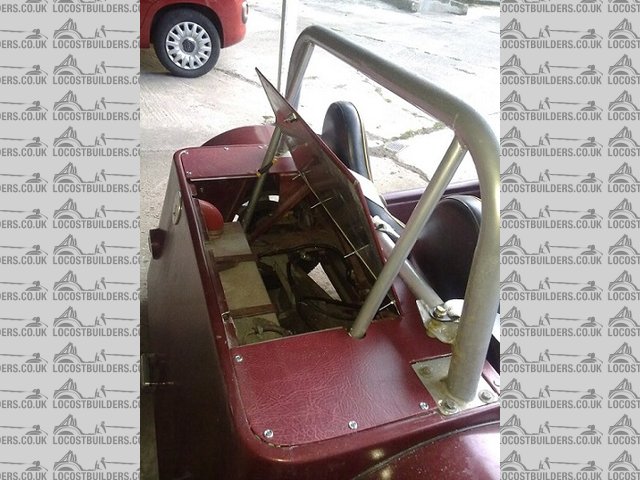
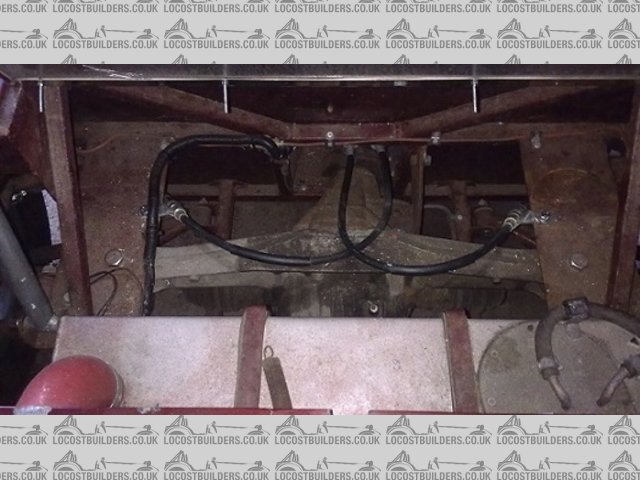
Then made the boot lid a bit of a faff about but I'm happy with it and it looks a lot better than a gaping hole, at some point I will make an
inner box for a few odds and ends.
[img]

Description
[/img]
[img]

Description
[/img]
[img]

Description
[/img]
[img]

Description
[/img]
[img]

Description
[/img]
[img]

Description
[/img]
gale force winds and rain so didn't go out till lunchtime stripped front n/s and rebuilt with lock stop in the steering rack ( will remove after
iva as it really has restricted the lock but nothing is stressed or touching) and gland covers over the track rod nuts and drag link nuts.
Doesn't sound much but took a couple of hours, so other side tomorrow 
well it was dry and not windy but very cold, snow forcast for the hills tonight  any way got the other front side done lock stop in gaiters and
gland covers on and all put back together, put the battery back in and it aint starting not even turning over so I will have to trace that next,
one step forward and one back.... lol.....
anyway happy new year to everyone and hope you all have a good one
well spent ages with checking all the fuses, fuel pump priming, everything else working lights, blower indicators etc, could here the relay clicking
but no turnover .... so check battery volts = good, check + at starter = good, grabbed a passing young lad and asked him to hit the key while I
checked the solenoid + = good ...., so after sqeezing a torch and mirror underneath the heavy wire from the solenoid to the starter is corroded so
pulled it out and just bought a 2nd hand one so hopefully once its here we will be sorted.
after that malarkey I trimmed the wishbone/ rack openings in the side panels, that's it for today 
well catching up with all the wee jobs , so filled the gearbox and turret with oil, wrapped the exhaust manifold and cat, trimmed the handbrake and
gear lever, put clips on the bottom side of trans tunnel top to catch on chassis rails and put gear knob on. hopefully starter motor will be here
tomorrow and I can get that in... then back to work on wednesday  so it will be back to weekends on the car
well the thread title says "progress at last" well very little today , welded in my vin number plate PLEASE NOTE IT IS A PIG TO DO NOW so a
word to the wise apply early on in your build and do it before you get to far on.
A wee something to smile about though, after being not very happy with the quality of the chrome headlights I bought and weeping at the price of
stainless ones I found an ad for stainless 7" headlight bowls in the states , said they were happy to ship and it cost me under £100 the pair
shipped and with priority customs clearance. so the postie delivered them today and I fitted them very happy with them and the service, we will see
how the quality bares up with british weather but it cant be any worse than the others.
on a down side I still have a starting problem (details in "electrics" ) and its causing me some grief.......... I need to sort this out
before I can do anything else
haha sorted, IT'S STARTING, some idiot (me) had made a mistake when I wired in the switches which meant I was dropping voltage on start, so a
wee bit of rewiring and its starting on the key 

so with her starting again , drained and refilled with anti freeze in the cooling system, ran it so all could come up to temp and surprise surprise
my red exhaust wrap isn't red no more ... oh well such is life .
Soooo with all ok I tried moving her under her own power for the first time in the courtyard , just forwards and back and round a bit , what a moment
stupidest grin you've ever seen ... lol , I think I need to cut the lock stops down as they really have limited the steering lock so I will
pull that apart again and adjust
day off work today  so pulled the steering rack ends apart and chopped my lock stops in half. its a lot better but I could have taken a bit more
off.. maybe later.
it's snowing now and the beach is 50 yards away !!!
made up and painted my battery strap, and picked up my vin plate from the trophy shop , masked the details so that they are in little boxes as per iva
manual and sprayed the remainder black. so once dry that will go onto the bulkhead. Incidentally I opted to leave off the max permissible weights, as
in the notes it says these are optional, so one less thing to be pulled up on.... I hope.
my list is getting shorter 
Im trying to come up with a neater idea for the steering column / stalk covers as I'm not 100% happy with what i've done but if the push
comes to the shove it will do for now
oh and my boost gauge is reading back to front ...lol I need to reconfigure the plumbing of it and I have a wideband sensor etc to fit to see what the
fuelling is up to
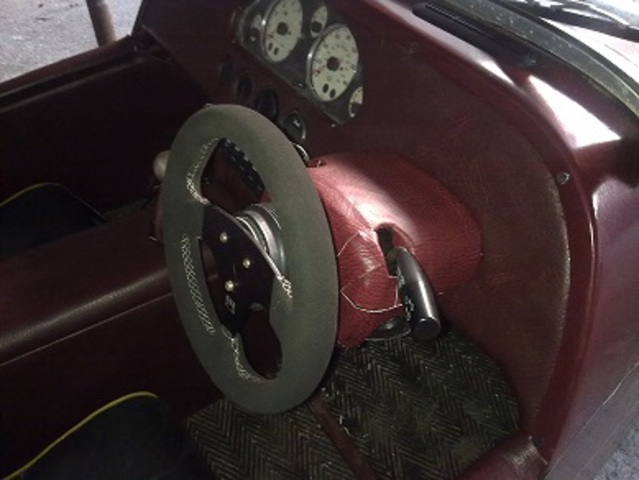
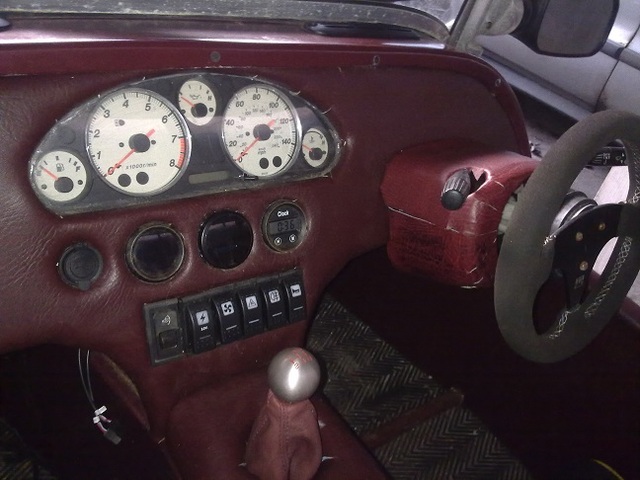
redid my column/switch covers and I'm a lot happier with them, changed some non std fuel pipes for pipes with the required std on them tidied and
secured the headlight / repeater wiring and fitted the wideband sensor / controller (and its still starting and running ) 
[img]

Description
[/img]
[img]

Description
[/img]
[Edited on 16/1/16 by garyt]
oh I tried replumbing the boost gauge into the plenum just after the t/b but its still reading negative, any ideas on how it should be plumbed in ?
ok after a bit of research it IS meant to read -10 at idle and 0 before start up !!!! so I guess I will put a few revs on and see what it reads as
they rise.
I was confused by it reading 0 when I turned the key on and then it going to -10 on start up, still don't understand why but we will see, so
ignore the previous question
just in and managed to get some wee jobs taken care of and crossed of the list, quite chuffed as attached the bulkhead vin plate, doesn't sound
like a big step but it makes it feel official , also scary as it means its getting close to iva application time 
spoke to a very nice lady at vosa yesterday as their website didn't include Aberdeen test station and I thought that I would have to go to
Edinburgh, lol , straight to the test and straight home officer, yes 500 miles round trip, after she finished laughing she did confirm that Aberdeen
do the test. So it will only be 60 miles each way.
Any way I'm going over and over the car trying to be brutally honest with myself and be critical of everything, once I think I'm close I
will try the local garage to do an emission test so I can see where I am on that.
Gary
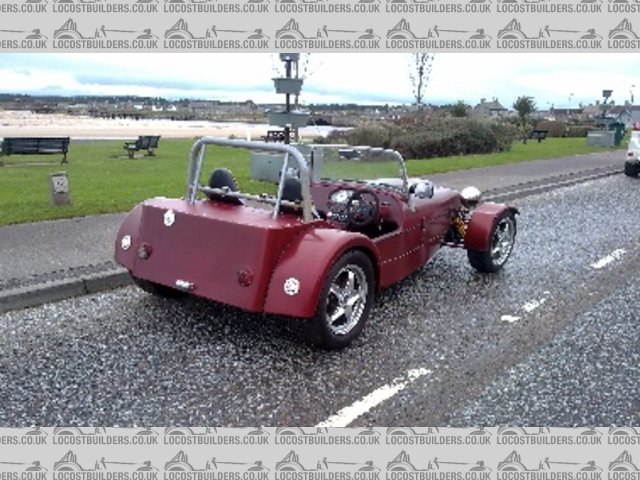
thought I would share a few up to date pics of her
[img]

Description
[/img]
[img]

Description
[/img]
[img]

Description
[/img]
[img]


Description
[/img]
found a couple more things to sort out but I'm getting there, 
well got the headlights shining the right way today and went and saw a friend who is going to put the car on the headlamp aim at the garage and pushed
my luck so he is going to do an emission run and brake test as well , next Saturday is mums birthday so it will be a fortnight after that at 7am 
"If you don't mind being early just bring me a bottle of malt" was his comment so sorted at least till I see what happens .....
so I need to crack on with a few other jobs and have a bit of a push. I have in my head to aim for iva before easter if I can
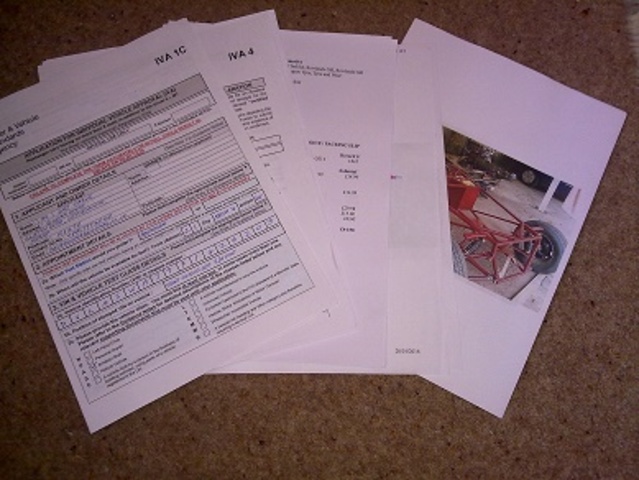
ok so today I sent off my iva application, said that she would be available for testing the week commencing 21 march at Aberdeen ...... gulp
[img]

Description
[/img]
nervously happy..... I think, now what all needs doing?
I've just moved to Kinloss and hope to get my car up here around Easter time, so would be keen to meet up for some blats once you're on the road and the weather has improved a bit! There seem to be cracking roads pretty much everywhere...
hi and welcome to the frozen north 
must be a shock to your system coming from sunnier southern climes..... yes it would be great to meet up, there is a bit of 7 activity up this way
with a plethora of westies, caterhams , robin hoods as well.
Worth getting on the westie site and look out for "clan McWesty" events, a couple planned trips being applecross weekend of june 17/19
camping road trips and a fair bit of craic. also there is a Scottish tour being organised by a lad from Yorkshire the following week being based
around Killin (Tayside) doing a loop eastwards round stonehaven, cairngorm , killin another going to skye .
And there is the north west 500 to do as well
There are tons of great routes to attack 
Feel free to drop me a line any time Regards Gary
ok so ticked a few more wee jobs off today ...... made version 3 of the remote brake fluid reservoir, I used a focus reservoir, got a plug mmmm 3
wires, still its only a float switch, haha no matter what I did I could not perm the 3 wires to the mazda 2 wires and get the fluid level warning
working ... So after much mucking about made an ally bracket to take the big round mx5 reservoir positioned it and reconnect pipes, handbrake off ...
light on  fill up with fluid ... light off
 handbrake on .... light on
  happy bunny so trimmed the requisite fluid sticker to size and put it on
the reservoir cap. SORTED at last.
moral don't mix manufacturers !!!!! started hailstone and rain so came in . Next is to disconnect the neutral switch and sort out the twin T/Bs

anyone need a focus reservoir let me know
so went out and started attacking the 2 throttle bodies no matter what I did It still wasn't right, searched about compressor surge causing
problems, so checked the bypass was working... yes popping open n shut like a good un,
Then the old fella next door came out to see if I needed a hand... he couldn't and didn't want to attempt to slide into the drivers seat
and asked if it was ok to work the throttle by twisting the linkage, and guess what no running on a steady idle, clean pick up and drop back, now
whats the problem ????
a badly routed throttle cable from the pedal was causing enough friction that the linkage was dragging so iffy pick up and not returning cleanly.
so re did the cable checking the pedal was free and the cable was free and guess what its all behaving from the drivers seat and by twiddlingt
linkage
MUPPET
still at least that's all done now and ordered a Db meter to see where I am on noise mmmmm
email from vosa confirming receipt of application and giving a reference #

just in from work to find an envelope with all my receipt copies, but no build photos returned, checked emails to find " your application has
been accepted, please pay" so will get them paid first thing in the morning , I guess they open at 9am?
panic, relief , excitement 
well a very nice lady relieved me of £450 today , so iva paid for , then got an email that it is now sent to TaSS (testing and support services) for
processing 
just back from the garage and it passed the emmissions BET test, headlights NOW correctly set and was reading 95Db at 3000 revs, but that needs to be
checked at 4000 my fault as I trusted my memory (must be an age thing) so will do that again later on.
On another positive after sorting my sticky throttle cable it is so much easier to drive, 2.4 rack + supercharger power delivery certainly makes her a
sprightly little beast 
so a spring in my step today.....
well put nut covers on today, trimmed a couple of edges that I found on the bottom of the headlight bracket, secured the heater/ header hoses onto the
bulkhead sorted the radius on the trip button, was really worried about the viewing angles of my small front indicators so took them off and ordered a
pair of '70's style chrome bulgy ones for the test so it should be ok on the 20 deg side view. ordered a new rad fan as mine looked untidy.
and reset the rear brake adjusters now the handbrake holds like a good un.
So still to do; trim under dash in footwells, fit a new reverse switch as its playing up, pad steering wheel center, keep going over bits and
pieces, found out I needed 2 odd size nut covers for the exhaust bracket so ordered them.
Does any one know the thread size of mx5 tre's as I have castellated nuts and would rather nylocs
more updates from vosa;
application released for inspection and successfully assessed.
then this one;
Your recent application has now been processed by DVSA Testing and Support Services (TaSS). If you have notified us of a preferred appointment time
and date you will receive an appointment letter via email once the DVSA Testing Station has allocated your appointment. However, if you wish to speak
to DVSA regarding the scheduling of your appointment please allow 3 days from the receipt of this email prior to ringing us on 0300 123 9000.
guess what I'm doing in 3 days time 
missed a phone call from a private number because I was driving into Aberdeen, turns out it was the test center admin trying to arrange my date in
Aberdeen, lol
got a really polite email explaining and asking me to call them to arrange, even gave me a direct call number, so will get that sorted tommorow 
got a date today when I spoke to the lady at aberdeen, 24th March at 8am , she said it has to be full of petrol and bring a wee tool kit in case
there is anything minor that can be sorted, she also said to allow around 5 hours for the test.
she is going to send a confirmation email with all the details
Really nervous now 
good luck,...
I shall look out for the "passed" message
thanks Howard, I'm getting very anal with looking for sharp edges and checking and rechecking, Replaced the reverse light switch, what a pig of a
job absolutely no room to get big hands up the side of the gearbox, still its done and reverse light is working now, trimmed the bottom edge of the
headlight feet as they had a sharp edge, so marked the pattern on a wheelie bin trimmed them and reset them so should be ok, Bit of a grumph after
getting the lights set last weekend at the garage, still they are trimmed now, harness bolts are m14 and you guessed it I had every nut cover except
that so some m13 ones went for a swim in a cup of boiling water for a few mins , made them supple enough to go on  ran out of split tubing so will
get some this week to wrap the front indicator wires and secure them.
so to do apart from the front ind wires, trim footwells and keep checking 
[Edited on 5/3/16 by garyt]
All the best, hope it goes well!
quote:
Originally posted by garyt
ok after a bit of research it IS meant to read -10 at idle and 0 before start up !!!! so I guess I will put a few revs on and see what it reads as they rise.
I was confused by it reading 0 when I turned the key on and then it going to -10 on start up, still don't understand why but we will see, so ignore the previous question
Thanks JS and thanks Jeff , after trying different things I had come to the conclusion that it was reading right just couldn't and didn't
understand why  so thanks for explaining it, what I can tell you is she is plenty quick when you give it some stick
  and I love that s/c noise
haha I guess that's the big kid in me...... My brother came up and asked to see it running after the concern about what's that noise? it
grew on him too ....lol
forced induction IS dangerous ................ because its infectious 
well it shows what a pair of fresh eyes does, the car sits on a slight slope side to side, my friend came round to see how things were going and he
asked if I wouldn't be better with some neg camber so after we discussed and eventually moved her on to the flat yes she had pos camber no
wonder she was twitchy anyway he nipped home and came back with a gauge so we put 2 deg NEG camber on her castor is as per the book by design so
hopefully the self centering will be fine, also found a couple of bolts that needed torqueing up, and a couple more tie wraps put on, and we adjusted
the float on the sender unit so quite a productive day, need to put an earth wire from the sender unit screw to the chassis but hadn't any ring
fittings the right size so will get them on the way home tomorrow.
It shows that you need to keep going over and over and that a pair of fresh eyes will see something that you have grown accustomed to.
11 SLEEPS TO GO (10 really cos I wont sleep the night before lol )
well as far as I can see that's me ready ... :0
earth wire from sender to chassis a couple of nut covers on the rear tub bolt heads (stuck on ) replaced the grip tape on the clutch pedal.
she is full of petrol and gauge reading full, insurance all paid and in effect from Wednesday, toolbox packed with tools and bits and pieces.
All paperwork printed off (iva and insurance) and in the laptop bag with all the receipts, and "drive cam" charged ready for the drive home
(have to read the setup destructions yet lol)
All I can do now is wait...... 4 sleep (less) nights to go .....
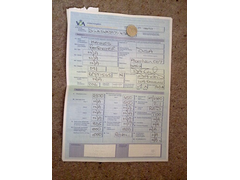
HAHA sorry to keep you all in suspense its a ......... PASS 
Left early doors this morning, drizzle and cold, add in a quick rack and she was a wee bit twitchy, had a steady drive through to Aberdeen, topped up
with petrol and then mcd's for some much needed coffee, ready to head over to the test center and met up with Campbell. we arrived at the center
and went in against their one way system, oops....
went in to reception and was met by the tester who really wanted the car to pass and even helped a bit later on.
So we got called over to the test bay and emmissions first mx5 2003 1.8 supercharged, failed the BET test on rich idle so on to CAT1 test and passed,
next noise, (he later found the wire wool packing amongst the tools and said worried were you? ) so as it was raining he opted to try inside first ,
fail, put the car outside and passed (scraped). then he did the lights, exterior / interior projections, all the time explaining, you could tell he
was really interested , onto the brake tests fronts great, rears great, handbrake the cable pulled through so as I tried to refix he carried on with
the other checks , One flexi was just touching and the headlights needed a wee adjust, Thanks Campbell for sorting these out with the handbrake cable
back together there was an imbalance, we will come back to that, so speedo check and
its spot on, so don't rely on 10%, he then took it away to do the self centering, and came back and asked if there was any way we could sort the
handbrake for an equal pull.
So while he went to do some paperwork we tried again Campbell said to remove the plastic cable covering so we could secure it without it slipping, so
with it all together again, nerves meant a toilet break, when I came out he was back with some paperwork so we did the handbrake again and bingo she
passed.
After collecting the paperwork and chatting I had a wonderful drive home in the sun and dry too
So a very big thank you to Campbell, and although he will not see this a very big thank you to the tester, now to deal with dvla for a reg number
a very very happy gary
ready for the off , early doors 
[img]


Description
[/img]
loaded up and ready
[img]

Description
[/img]
[Edited on 24/3/16 by garyt]
and PASS yee haa
[img]

Description
[/img]
[Edited on 24/3/16 by garyt]
FANTASTIC!
Well done 
Been reading your posts. Well done, hope summer brings good weather for you to enjoy your new toy.
congratulations 
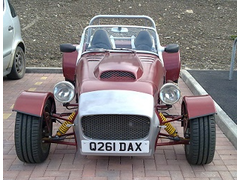
phoned kits n rebuilds at lunchtime to "enquire" of any progress to be told "yes registration issued and in the post today would you
like an email copy sir?" did I ever, so I phoned local car shop and explained my position he said "bring the email and your driving
licence", a quick call to work asking for an extended lunch, granted followed by a quick trip to get the plates  home and put them on and then
off to work, very little work done as foreman is a bit of a petrolhead himself, so just back from a wee afternoon run
[img]

Description
[/img]
[Edited on 20/4/16 by garyt]
[Edited on 20/4/16 by garyt]
I bet you wouldn't have got that plate if you had built a dax!
The hard work's all paid off, now you can enjoy the car.
Dave
Nice one. Just as the nice weather makes an appearance, well it did down here anyway!
cheers guys, yes absolutely buetifull today, wintry showers at the weekend though  but boy did it feel good today
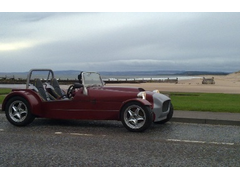
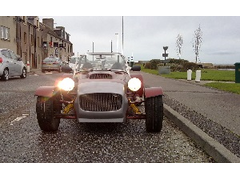
so after a few good trips including a 1043 mile round trip to Silverstone classic and back a few wee changes have taken place, the paint was a 6 foot
paint job so she has now been wrapped (bottled out of doing the nose) and a pair of clamshells. I am well pleased with her
[img]
Description
[/img]
[img]
Description
[/img]
[Edited on 12/8/16 by garyt]
[img]
Description
[/img]
[Edited on 12/8/16 by garyt]
[img]
Description
[/img]
[Edited on 12/8/16 by garyt]
its been a wee while but here she is after a bout of winter upgrades  new bodywork, knock of wire wheels and a nice burr walnut veneer dash, with
the mx5 instruments rebuilt into some mgb gauges and a boot box made with some marine locking locker catches
[img]
Description
[/img]
[img]
Description
[/img]
[img]
Description
[/img]
[img]
Description
[/img]
[img]
Description
[/img]
and here is the boot box, also got my build plate on 
[img]
Description
[/img]
[img]
Description
[/img]
Some people get a bit sniffy about clamshells - but I must admit that I like the look of them. They're also practical, in that they deflect more
stones flying off the front wheels, and they keep people's legs away from the hottest part of the exhaust pipe.
If I could find a supplier who could make me a pair in the right colour I might well be tempted...
clamshells courtesy of wesfield owners club then 2pack sprayed to colour match the ral number of the bodywork, you can place a wanted add on the wscc forum and see what pops up
What a refreshing change.........I love the style you have gone for ! The whole thing harks back to what sevens looked like in the beginning. I have had two cars with clam shell wings , a Caterham and an F27 , my current car , an MK Indy has cycle wings in carbon fibre. Now I don't usually care for wire wheels , personally , but they look stunning on your car. The steering wheel is also very nice.......is it a particular make ? You should be proud of your efforts.....the whole package works really well.
Thank you for your kind.comments she is just about where I want her appearance wise, and just in time for touring Scotland in a fortnight and the
silverstone classic end of July 