Twin40
|
 posted on 22/3/13 at 09:31 PM posted on 22/3/13 at 09:31 PM |

|
|
Hayabusa cooling help!?!
Hey guys, hoping the LCB team can help me out with the final parts of the Mk build, i've been fitting the coolant hoses and have routed it as
per the SBD motorsport guide when using an electric pump.
However i'm a little stuck with what to do withall of the small connection located on the cylinder head/thermostat housing/ rad and tank.
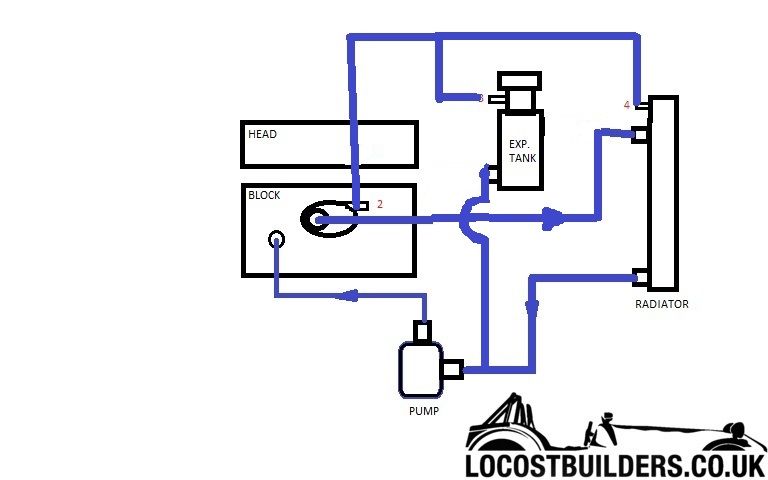
I've done some searching but haven't found anything specific. So thought i'd draw a pretty picture and ask the question!
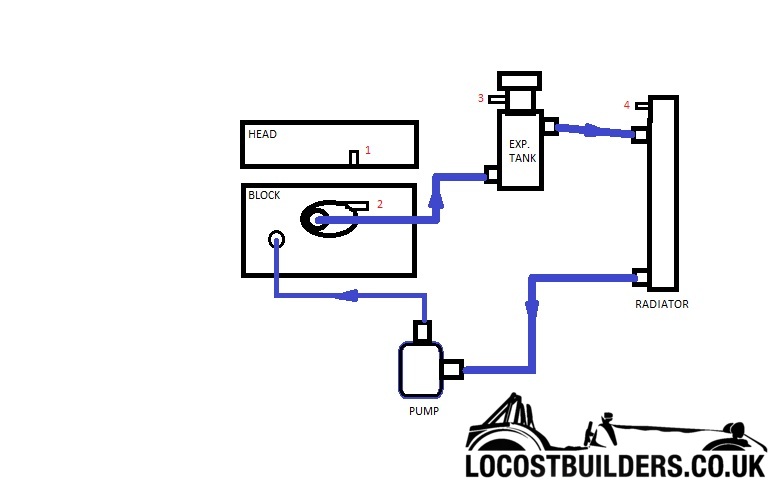
connection 1 - block off?
connection 2 - block off?
connection 3 - overflow...?
connection 4 - no idea......!
any help would be much appreciated!!
Cheers.
C.
|
|
|
|
|
rdodger
|
| posted on 22/3/13 at 09:56 PM |
|
|
I think what you have drawn is a set up with a header tank? ( a tank that is normally half full)
It looks like (3) is to go to an expansion tank? (that header tank would be full in normal use and expand to an extra tank)
In the case of a standard header (4) & (1) would T together and connect to (3) to vent air from the rad into the half empty header tank.
Couldn't you use a standard header tank (rover 200, Golf etc) Run the hose Block to rad, Rad to pump, pump to block. T the header in to the
return. T 4&1 together back to the top of the header?
[Edited on 22/3/13 by rdodger]
This may help
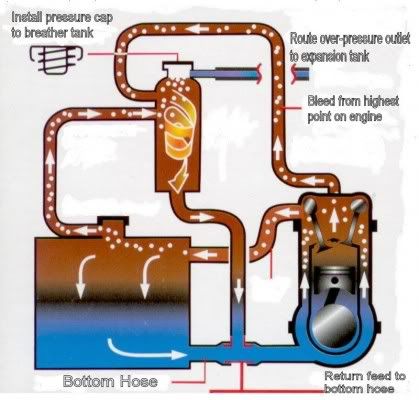
perhaps add the pump at the bottom hose?
[Edited on 22/3/13 by rdodger]
|
|
|
Twin40
|
| posted on 22/3/13 at 10:56 PM |
|
|
Yes, my mistake, should have tagged it as a header tank. I understand '3' will be the pressure relief, but I can't workout what to
do with the other connections. Surely if its a pressurised system, I simply bleed out all the air manually, then block off the other outlets. If over
pressure occurs the cap releases via '3'.
I'm obviously having a stupid day....
Thanks for the help!
|
|
|
GreigM
|
| posted on 22/3/13 at 11:13 PM |
|
|
From memory on my car:
1. Blocked off (assuming thermostat is gutted or has hole) - this was a small bypass from the original mechanical water pump which allowed some flow
when the stat was closed
2 connected to 3 (I think as a bypass of the stat above, but possibly not needed anymore - maybe someone will confirm).
4 blocked, or connect to a T-piece and go to 3 - its simply a bleed tube from the rad, but not necessary if your header tank is high enough (i.e. its
level is above top of rad)
|
|
|
Jon Ison
|
| posted on 23/3/13 at 01:06 AM |
|
|
That looks all wrong to me, on phone so can't copy pic but as I see it.......
Assuming 3 is only open if the cap relives pressure fit a open ended hose to it.
From Bottom expansion tank "T" into bottom hose.
2 to top of expansion tank.
4 block or/and use to bleed system.
Out of block (thermostat housing) direct to top of rad.
1, assume block not seen one on head of a busa?
|
|
|
Twin40
|
| posted on 23/3/13 at 05:57 AM |
|
|
Yep blocking off connection 1 ties In with SBD's diagram.
And 3 would only be a point to route the overflow.
http://www.sbdev.co.uk/Info_sheets/Hayabusa/SBD%20suggested%20EW
P%20plumbing.pdf
I might join 2 and 4 together and have a tee in place with a bleed valve.
Thanks again people...
|
|
|
renetom
|
| posted on 23/3/13 at 08:09 AM |
|
|
Hi
We did this for our R1 engine
Don't know if its any use for yours ?
we blanked off the little outlet at the top of
the polo rad. all works fine.
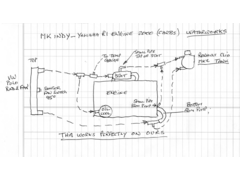 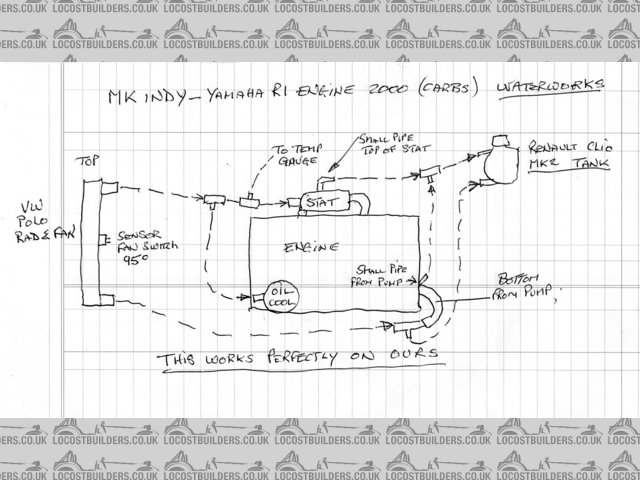
Waterworks R1 Indy
|
|
|
mark chandler
|
| posted on 23/3/13 at 08:46 AM |
|
|
It's never a good idea to blank off little pipe connections that are at the top of thermostat housings, when water boils in the he'd these
take away the bubbles and would be plumbed via a small pipe to the expansion tank.
Failure to do this leads to the steam building up as it cannot bubble off and the engine overheating.
In old cars the header tank was at the top of the radiator so the pipe would have bubbled off to here.
So from the OP,s drawing take a 6mm pipe from 1 to 4, not great or better take a 6mm pipe from 1 to the expansion tank.
If the outlet on the tank is above the pressure cap seal this is just an overflow, you will need to add a new inlet below this.
[Edited on 23/3/13 by mark chandler]
|
|
|
renetom
|
| posted on 23/3/13 at 09:07 AM |
|
|
Hi
you didnt look a the drwg did you ?
|
|
|
Davegtst
|
| posted on 23/3/13 at 09:51 AM |
|
|
This is how I did it on mine using a rover expansion tank. As I remember there isn't a number 1 (head port) on my engine. Make sure the tank
is as high as you can get it.
|
|
|