scudderfish
|
| posted on 11/2/10 at 01:22 PM |

|
|
Structure of Rover V8 crank pulley
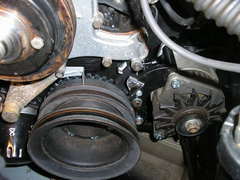
I'm figuring out how I'm going to fit my trigger wheel. I noticed that the front pulley is held on by three bolts that go through what I
assume is a dampner and I can feel nuts on the back of this. Can I take the pulley off without having to undo the FO big nut in the middle? If I do
manage it, what is the likelyhood of me being able to get it back on and hit the nuts at the back with the bolts?

I can't attach the sensor on the right where it normally goes as that is where my alternator sits. If I put it on the left then it'll
have to go on the front of the oil pump and will sit further forward. In this position, my trigger wheel would sit between the pulley and the damper
thing.
|
|
|
|
|
blakep82
|
| posted on 11/2/10 at 01:41 PM |
|
|
i know its a different engine, but thats basically how i did it on my vauxhalll. there's 4 bolts on mine. i just used longer bolts and put the
trigger wheel on the front with them
________________________
IVA manual link http://www.businesslink.gov.uk/bdotg/action/detail?type=RESOURCES&itemId=1081997083
don't write OT on a new thread title, you're creating the topic, everything you write is very much ON topic!
|
|
|
NS Dev
|
| posted on 11/2/10 at 02:06 PM |
|
|
The nuts are on a plate (assuming its not been mucked about with), you'll be fine, just done this very thing on a 4.6 rover we're working
on, different front pulley bit but same lump behind it, and same nuplate arrangement.
[Edited on 11/2/10 by NS Dev]
Retro RWD is the way forward...........automotive fabrication, car restoration, sheetmetal work, engine conversion
retro car restoration and tuning
|
|
|
RAYLEE29
|
| posted on 11/2/10 at 03:46 PM |
|
|
I have a vague recollection that the pulley on mine was tapped.
should be quite simple to find out loosen the bolts and see if they can be moved in/out and as a whole or independently. should give a good idea what
theyre threaded into.
either independent nuts
nuts captivated on plate
threaded into pulley/damper
hth
Ray
[Edited on 11/2/10 by RAYLEE29]
|
|
|
boggle
|
| posted on 11/2/10 at 04:29 PM |
|
|
the pulley will come off just fine, the big bolt holds the sprocket on to the crankshaft that drives the timing chain....
just because you are a character, doesnt mean you have character....
for all your bespoke parts, ali welding, waterjet, laser, folding, turning, milling, composite work, spraying, anodising and cad drawing....
u2u me for details
|
PLEASE NOTE: This user is a trader who has not signed up for the LocostBuilders registration scheme. If this post is advertising a commercial product or service, please report it by clicking here.
|
boggle
|
| posted on 11/2/10 at 04:30 PM |
|
|
just a thought...is this a 3.9 efi you are running?
just because you are a character, doesnt mean you have character....
for all your bespoke parts, ali welding, waterjet, laser, folding, turning, milling, composite work, spraying, anodising and cad drawing....
u2u me for details
|
PLEASE NOTE: This user is a trader who has not signed up for the LocostBuilders registration scheme. If this post is advertising a commercial product or service, please report it by clicking here.
|
scudderfish
|
| posted on 11/2/10 at 05:22 PM |
|
|
Thanks for the replies. It isn't 3.9 efi, it's a carbed 3.5 that I'm converting to EDIS ignition with megasquirt. Unfortunately
the crank sensor bracket I bought from triggerwheels.com is meant to go where my alternator is so I'm looking at 'non-standard' ways
of fitting it all. I was hoping to avoid taking off the whole assembly given how tight that nut it.
|
|
|
Paul (Notts)
|
| posted on 11/2/10 at 08:05 PM |
|
|
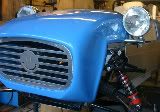
My set up....
if you want to mount the trigger wheel on the front of the pully then I have a spare 5mm spacer that may help, correct bolt pattern for pully.
Paul
Rescued attachment majorca 025.jpg
|
|
|
scudderfish
|
| posted on 11/2/10 at 08:14 PM |
|
|
That's very interesting. Your alternator is in the same place as mine, but your water pump looks to be offset to the left. Do you have any
other photos of the front end of your engine?
Regards,
Dave
|
|
|
Simon
|
| posted on 11/2/10 at 08:49 PM |
|
|
Have a look at my blog (link in sig) and go to Tuesday, 1 January 2008 post.
As for removing that bolt, I made a T bar with a 2 1/2 foot handle with a new socket welded to it. So little effort required with the right tool
ATB
Simon
|
|
|
scudderfish
|
| posted on 12/2/10 at 10:49 AM |
|
|
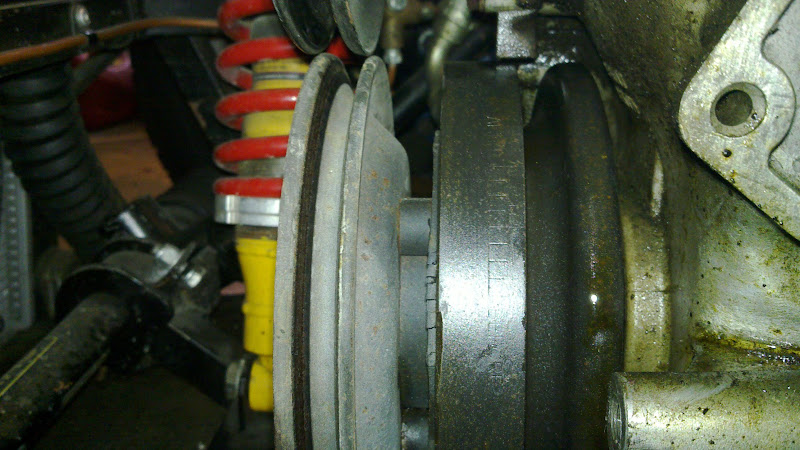
More progress. It turns out the captive nuts weren't. I heard the dreaded 'plink' as the first bounced across the garage floor.
Oh well, worst case is I have to undo the FO nut to get it all back on, so I'm no worse off really. I ploughed on and got the pulley off. In
the second pic above, you can see some spacers between the pulley and the damper. These fortuitously are the same size as my TW and a spacer, so it
all fits together nicely.
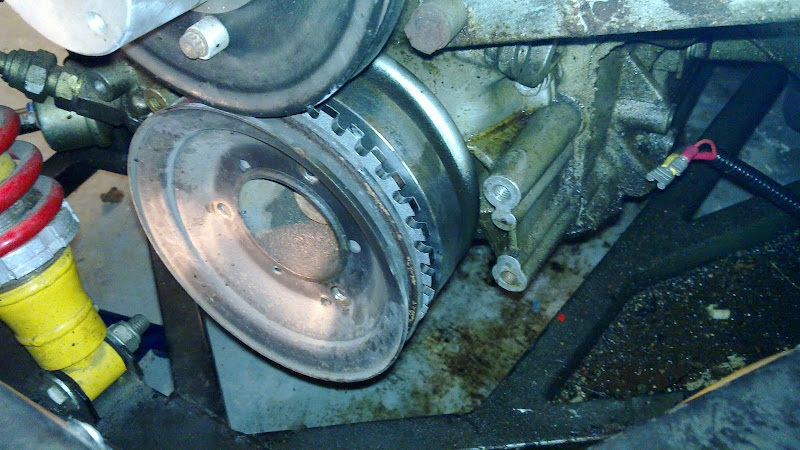
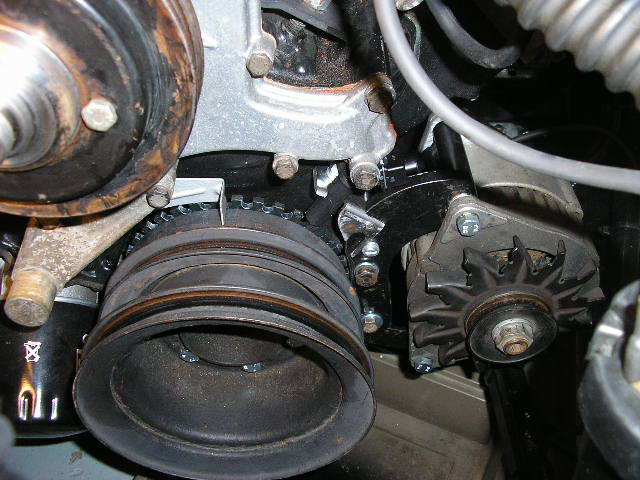
What I need to do now it make up a bracket. There are a convenient pair of threaded holes on the left side.
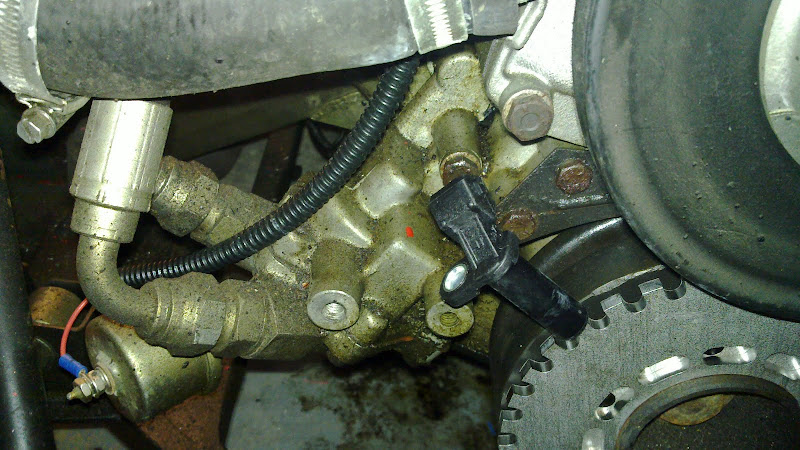
However they are above the centre line (it was too much to hope for) so I'm going to have a funky angle in there to get the sensor at right
angles to the wheel. Getting in there to measure that funky angle is a bit of a swine. I think I'll end up mocking it up in ABS or something
similar so I can easily heat and bend as appropriate before making the real thing.
|
|
|