
Eaton m90 supercharger mods
mark chandler - 11/2/12 at 07:32 PM
Hello chaps
Looking for a bit of advise, here is a picture of the supercharger from my DB7
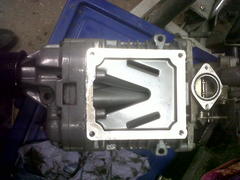

Eaton supercharger -1
I was expecting this to be rough cast, however it has epoxy coated vanes and outlet so I am wondering if anyone can help me in identifing what
generation it is?
If its a 3rd gen, which I suspect it is then I can open the outlet out a bit and remove the bolt castings (right hand side picture below) to improve
flow, if a 5th gen then I am restricted to just removing the bolt casting as this is a superior design.
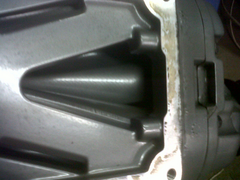

Eaton supercharger -3
Cheers Mark
[Edited on 11/2/12 by mark chandler]
MikeRJ - 11/2/12 at 09:52 PM
Do those bolt casting really make any significant difference?
mark chandler - 11/2/12 at 10:09 PM
Googling all the pictures for ported 3rd gen that have been cut back its not an issue, you have to seal the threads on the bolts or you risk
pressurising the gear box when done.
They obviously do shroud the vanes, but as far from the inlet how much is real terms I have not got a clue but I will be removing and opening the V a
little bit. The vanes are made are made with a 15 degree twist, the actual angle of the cast hole tapers in slightly to the bolt end so a little
adjustment required.
It looks to my eye like the front induction end will give most value, rough cast and poorly matched, it has a TB bolted to an angled tube bolted to
the S/C.
That aside on 3rd generation they recon you can get a 15% improvement, it may not up boost but reduces inlet tempretures and HP consumed to spin
it.
Trouble is of course the internet is full of BS, I could be reducing a very expensive item to scrap 
Regards Mark
[Edited on 11/2/12 by mark chandler]
Benzine - 11/2/12 at 10:15 PM
I emailed my serial number to eaton asking what model it was and they emailed back with the info, nice and friendly and helpful
mark chandler - 12/2/12 at 07:25 PM
Been porting today so question to follow:
Outlet, now minus the bolt castings, its a poor camera picture but I have also put a 45 degree cut on the inside to match the lobe tip then blended
into the outlet, in total I would guess maybe 5% more flow but as nice smooth transition it should cut heat down which is the main aim this side 
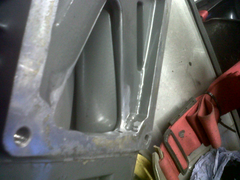

Ported outlet
Next the inlet, again rubbish picture but the before has black ink showing where the inside lobe was shrouded, also the casting was very rough where
the factory had milled out.
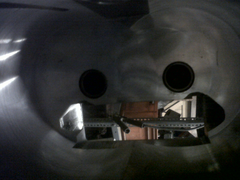

Unported inlet -black shrouded
From the other side ported:
The port now matches the inside of the lobe, not 3/8" above so carefully curved to match not square.
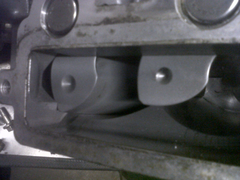
So the question, in this picture you can see the outside of the lobe where it hits the port, nearly closed on the left hand side:

Uported inlet lobe tip
Do I need to cut this to match the shape of the lobe, I think probally yes but do I also open the bottom bit in this picture to extend to the end of
the tip?
Cheers Mark
[Edited on 12/2/12 by mark chandler]
mark chandler - 14/2/12 at 11:39 PM
I have been doing some more research on this now, the eaton Gen V supercharger outflows the Gen III with ease.
When you consider the size of the inlet to the size of the outlet it is clear that the greatest restriction is on the inlet track, as such this is
where the attention is required so I have finished cutting away on the exhaust side
was:


Eaton supercharger -1
is now:
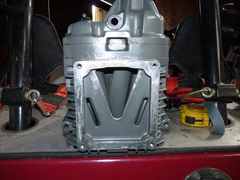

outlet
I found this photo of a Gen V
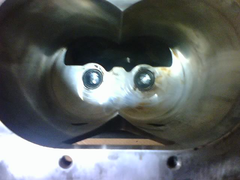

Eaton Gen V internal port
Note how the floor of the inlet is cast so that is lower than than the humps that support the bearings as in this Gen III
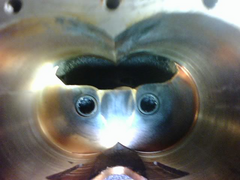

Gen III internal port
The rotors have a solid middle so there is no point in cutting below so this will be next weeks few hours of grinding away 
mark chandler - 27/2/12 at 06:20 PM
Finished porting the intake on the S/C now, here's a nearly done picture before I balanced the left hand side, big difference from the picture
above.
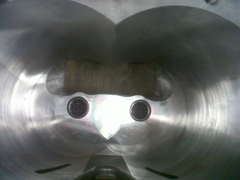

Internal port nearly finished
This has increased the inlet duration by around 15-20 degrees, and by lowering either side of the bearing allows a smidge more air in.
Looking in from the Lobe side you can see the port closing on the hole, I assumed that its not an instant closure to reduce pulsing so did not match
the lobe but left so you get a decreasing half moon until it closes completely
I also put a chamfer on the edges of the raised bridge so that air flows smoothly and polished everything smooth with 180 grit paper.
On the exit I added a chamfer on the rear of the triangle next to the cogs to aid air leaving at the rear end of the casing, air strikes the back and
would then hit 1/2" right angle bend otherwise.
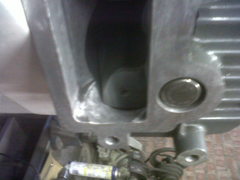

Lobe and bridge
The rest of the induction was quite nicely cast so port matched all the elements and ground out and big bumps etc, it looks quite nice when viewing
through now.
I am not sure what difference it will make in the real world, it will be a seat of the pants on an occasionally driven car 
What I do know is that when I span by hand before I started I could barely feel any pressure around the exit, now I can definitely feel it blow and it
sounds different, like a pump running slowly so indications are good 
mark chandler - 4/3/12 at 07:47 PM
All back together and the car sounds ace, engine is absolutely flat when running, could stick a coin on its side on the rocker cover without is
falling over, straight six's rock 
I have a problem, idle sits at 2000rpm so need to sort this out before I can go for a drive 
I do not have any air leaks however the supercharger makes a lot more whooshing noise so I am assuming that it is providing more blow than before so
I will need to close the gap down on the throttle body butterfly as the idle valve is outside it's range.
Aston Martin in their wisdom installed all this under the supercharger so its all got to come out again....
Next weekend is now sorted.
mark chandler - 5/3/12 at 05:09 PM
Simple fix, the throttle cable was a tad tight just holding the throttle open.
Result:
Car is definately faster (by the seat of pants test) and a quick whizz on the motorway.
Car has much faster pickup at at all rev's, especially below 3000rpm
Slightly more s/c whine, not a bad thing and still very quiet, you need the radio off to here it.
Engine feels much smoother, the closest other car I have driven that felt like this was my old V12 XJS.
When driving the car it used to feel a bit sluggish pulling away, touch throttle now and it is very eager, it has transformed the drive and given a
turbine smooth feel, almost as if I had dropped the diff ratio.
Regards Mark
mark chandler - 6/5/13 at 04:09 PM
I had the supercharger off over the last couple of days as I intended to replace the pulley with a smaller one, purchased a billet of ali and started
to make a new pulley, unfortunately I could not remove the old one so have parked that.
While to S/C was off I decided to improve my porting after the earlier success, opening up the inlet and exhaust further.
For the inlet I step drilled the centre between the bearings and enlarged the inlet ports.
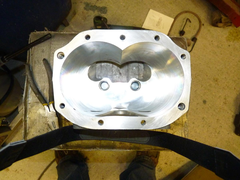

internal 6 may 2013
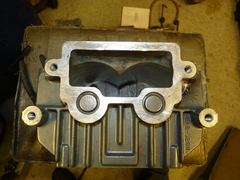

external may 2013
I then match the Throttle body to suit
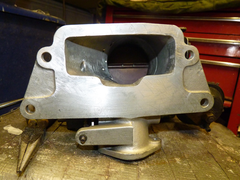

tb may 2013
here it all is bolted up, a nice clean run in to the rotors.
I also opened the exhaust up by 3/8" each side and champhered
Before I commenced I did a few speed runs in third, then a run today to see the difference, it felt faster and it is as I have shaved 1 second off my
times.
So third gear at 25mph, then floor it until the rev limiter cuts in at 90mph on a private road:


I think thats as far as I can go with the M90
mark chandler - 12/5/13 at 03:59 PM
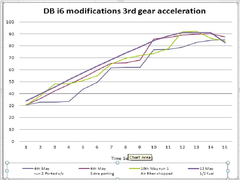

Porting 12 May 2013
Tests recorded on my iphone using Speedbox
I tried 0-60 with Dynolicious but it's hard on the car although did record a best 0-60 of 5.3 with axle tramp and smoke  so will not be
repeating that.
[Edited on 12/5/13 by mark chandler]


