

Just a quick check of parts required to convert Pinto to Duratec and likely source:
Engine Mounts (Fisher Fury as it is the same chassis as the Stylus)
Engine (ebay)
Exhaust manifold (FastDan for flange then DIY the Pinto one or treat myself to a stainless one)
Inlet manifold (FastDan)
bell housing (Titan or RWD; I want the cable version to save effort)
flywheel (RWD; so I can use 8 1/2 uprated clutch I already have)
Alternator (Honda)
ARP Bolts (Burton)
Aux tensioner (ford focus & ebay or breakers yard)
I'm after recommendations for the following:
Sump (anything other than Dunnells at £300!. don't have resource to DIY though)
TB's (would like to go up to 51mm, any recommendations, currently have GSXR 1000)
Alternator mounts (supplier needed, any recommendations?)
Oil filter relocation (Any recommendations before I shell out and buy Dunnells at aprox £100!. is it needed? is there a DIY option?)
HD clutch I already have along with engine management.
Have I missed anything?
Thanks
Alex
[Edited on 14/6/11 by se7ensport]
Try Strontium Dog off of this forum for the Sump.
I know he was going to try and alter a Duratec Sump.
[Edited on 14/6/11 by karlak]
deep pockets mate!
quote:
Originally posted by daniel mason
deep pockets mate!

getting on for just over £2k with some of the initial prices I'm trying to avoid (sump comes to mind):
Engine Mounts £75
Engine £400
Exhaust manifold £200
Inlet manifold £155
Sump £360
bell housing £240
flywheel £240
clutch £140
TB's (have GSXR looking at other options)
Alternator £30
Alternator mount £???
ARP Bolts £100
Oil filter relocation £100
Total £2,040
what happend to the s2000 option?
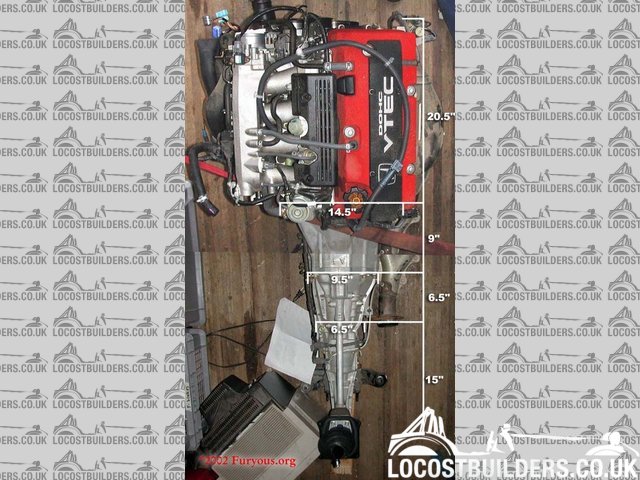
Can't get it to fit existing transmission tunnel which is only 7 inch wide and it looks to be about 10 needed; I'd love to use the engine
but additional changes to chassis make it very hard to justify.
[Edited on 14/6/11 by se7ensport]
i suppose it all depends how far back in the chassis you put it! if you can stick it an inch or two forward and still have a good gear lever position it could be ok. might alter weight distribution slightly but wouldnt imaging a dramatic effect. i can measure mine up for you tomorrow if you like?
FastDan will do the engine mounts too if you need them.
Raceline do a Filter Housing which is slightly cheaper than Dunell.
I have used a Dunell Sump, you can get a cheaper steel on from 3GE components at £275 I think.
You will need a fuel rail £70 from AT.
Alternator mounting Kit from Burton if you feeling Rich, I just made up some brackets to suit my tiny Denso unit.
HD Pinto Friction plate from AP Racing via Burton
Uprated Clutch plate from an Escort RS Turbo I have used, need to trim the fingers in length possibly.
Welcome to the world of deep pockets and never ending spending!!
I'd be really interested to know from the point of 6.5 inches width of the gearbox the exact measurement to the front of the engine, according to the drawing it would be 36 inches which puts it too far forward for the bonnet line and weight distribution.
Flak monkey does a steel sump as a flat pack(£125) or made up and testsed at £250.
Personally I'd buy the sump flat pack (125) a small stick welder (75) and some bits of steel, drills and taps and then make a steel sump, inlet
manifold (18 inches of 80*8 mild steel (5)+ a length of exhast pipe the size you want you inlets (mine was £5 fro a 2m length of 45mmod/42 id)), the
engine mount brackets, and alternator mount (I made mine from 150mm of 40mm*40*5 angle, a bit of 6mm flat, and 150mm of M10 stud. You'll probably
need 8/10mmm clearance and tapping drills and taps).
Regards
Hugh
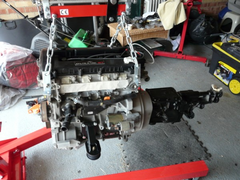
Engine length rear of block to front pulley 19 inches.
Length from rear of Titan Bell to Front Pulley 26 inches
Length from rear of lidded section of gearbox to front pulley is 36 inches
Engine is quite high can measure that for you too if you need, luckily the panther has been designed with a high bonnet line so enginge sits about
10-15mm lower than this.
[img]

Engine and box together
[/img]
quote:
Originally posted by se7ensport
getting on for just over £2k with some of the initial prices I'm trying to avoid (sump comes to mind):
Engine Mounts £75
Engine £400
Exhaust manifold £200
Inlet manifold £155
Sump £360
bell housing £240
flywheel £240
clutch £140
TB's (have GSXR looking at other options)
Alternator £30
Alternator mount £???
ARP Bolts £100
Oil filter relocation £100
Total £2,040
quote:
Originally posted by se7ensport
TB's (would like to go up to 51mm, any recommendations, currently have GSXR 1000)
quote:
Originally posted by karlak
quote:
Originally posted by se7ensport
getting on for just over £2k with some of the initial prices I'm trying to avoid (sump comes to mind):
Engine Mounts £75
Engine £400
Exhaust manifold £200
Inlet manifold £155
Sump £360
bell housing £240
flywheel £240
clutch £140
TB's (have GSXR looking at other options)
Alternator £30
Alternator mount £???
ARP Bolts £100
Oil filter relocation £100
Total £2,040
Which exhaust manifold are you considering (£200 ??) ? I was going to adapt my "over the rail" Pinto one, but think I would prefer a "through the side panel" type.
[Edited on 15/6/11 by karlak]
SR20 DET from a nissan 200 sx would be cheaper buy the whole car then sell n the bits you dont need
For the GSXR1000 TBs and the inlet flange you have from FastDan have you considered the following sort of setup? Been running well with this setup for
a month or two on my Tiger (photos are a while ago and mid modification):
Duratec flange + GSXR1000s
Duratec inlet adapter plate installed
quote:
Originally posted by pjay
For the GSXR1000 TBs and the inlet flange you have from FastDan have you considered the following sort of setup? Been running well with this setup for a month or two on my Tiger (photos are a while ago and mid modification):
Duratec flange + GSXR1000s
Duratec inlet adapter plate installed
Hi - the inlet rubbers came from a GSXR1000 however IIRC the GSXR750 uses the same TBs/inlet rubbers. The GSXR600 inlet rubbers are definitely smaller.
Conversion starts tomorrow, budget is already blown after buying a 5k engine for £800:
Engine Mounts £75
Engine £800
Exhaust manifold £20 (need to get flange welded to existing pinto manifolds)
Inlet manifold £145
Sump £426
bell housing £330
flywheel £195
clutch £140
TB's £0
Alternator £0 (not needed on focus engine as it already sits on inlet side)
Alternator mount £0
ARP Bolts £40 (only flywheel)
Oil filter relocation £55
Total £2,226

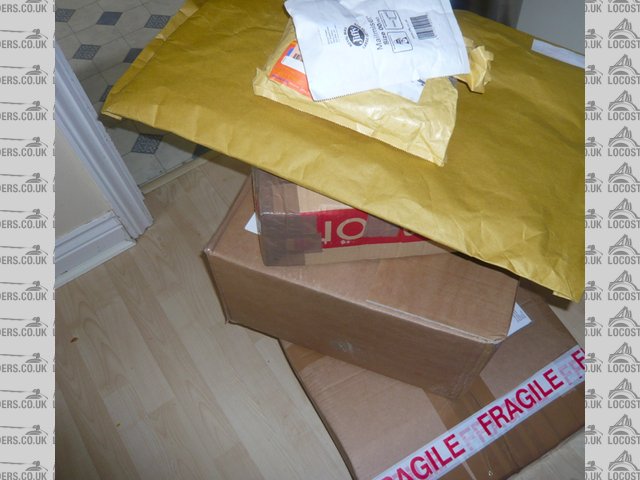
lots of new stuff
engine
[Edited on 24/6/11 by se7ensport]
[Edited on 24/6/11 by se7ensport]
Looks good but easy to blow budget.
Isn't the Focus alternator a 'smart charge' type on the Duratec e.g. ECU controlled - or have you got info on how to override? The
Duratec I've fitted came from a Mondeo which had one of these 'smart charge' alternators.
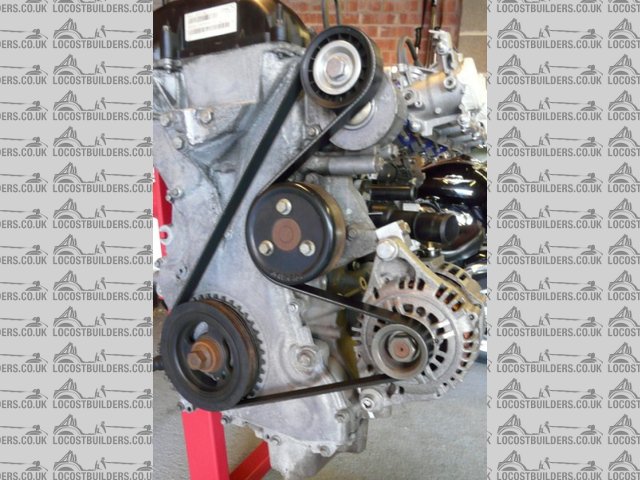
Having been there done that, I think your alternator may be too big, I originally used a unit from a Micra which fouled a chassis member.
I now have a tiny Denso alternator fitted.
Here's a pic so you can compare
[img]

micra alternator - too big
[/img]
quote:
Originally posted by pjay
Looks good but easy to blow budget.
Isn't the Focus alternator a 'smart charge' type on the Duratec e.g. ECU controlled - or have you got info on how to override? The Duratec I've fitted came from a Mondeo which had one of these 'smart charge' alternators.
New bits:
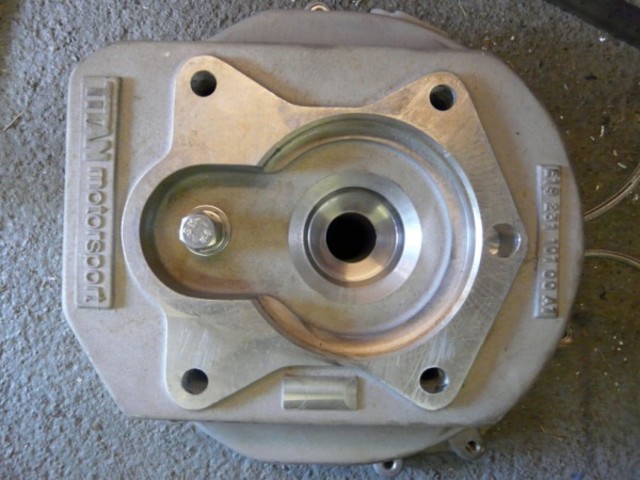
RWD Bellhousing
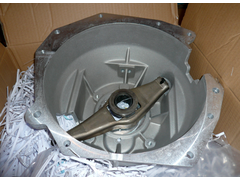

RWD Bellhousing
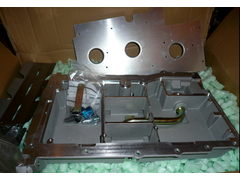

Raceline sump
Sump kit takes a fair bit of time to put together, in doing it I split an "O" ring by pushing the oil pick up pipe too far in causing it to
expand with no way of pulling it back out without it taking a chunk out of it. After spending 2 hours trying to make a 3 x 20mm fit (couldn't get
a 2.6 x 20mm anywhere) it turns out I was missing the piece of plastic that fills the gap above the pick up pipe, so will have to wait till next
weekend to get any further with the sump 
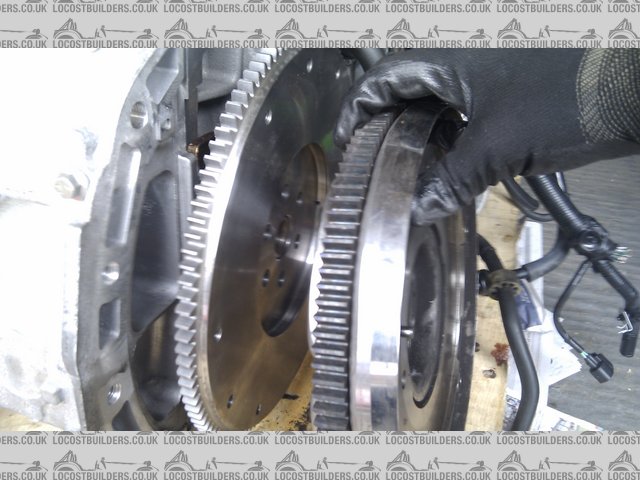
Did get the flywheel done though, taking the old one off was a piece of wee once I'd sussed a way to lock the ring gear:
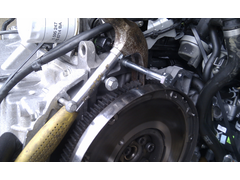

flywheel swap
Comparison between new and old is substantial, I didn't weight the old one but it's 2-3 times times the weight of the new one at 3.1kg:
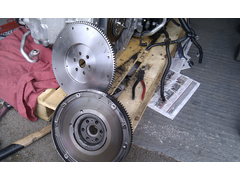

flywheel swap comparison

flywheel swap comparison 2
[Edited on 25/6/11 by se7ensport]
Good news on the alternator. Must admit I gave up on mine pretty quicky due to size/mounting position - managed to reuse the alternator from my Pinto
so not wiring changes!
New parts look good and very familiar.
Got to say the Raceline sump is top quality, on my second one. Shame about the O ring - it's a tight fit on the oil pick up pipe.
The cable clutch bellhousing from RWD is good quality too and it makes for a quicker/simpler conversion from Pinto. Is the flywheel from RWD as well
e.g. with the mounting holes PCD for a Pinto clutch cover?
Flywheel is from turbosport.net; £195 delivered, which is pretty good value & quality is spot on. It's designed to take the pinto clutch
which is a bonus as I'd already bought a heavy duty set up to go on the pinto.
[Edited on 25/6/11 by se7ensport]
I'll be watching this thread closely because I'm hoping to do a Duratec conversion in a Le Mans bonnet Fury later in the year. Would you
mind listing where you bought the parts from?
My main concern is fitting the engine under the bonnet without cutting holes. Does the Raceline sump reduce the height? Have you measured up
clearances?
Is this going on a Type 9 gearbox?
Make sure you take lots of photos, especially of any problems you have. 
quote:
Originally posted by Furyous
I'll be watching this thread closely because I'm hoping to do a Duratec conversion in a Le Mans bonnet Fury later in the year. Would you mind listing where you bought the parts from?
My main concern is fitting the engine under the bonnet without cutting holes. Does the Raceline sump reduce the height? Have you measured up clearances?
Is this going on a Type 9 gearbox?
Make sure you take lots of photos, especially of any problems you have.
I have just fitted my Duratec in an Avon and had the problem of it sitting too high on the engine mounts. I had to get smaller rubbers (25mm) to drop it down and it should all now fit.
quote:
Originally posted by Tiger Super Six
I have just fitted my Duratec in an Avon and had the problem of it sitting too high on the engine mounts. I had to get smaller rubbers (25mm) to drop it down and it should all now fit.
I'm going to put the request out there early: does anyone have a duratec spark map that they are willing to share??? Any format will work as
I'll manually convert it.
Thanks
Alex
From a company called robush.co.uk it's 75mm diameter, 25mm thick and m12 threads coming out of it. Also has metal plates top and bottom.
quote:
Originally posted by neilp1
quote:
Originally posted by Tiger Super Six
I have just fitted my Duratec in an Avon and had the problem of it sitting too high on the engine mounts. I had to get smaller rubbers (25mm) to drop it down and it should all now fit.
Mark where did you get the smaller rubbers from?
Neil
quote:
Originally posted by se7ensport
I'm going to put the request out there early: does anyone have a duratec spark map that they are willing to share??? Any format will work as I'll manually convert it.
Thanks
Alex
quote:
Originally posted by FASTdan
quote:
Originally posted by se7ensport
I'm going to put the request out there early: does anyone have a duratec spark map that they are willing to share??? Any format will work as I'll manually convert it.
Thanks
Alex
If you have any luck on this please let me know, we currently run a stock zetec one.
[Edited on 28/6/11 by FASTdan]
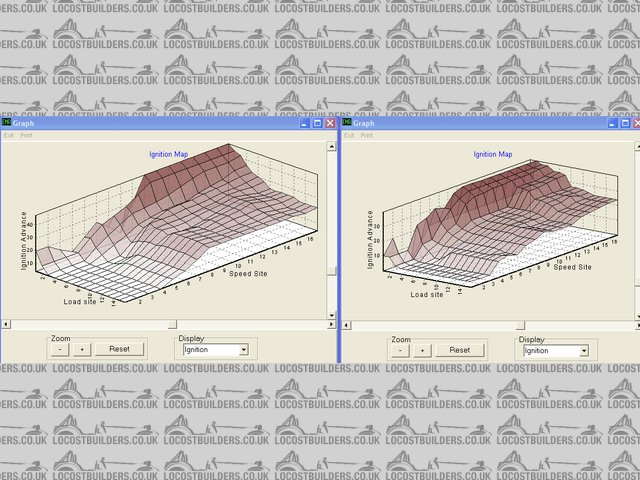
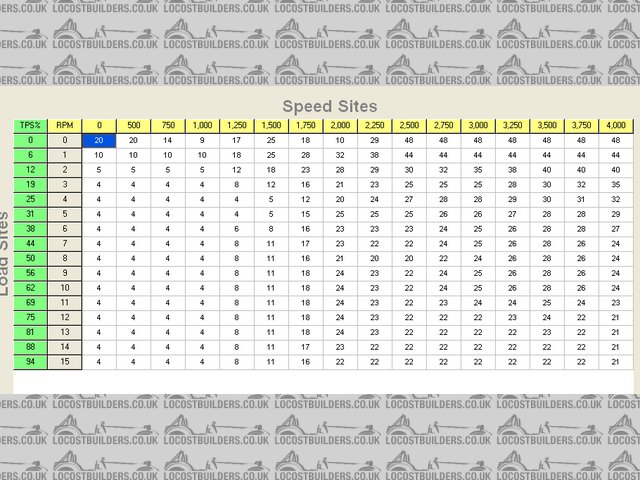
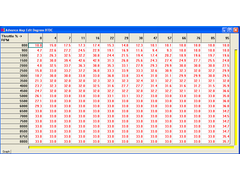
okay, after an evening of surfing and messing about with emerald software I've got a copy of Duratec map based on the following spec (curtesy of
http://k80rum.co.uk/emerald_maps.aspx):
2,0 Duratec. 296o cams, Jenvey 45 TBs, grouped Bosch 155 968 injectors @ 3.7Bar in TBs, forged pistons, steel rods
I would expect the cams to change it slightly, but I should be a closer ignition map than a Zetec.
Duratec on left, Zetec on the right
[img]

duratec v zetec
[/img]
Duratec ignition advance, once I've manually transposed these in to excel I'll post a link for others:

duratec part 1

duratec part 2
Hi Alex - missed your request. Here's my current Spark Advance Table on a standard 2.0L Duratec. It's pretty basic but seems to run well:
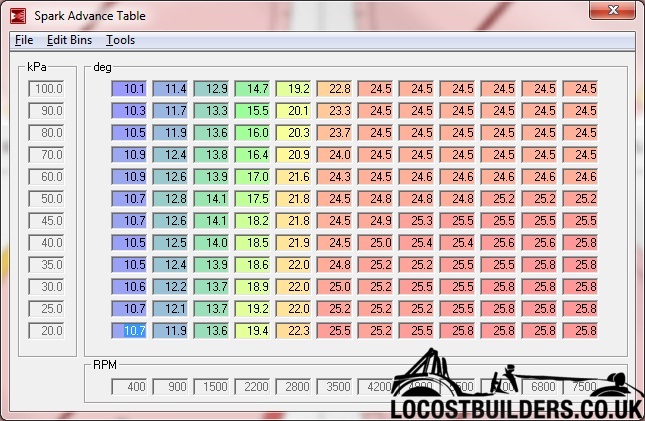
Thanks pjay, interesting to see that yours is a much flatter map than the ones I found. I'm hoping a few others will post theirs so that they
can be tried and compared.
Alex
quote:
Originally posted by se7ensport
okay, after an evening of surfing and messing about with emerald software I've got a copy of Duratec map based on the following spec (curtesy of http://k80rum.co.uk/emerald_maps.aspx):
2,0 Duratec. 296o cams, Jenvey 45 TBs, grouped Bosch 155 968 injectors @ 3.7Bar in TBs, forged pistons, steel rods
I would expect the cams to change it slightly, but I should be a closer ignition map than a Zetec.
Duratec on left, Zetec on the right
[img]
duratec v zetec [/img]
Duratec ignition advance, once I've manually transposed these in to excel I'll post a link for others:
duratec part 1
duratec part 2
Watching with mucho interest
Alex - yes it's pretty flat and I imagine quite conservative.
I decided to work on the basis of a maximum of 26 degrees advance because of the design of the combustion chamber/spark plug position etc. (although
I'm not an expert). The actual profile is pretty much straight out of MegaTune.
I'm hoping to get to a rolling road in the next couple of months and will see what modifications they make - but also interested to see what else
might be posted.
Cheers
Pete
[Edited on 2/7/11 by pjay]
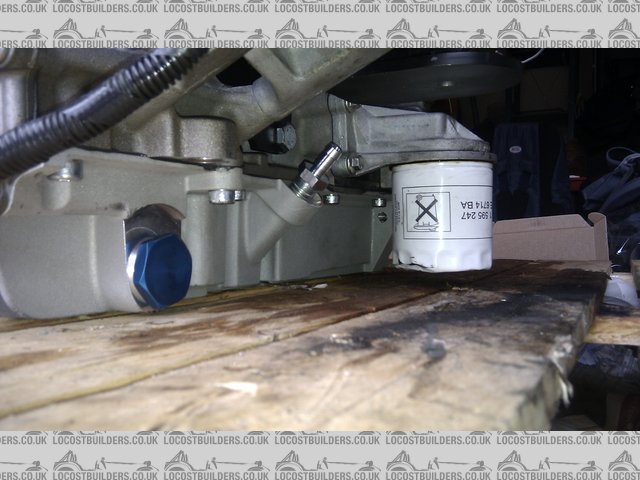
Now I've got the sump on it appears that I don't need to relocate my oil filter, I was expecting it to be the lowest point on the engine but
it isn't, by at least 10mm. Have Ford changed the design of the housing or is the filter shorter?
[img]

Description
[/img]
[img]

Description
[/img]
quote:
Originally posted by se7ensport
Now I've got the sump on it appears that I don't need to relocate my oil filter, I was expecting it to be the lowest point on the engine but it isn't, by at least 10mm. Have Ford changed the design of the housing or is the filter shorter?
[img]
Description [/img]
[img]
Description [/img]
Just been out to look at mine, the standard Duratec oil filer housing has a heat exchanger built in on the ST150.
However looking at the engine in relation to the bottom chassis rail I think your filter will foul the rail even though it is above the sump level.
Its the standard filter from a 2009 Focus, FINIS number 1595247, part number 1S7E-6714-BA.
Luckily I don't have a chassis bar in the way that will foul it as it's a Stylus chassis rather than a seven, unfortunatley it also means
the engine mounts I bought from FastDan aren't going to fit as they will be too narrow. I'll be aligning the engine next weekend and
deciding what to do for the mounts, will probably be buying the plates from Dan and making the rest in situe (end result will mean my engine mounts
will be up for sale).
On a similar note the dipstick location on the Raceline sump isn't great, it comes out directly below the engine mounts, the only way to get a
dipstick in currently would be to drill a hole through the mount!!! Needless to say I'll be factoring in a mod to my mounts.
Yep I found that out on my Dunnell sump, the solution was to cut a section of the dip stick tube out and replace with a rubber tube between the ends
to bend around the mount.
Better to mod the mount though.
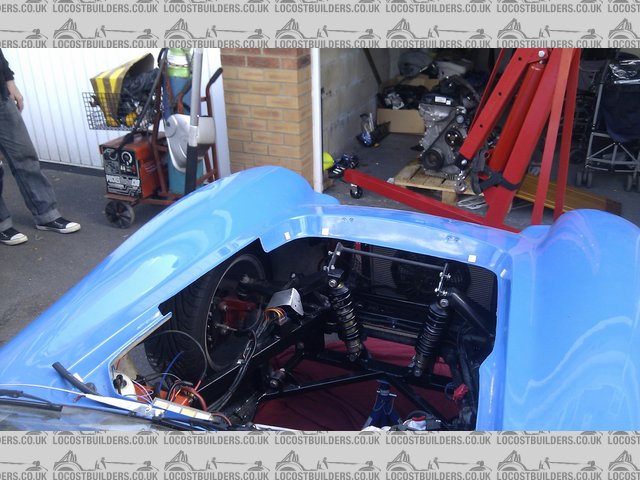
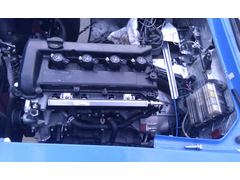
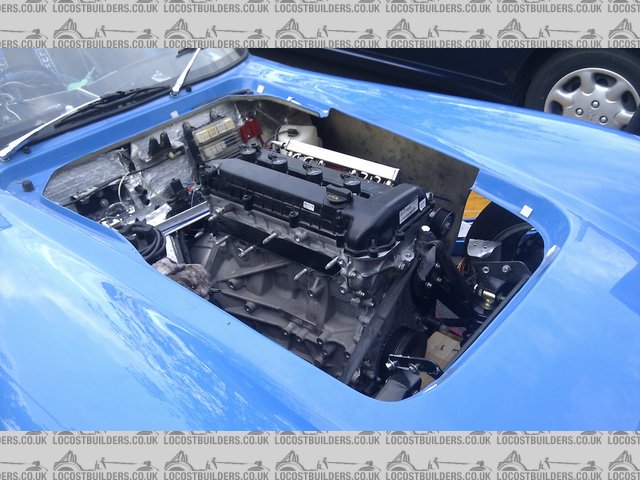
Well engine went in tonight (wooden engine mount on crank for time being), I'd been waiting on 4 bloody bolts for the alloy bellhousing for two
weeks! Pretty hard to track down as i needed M12x50 with 1.50 pitch thread, the original bolts were too short.
[img]

Description
[/img]
[img]

Description
[/img]
[img]

Description
[/img]
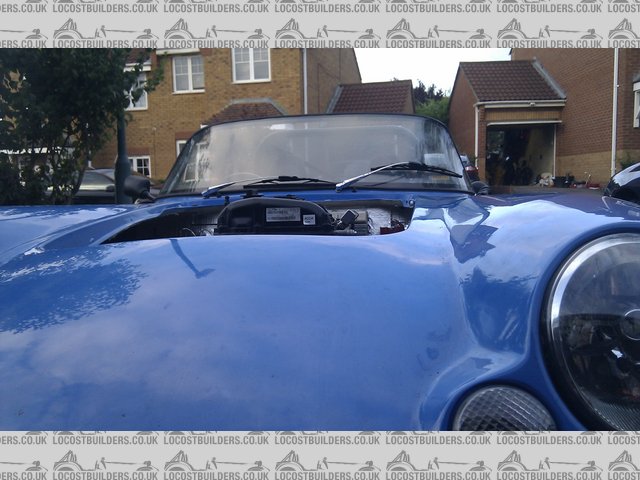
I have a couple of challenges to overcome:
1. engine alignment is off to the passenger side due to drivers footwell, this means alternator and oil filter no longer fit! Some effort with a lump
hammer on the footwell and a bit of grinder action to the bellhousing might allow the alternator to fit again, but oil filter wont unless I move the
engine forward, easily doable but weight distribution suffers.
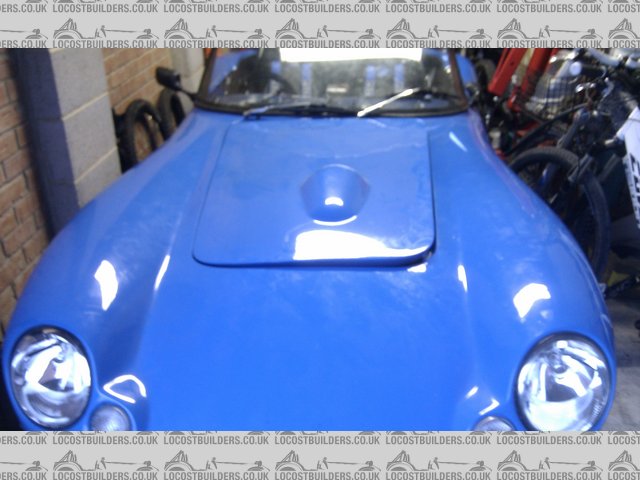
2. think a new bonnet bulge may be needed, although final engine height is yet to be decided up on.
[img]

Description
[/img]
[img]

Description
[/img]
quote:
Originally posted by se7ensport
I'm going to put the request out there early: does anyone have a duratec spark map that they are willing to share??? Any format will work as I'll manually convert it.
Thanks
Alex
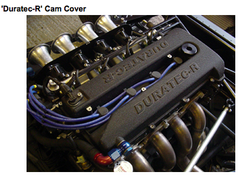
You could consider a low profile Duratec cam cover to see if that allows your bonnet to fit.
Not the cheapest out there but may save you some hassle with the bonnet
quote:
Originally posted by radom
quote:
Originally posted by se7ensport
I'm going to put the request out there early: does anyone have a duratec spark map that they are willing to share??? Any format will work as I'll manually convert it.
Thanks
Alex
at the bottom of the page
http://www.zetecinside.com/xr2/dtas80_tech.shtml

quote:
Originally posted by big-vee-twin
You could consider a low profile Duratec cam cover to see if that allows your bonnet to fit.
Not the cheapest out there but may save you some hassle with the bonnet

Unfortunately COP won't help the height if you think of using the Raceline cam cover. Any reason you're wanting COP?
I've got the alternator on the driver side but sounds like the driver's footwell is the real problem. How far over is it pushing the
bellhousing?
Aux drive belt set up
my understanding is that the cam cover saves about an inch its as high as the lowest side on the original cover
apparenly you can get detail from the Raceline brochure
COP... because I have it, I've already done the wiring loom and the cost of new HT leads, I'm also expecting to be able to align them to my
existing bonnet bulge. If need be I'll revert to wasted spark.
I think about an inch dent in the footwell might do it, as that should give me more than an inch at the front of the engine and I need just under an
inch. It's due to the flange and bolts that push it over, otherwise the profile would have cleared.
Time for the lump hammer...
Re cam cover:
"Duratec-R aluminium cam cover improves bonnet clearance by between 30-50mm depending on the engine type, while improving the aesthetics of the
engine immeasurably. As well as the low line aluminium cover, the height clearance is made possible by a sunken spun ali filler cap opened with use of
an allen key."
Trouble is the front of the cam cover rather than the oil filler. I'm hoping to mount the engine lower to remove the problem, I'm going for
100mm ground clearance with driver and passenger, just need to find a couple of bodies to put in the car to take suspension measurements.
[Edited on 17/7/11 by se7ensport]
alex
Sorry to go off topic but looking at your photos I see you have a different pulley tensioner for your alternator.
Im guessing this is a new one fitted to the focus engine.
Would you happen to know the part number for it, may possibly be written on it as it would be ideal for my duratec install as im fitting gsxr TBs and
have limited space for the TPS.
Looks like a very tidy install btw.
Many thanks
Patrick
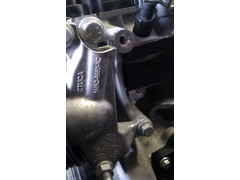
Ford Focus 2009 aux pulley part number:
[img]

Description
[/img]
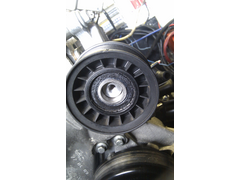
Odd thing is I can't find any way of tensioning this setup, I thought the pulley might have a concentric pivot but it doesn't:
[img]

Description
[/img]
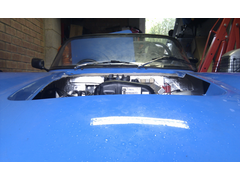
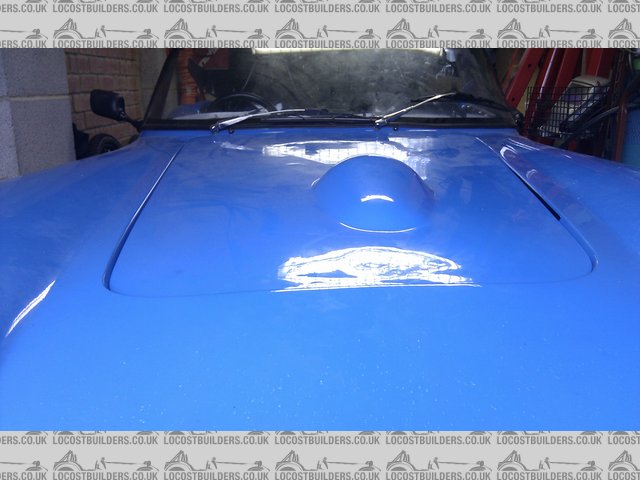
Engine has now been lowered to 100mm ground clearance (95mm with passengers), combined with a bit of footwell bashing and cutting back the bolt
mountings on the bellhousing has given the clearance for the bonnet.
[img]

Description
[/img]
[img]

Description
[/img]
Alternator needs another 5mm for clearance which isn't going to happen so I'll be buying a smaller one and relocating it to the other side
of the engine.
Alex - Looks like you've cracked it! I run with 100mm ground clearance and haven't had a problem so far.
Interesting about the the lack of adjustment on the tensioner pulley. Which exhaust side alternator mounting option would you go for.
Patrick - also interested in the part number for the tensioner part. I've got gsxr ITBs and I made up an aluminium mount for the tensioner
pulley:
Tensioner Pulley
Thanks very much guys, that gives some options to look at
Need to source the alternator before I decide how to run it.
Many thanks
Patrick
Just a thought Alex, the tension isnt taken up by the alternator itself is it? is the alternator movaable or is it fixed in one position?
If it can be moved along the mount then this may be the way you tension the belt
When collecting info before the swap I cut & pasted this into my notes, I think this came from Flak:
"The 2006 onward 1.8 duratec ford focus is fitted with a spring loaded tensioner. This fits where the power steering pump would normally be on
the 2.0 engine. Available from Ford for about £70, but also from the breakers for about £20. The ford part number is 3M5Q-6A228-AD. "
Now on the 2009 things are a bit different; the alternator is solidly mounted top and bottom, there is no adjustment in this setup, the same goes for
the power steering pump that runs off a second pulley on the crank, my suspicion is that Ford is using belts with more elasticity in them so the
stretch creates enough tension in the system, this combined with running 6 groves in the belt should prevent slipage.
I'm now considering using existing alternator but cutting the mounting legs down and adding washers to space the top pulley out to take out the
slack, potentially less work and cost than sourcing a new alternator. If this doesn't work I'll probably have to mount an alternator on the
exhaust side.
[Edited on 17/7/11 by se7ensport]
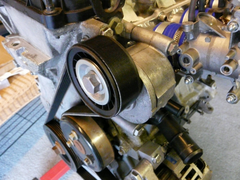
The Focus pulley is spring mounted and rotates against the spring, it is this that tensions the belt.
When fitting the belt the pulley is rotated on a concentric cam anti clockwise which allows you to slip the belt over easily.
The internal spring then tensions the belt, it is not elasticity in the belt itself.
The inlet manifold that I designed in conjunction with fastdan (the one he now sells) has an offset in the first runner to allow space for the TPS.
[img]

Focus Pulley
[/img]

[Edited on 17/7/11 by big-vee-twin]
quote:
Originally posted by se7ensport
quote:
Originally posted by radom
quote:
Originally posted by se7ensport
I'm going to put the request out there early: does anyone have a duratec spark map that they are willing to share??? Any format will work as I'll manually convert it.
Thanks
Alex
at the bottom of the page
http://www.zetecinside.com/xr2/dtas80_tech.shtml
Thats brilliant, thanks for pointing that out, I'd been through his site before and found other info, but missed that!
[img]
Description [/img]
Engine info (198.9bhp@7000rpm):
2.0 L Duratec
IW030 Injectors
Tony Law manifold
4-2-1 Exhaust
Standard Engine Internals
Standard 3bar Fuel Pressure
Titan Roller Barrels
Sequential COP and Injectors
Coil per plug OFF
Twin Spark ON
Sequential Injection OFF
source: http://www.zetecinside.com/xr2/dtas80_tech.shtml
[Edited on 17/7/11 by se7ensport]
[Edited on 17/7/11 by se7ensport]
quote:
Originally posted by se7ensport
Its the standard filter from a 2009 Focus, FINIS number 1595247, part number 1S7E-6714-BA.
Luckily I don't have a chassis bar in the way that will foul it as it's a Stylus chassis rather than a seven, unfortunatley it also means the engine mounts I bought from FastDan aren't going to fit as they will be too narrow. I'll be aligning the engine next weekend and deciding what to do for the mounts, will probably be buying the plates from Dan and making the rest in situe (end result will mean my engine mounts will be up for sale).
On a similar note the dipstick location on the Raceline sump isn't great, it comes out directly below the engine mounts, the only way to get a dipstick in currently would be to drill a hole through the mount!!! Needless to say I'll be factoring in a mod to my mounts.
Would you mind measuring from the bulkhead to both the front and back of the engine, and also the height of the engine, top to bottom? It looks like the Stylus bonnet slopes down almost immediately from the scuttle, whereas on the Le Mans Fury the bonnet lump is level until quite far forward. The reason I ask for a measurement to the back of the engine is because I'm wondering if my gearbox would need moving. That's not ideal because it would mean a new propshaft. I think my box is a couple of inches further forward than it really needs to be.
quote:
Originally posted by Furyous
Would you mind measuring from the bulkhead to both the front and back of the engine, and also the height of the engine, top to bottom? It looks like the Stylus bonnet slopes down almost immediately from the scuttle, whereas on the Le Mans Fury the bonnet lump is level until quite far forward. The reason I ask for a measurement to the back of the engine is because I'm wondering if my gearbox would need moving. That's not ideal because it would mean a new propshaft. I think my box is a couple of inches further forward than it really needs to be.
Thanks for that. It looks like it would be about the same as the Crossflow that's in it now, just fatter. Does the Stylus have a ledge about 6
inches below the scuttle? I measured from the leading edge of that ledge. My gearbox is an inch or so in front of that. The front measurement seems
ok. It's as far forward as the Crossflow, assuming things like water pump and alternator don't stick out any further. The height is fine. It
looks like it might actually have an inch more ground clearance on the sump. The crossflow could be a lot higher if the oil filler tube wasn't
three feet long. 
Photos for reference (not my car or photos)
Link 1
Link 2
Now I'm wondering how much space the air intakes and filters take up. I think I saw a photo of a Duratec where the intake was angled upwards.
And I need to decide if I want the hot exhaust on my side. 
No ledge on the Stylus, just drivers footwell:
[img]


Description
[/img]
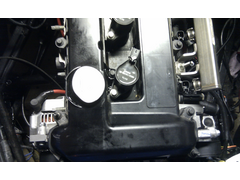
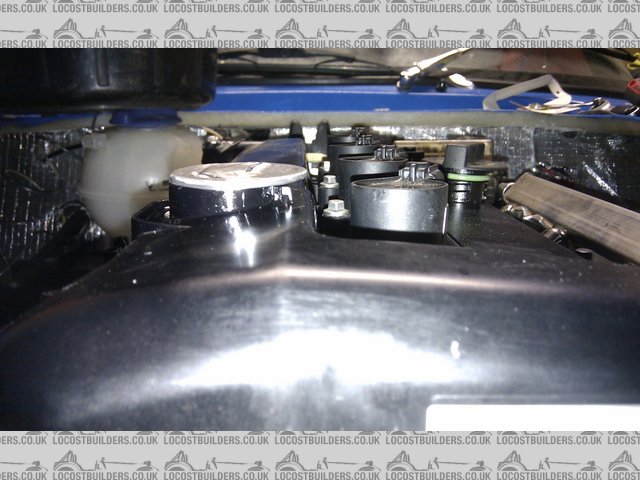
Low profile oil cap made from RS alloy filler cap and dip stick tube made from 8mm fuel hose with original top section of tube re-used.
[img]

low profile oil cap
[/img]
[img]

low profile oil cap 2
[/img]
[img]

dip stick
[/img]
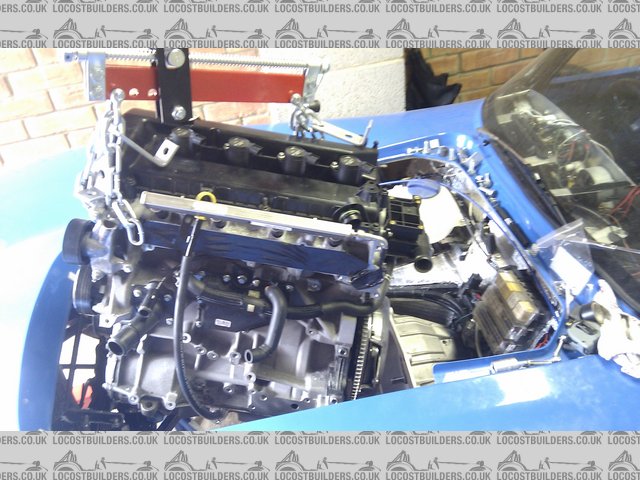
Following the thread regarding the spacer that is SUPPOSED to be supplied with the bell housing to stop a layshaft from coming adrift I have been
supplied with the spacer free of charge from RWD Motorsport and a thermostat as a goodwill guesture. It only took 2 1/2hours to get the engine out and
back in again, but it's put my conversion back 4-5 weeks as its a two man job. Hopefully I can get the wiring in over the next few days, then it
is just the plumbing, exhaust and inlet to sort.
[img]

engine back out
[/img]
[img]

RWD Bellhousing spacer
[/img]
It really is a pi$$y little spacer:
[img]

RWD Bellhousing spacer install
[/img]
Sympathise with you mate, only just got mine in after two weeks being on the garage floor, all for as you say a stupid little spacer.
[img]

Layshaft retaining bolt
[/img]
Bit of progress over the weekend and this evening; I've completed the loom and it's now mostly fitted and I have aquired a set of direct to
head throttle bodies which I have trial fitted. Need to identify and purchase the correct TPS connector and find a way of fitting the exhaust
manifold without removing the engine, I'm hoping to post it through the front wheel arch!
[img]

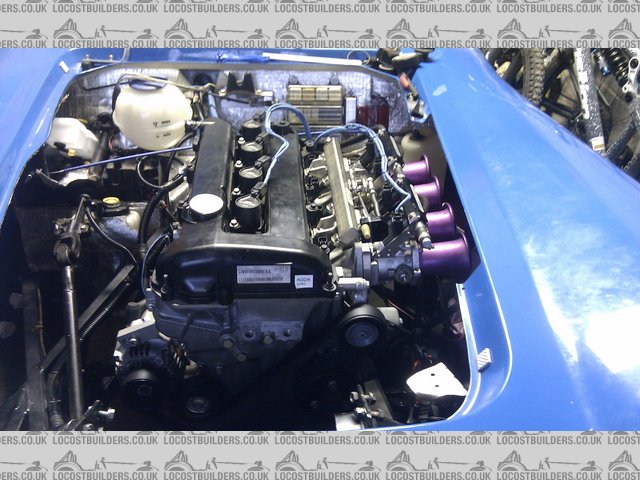
DICE Throttle bodies
[/img]
[img]

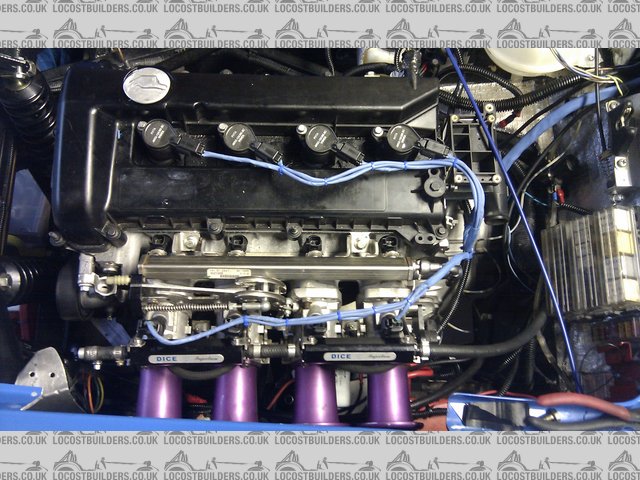
DICE Throttle bodies 2
[/img]
Mmmmmm shiny... 
quote:
Originally posted by se7ensport
Bit of progress over the weekend and this evening; I've completed the loom and it's now mostly fitted and I have aquired a set of direct to head throttle bodies which I have trial fitted. Need to identify and purchase the correct TPS connector and find a way of fitting the exhaust manifold without removing the engine, I'm hoping to post it through the front wheel arch!
[img]
DICE Throttle bodies [/img]
[img]
DICE Throttle bodies 2 [/img]
Throttle bodies are by Dave Ingle Competition Engines (DICE) stocked by Pumabuild:
http://pumabuild.com/pumacat/product_info.php?manufacturers_id=75&products_id=1099
Not cheap at £1250 (but I purchased used).
I'm not using a return line from the engine bay, I didn't on my GSXR setup and the standard Duratec fuel system on the Focus doesn't
use one either; I do have a fuel regulator inline immediately after the pump & filter that returns to the tank.
Well the exhaust manifold fits via the wheel arch, practically made to measure even though it's from a Quantom, it's back off to have the
lambda boss relocated.
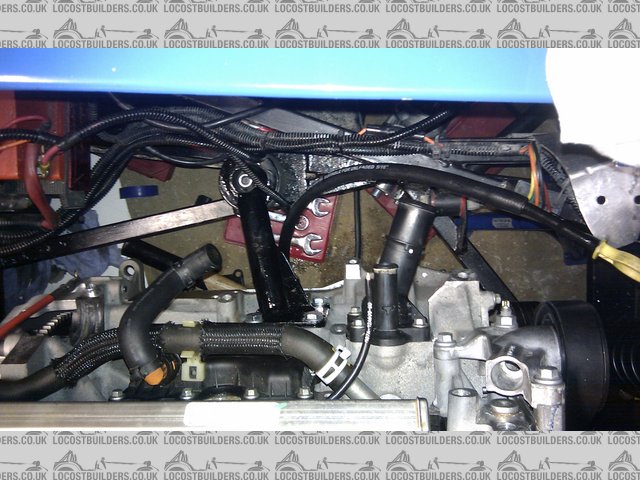
Engine is now fully pumped in, took a bit of a creative approach to keep all pipes away from the exhaust side of the engine; I've flipped the
radiator 180 so that both inlet and outlet are on the passenger side, additionally the fan is now a sucker rather than a blower allowing it to sit
further into the nose cone making sealing it in for optimum cooling easier.
[img]
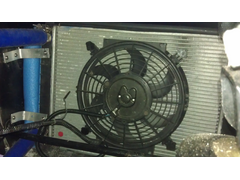

Radiator 180
[/img]
[img]

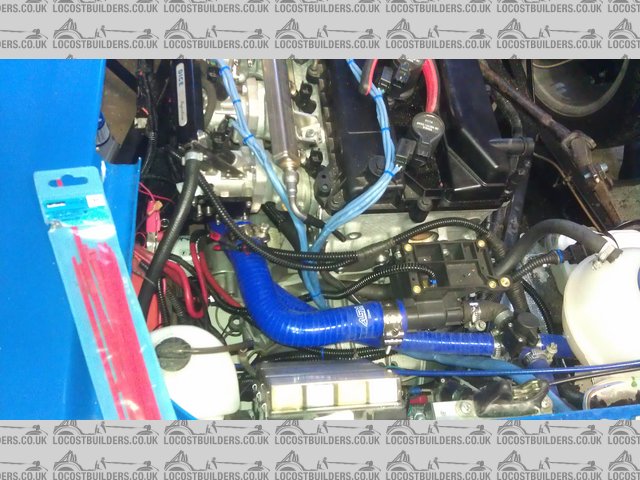
Plumbing
[/img]
While I was at it I changed the diy oil catch tank (sports drinking bottle) to a slightly nicer looking bit of alloy and mounted it down against the
chassis rail.
[img]

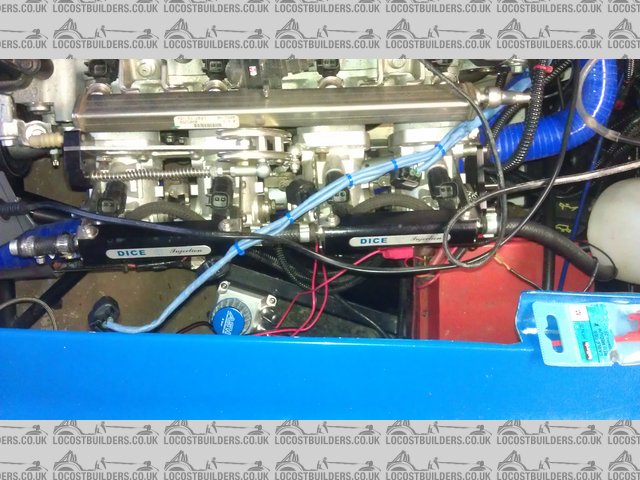
Oil catch
[/img]
Ford KA tps should be with me Monday, once it's fitted and the manifold back on I should be able to get it running (bar a fair bit of tinkering
with ECU!)
Coming on looking very nice, I may catch you up one day, recently I've been building a Megasquirt MS2 V3 with extra code. I modified it to do
direct coil waisted spark so I dont need an EDIS.
Going to start fitting it to the car over the next week or so/Xmas.
[Edited on 4/12/11 by big-vee-twin]
Finally got a couple of days to work on the car.
I'm having a few issues in getting it started that should be resolved tomorrow once i've checked the timing with a helper - is there a
timing mark on the crank for checking with a timing light?
Moving to coil on plug without a cam sync sensor means I'll have to run it as wasted spark initially; my cam cover looks as though there is a
plastic planking plate that should unscrew with a 10mm socket, having tried it feels as though the plastic bolt head will sheer - anyone know how this
removes?
Cheers
Alex
Yours looks different to mine but it just un-screws, you can see the one on my engine in my photos
Have you checked inside the cam cover since I'm guessing there's some sort of sandwiched piece to create a good oil seal and it may need loosening from inside?
Not yet, had been reluctant to remove cover unnecessarily. Is it just a gasket or does it need special gasket compound?
Mine has a rubber o ring type gasket located in a groove
Finally got it started today!
Only ticking over, but without a silencer fitted I've got little chance of tuning it. The old silencer was 4inch diameter and sat within the
sill, the new one is 6inch and will be partially exposed, I've taken the biggest step in cutting out the sill, but the weather and light got the
better of me for today:

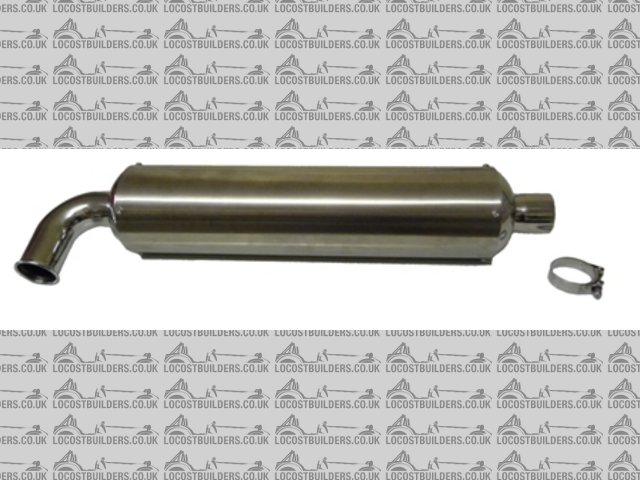
Plays Kool exhaust
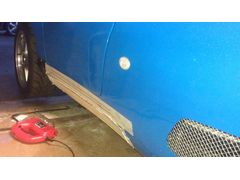

Sill: before
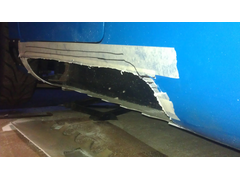

Sill: after
I've ordered a cam sensor and will take off the cam cover in the week to see if the blank unscrews from the inside.
Bet you had to summon up courage to do that, I've been looking at the Quantum manifold for my car, Do you have any pics of yours I could look at, is your chassis similar to a Seven beneath the bodywork, just trying to gauge if it would fit.
Pics as requested (mine is a se7en in a pretty frock):
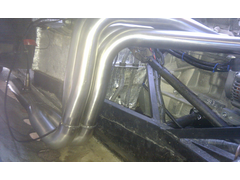

manifold 2

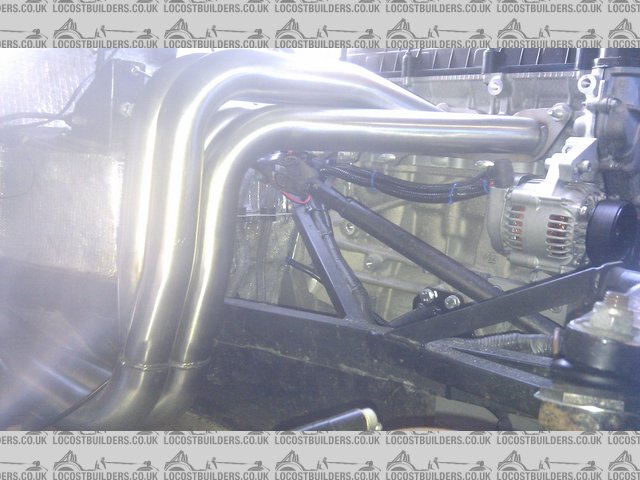
manifold 3
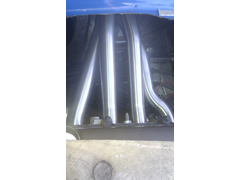

manifold 4
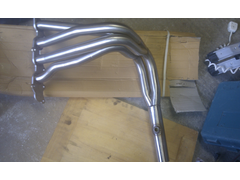

manifold
Measurments are from cylinderhead to inner pipes 14.5inch, to the outside pipes 18inch.
Note: I have relocated the lambda boss from the bottom of the pipe to the top.
[Edited on 7/1/12 by se7ensport]
That looks very well made, many thanks and for the measurements I will go and check and then speak to Quantum
Kev
Exhaust is now mounted, the link pipe I had made up was perfectly straight, it turned out that I needed it to be a couple of mm out of true to pull
the rear of the can back in line with the body work; a cut, bend and weld fixed this:

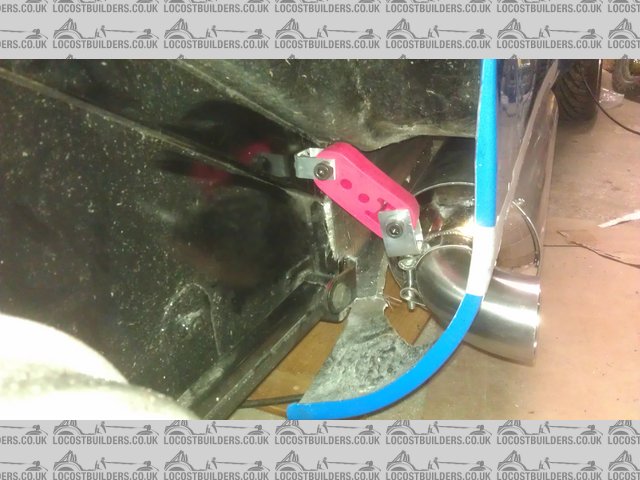
Exhaust mount 2
I've had a new tail pipe welded on, it's a slightly larger diameter, but more importantly it is a much tighter bend meaning it doesn't
protrude too far towards the rear wheel.
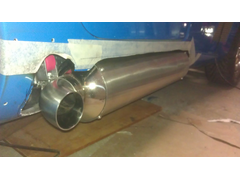

Exhaust mount 1
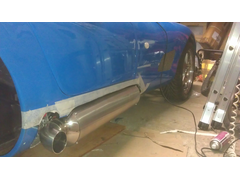

Exhaust new tail pipe
I now need to remove the silencer to lag the sill with heat reflective matting and add some strengthening strips of alloy to the rear body work, once
in place I can then cut bodywork to final alignment.
[Edited on 29/1/12 by se7ensport]
Looking good mate, I bought a Quantum exhaust myself from front to back here's a picture.
Thanks for the pics
[img]

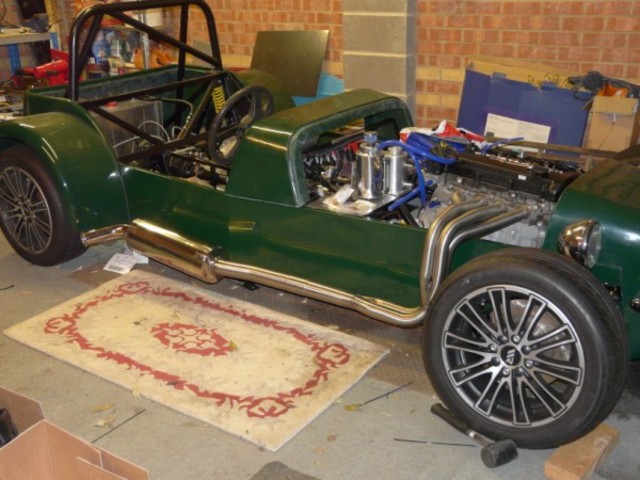
Exhaust Fitted
[/img]
quote:
Originally posted by big-vee-twin
Looking good mate, I bought a Quantum exhaust myself from front to back here's a picture.
Thanks for the pics
Its a pretty good fit not perfect but good enough as they say - Ablind man would be glad to see it!
Also when you consider it was going to cost over a £1000.00 and a trailer to have a custom one built I think it was a bargain.
Well missing a spigot bearing can't be good; I'm seriously pi$$ed with RWD Motorsport, but minimal damage seems to have been done.
I found a small amount of swarf in the end of the crank shaft where the bearing should be, from inspecting all of the possible parts only the edge of
the clutch plate teeth shows wear:
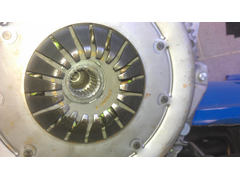

AP Clutch plate

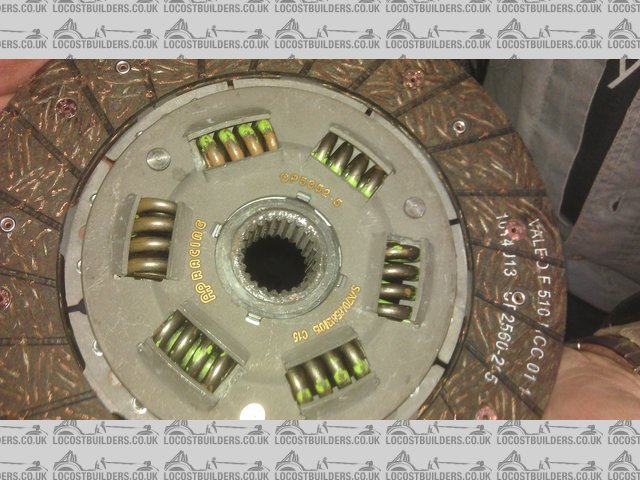
AP Clutch plate 2
Engine is back in, but ran out of time to connect everything back up and I need some more silicon hose to complete the job as I'm re-routing the
pipework to allow fitment of an anti-roll bar.
Why is it RWD's fault that you didn't put a spigot bearing in the end of the crank?
quote:
Originally posted by Tiger Super Six
Why is it RWD's fault that you didn't put a spigot bearing in the end of the crank?
I found that they were helpful, but Ian is not quite as efficient as say the likes of raceline. I am guessing because you bought the clutch setup elswhere they just thought of the parts relating to the bellhousing. I got my bellhousing from them and it had the layshaft fitted, but they didn't provide the cap heads to bolt it to the actual gearbox. They appear to miss some of the finer details.
Engine conversion is now complete; I'd hoped it would take 2mths, instead it was just shy of 10mths and budget went over by 40%!
I took the car for it's first drive yesterday and it feels really sweet, will need a rolling road session to get the most out of the engine, but
for the time being it's good enough.
Final list of parts and prices:
Engine £800
Engine Mounts £30
Exhaust manifold £250
Silencer £300
Sump £400
Bell housing £330
flywheel £195
clutch £140
spigot bearing £10
Inlet manifold and TB's £435
Airbox and filter £90
Alternator £200
Alternator mount £20
ARP Bolts £40
Oil filter relocation £105
Silicone hoses £100
Odds and sods £150
Total £3,595
I now have the first and only Stylus running a Duratec!
Great news and well done!
Can you post some pics of the final result?
brilliant, well done!! im hoping my duratec mgb will be on road soon. ive test drove it a few times but the bell housing came loose from the gearbox so im having to sort that out.
Everything went well with the new engine, straight through the emissions test although not as low as I expected on the hydrocarbons: it registered .70
at 1.07 lambda, modern cars get around 0.02, is this the effect of the CAT?
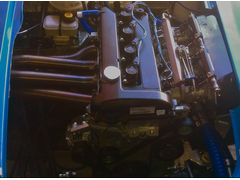

Duratec on the road

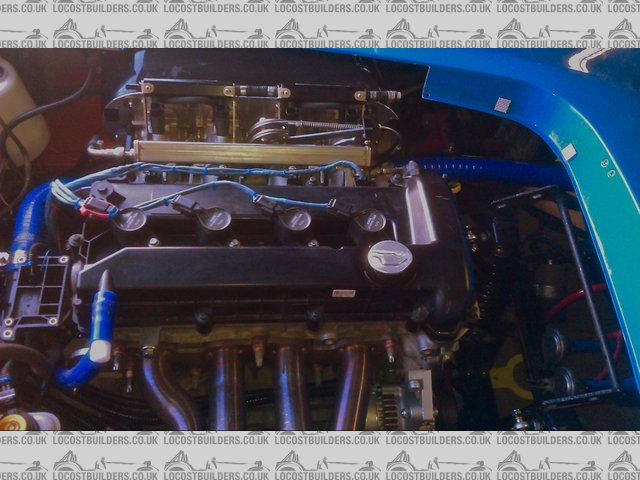
Duratec on the road 2
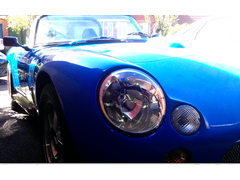

Duratec on the road 3
Unfortunately it failed the MOT due to lack of brake lights; the bloody pressure switch had packed up from a lack of use!
Nice to see it finished, mines up and running now
Finally got it rolling roaded having blown an ECU and a coil pack on the last attempt.
216bhp and 170lbft at the flywheel
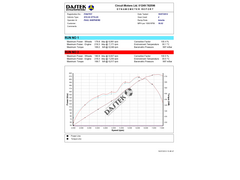

Rolling Road
In addition to the list above I have now fitted Bosch 440CC (Blue Giant) fuel injectors.
I have a spare set of 4 that I might be parting with as I bought 8 intending to run 4 in the head and 4 in the throttle bodies but it got too
complicated.
[Edited on 19/7/12 by se7ensport]
Thats a great rewsult, sort of helps make all the pain go away of doing the conversion
Fantasic, summers about to start and you can enjoy all that power.
That is a superb result.
Was this with standard 2litre internals ? I cant recall.
I want mine ready now!!! 
Crumbs- I bet that goes nicely! Nice one
Standard 2.0 internals, wish I had fitted ARP conrod bolts as I could set the redline at 7500 as it stands I've put it at 7000.
Worlds shortest youtube rolling road video:
[Edited on 19/7/12 by se7ensport]
quote:
Originally posted by se7ensport
216bhp and 170lbft at the flywheel
[Edited on 19/7/12 by se7ensport]


quote:
Originally posted by radom
quote:
Originally posted by se7ensport
216bhp and 170lbft at the flywheel
[Edited on 19/7/12 by se7ensport]
thats a lot
in the end which spark map did you use as a base map?
now I feel the need to dyno mine
congratulations
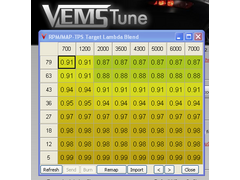

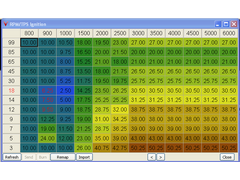

216bhp from a standard engine?
Most engine builders are having to do work to get lower figures than that? My standard engine came out at 140bhp at the wheels and giving 20% drive
train loss that would be around 170bhp. Most people expect a normal engine to be around 185bhp, which I believe PJ's was.
quote:
Originally posted by Tiger Super Six
216bhp from a standard engine?
Most engine builders are having to do work to get lower figures than that? My standard engine came out at 140bhp at the wheels and giving 20% drive train loss that would be around 170bhp. Most people expect a normal engine to be around 185bhp, which I believe PJ's was.
Fair enough, they're very good results, like I say most engine tuners aren't getting that without a set of cams.
[Edited on 20/7/12 by Tiger Super Six]
Got 192 on my Mondeo Duratec but it doesn't have the better flowing head.
Alex's is the later engine with, I assume, the better flowing head but I'm working on the basis the better head would only give another
10-15 BHP:
http://www.sbdev.co.uk/Duratec/Cylinder%20Head.htm
All a bit side tracked at the mo though with getting ready for a Fury build...
quote:
Originally posted by pjay
Got 192 on my Mondeo Duratec but it doesn't have the better flowing head.
Alex's is the later engine with, I assume, the better flowing head but I'm working on the basis the better head would only give another 10-15 BHP:
http://www.sbdev.co.uk/Duratec/Cylinder%20Head.htm
All a bit side tracked at the mo though with getting ready for a Fury build...
Cheers. Already got the engine sorted - Fiesta ST150 Duratec. It should be the first factory built Duratec chassis.
Its the ST150 that has the better flowing Head I understand
quote:
Originally posted by big-vee-twin
Its the ST150 that has the better flowing Head I understand
Definitely both ST150 and later Focuses (Foci?) have them. I suppose it's prossible they appear on other later vehicles knowing Ford.