
My Pinto to Duratec conversion
karlak - 20/4/11 at 07:00 PM
Well after a bit of searching my 2 litre Duratec turned up today on a crate. Really well packaged and strapped down safely. It is very early days
and there will be a bit of dealy until I can get the car in the workshop to start work, which gives me time to buy all the bits and bobs I need.
As can be seen form the photos, it was taken out as a complete engine, so the first thing I need to do is strip it down, then a clean up and check for
any obvious problems.


Need to sort out the Flywheel in the next couple of weeks, this is the standard Mondeo/Duratec affair

Also, am a tad confused about the Sump shortening. I know that shortened SUMP KITS are available and others have altered them themselves. Well I
took a look at it today and to my eyes it does not appear that a huge amount can come off the Sump. To me it seems that the bottom of the bellhousing
will be only a little higher than the standard Sump? Maybe it will become clear that it needs shortening when we dry fit it.

Mine has a plastic cam cover fitted, where I think I have seen some are an 'alloy' type. Is this an older engine because of this ?

Will add to this as I progress, but will take a bit of time getting the bits and Finances together 
daniel mason - 20/4/11 at 07:14 PM
does not look a tall engine compared to mine. do you need to chop the sump?
flak monkey - 20/4/11 at 07:39 PM
They are tall. About 0.75" taller than a pinto with a shortened sump...
The after market bellhousing have the bottom cut off effectively. Aftermarket sumps are 75mm deep for comparison. Look through my thread at the top of
this section and you'll see I had the same thoughts to start with....
Alloy covers are found on the Mondeo 2 litre engines. Looks like yours came from a Focus.
[Edited on 20/4/11 by flak monkey]
big-vee-twin - 20/4/11 at 08:45 PM
The lowered sump is 75mm as Flak says and does remove quite a lot the Duratec bell housing also has a flat bottom and my sump is slightly lower than
the bell housing i.e. the bell is closer to the road.
The plastic rocker covers were fitted to the newer engines.
[img]
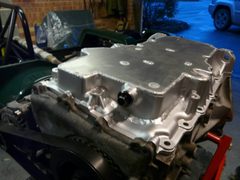

New Dunnell Sump
[/img]
karlak - 20/4/11 at 08:51 PM
quote:
Originally posted by big-vee-twin
The lowered sump is 75mm as Flak says and does remove quite a lot the Duratec bell housing also has a flat bottom and my sump is slightly lower than
the bell housing i.e. the bell is closer to the road.
The plastic rocker covers were fitted to the newer engines.
[img]


New Dunnell Sump
[/img]
Thanks for that, just trying to save few pennies really  . Oh well, I guess I can use the car at weekends to go and do the overtime that I am
obviously going to have to do.
I was told the engine came from a 2003 Mondeo, so I guess that could be classed as a later engine. Back at it tomorrow to finish stripping it down
and then have a quick look at the state of the cams and crank hopefully.
flak monkey - 20/4/11 at 08:56 PM
Check its a 2 litre then. Its cast into the block on the exhaust side next to the engine mount.
Only reason I say that is that the 1.8 mondeo engines all had plastic cam covers. I think only the focus and fiesta ST 2 litres had the plastic
covers.
Not that it matters, all the 2 litres are the same spec (power etc)
big-vee-twin - 20/4/11 at 09:13 PM
Mines the ST150 and haS plastic cover its a 2007 engine. You can check if it is a ST150 as the EGR valve will be blanked off allready if its out of
the ST.
karlak - 20/4/11 at 10:20 PM
quote:
Originally posted by flak monkey
Check its a 2 litre then. Its cast into the block on the exhaust side next to the engine mount.
Only reason I say that is that the 1.8 mondeo engines all had plastic cam covers. I think only the focus and fiesta ST 2 litres had the plastic
covers.
Not that it matters, all the 2 litres are the same spec (power etc)
I checked next to the exhaust today and it has 2litre marked on there. Also had a sticker on the plastic cam cover stating two litre as well. The
engine code is also CJBA which a google suggest 2 litre also. Perhaps it has had a plastic cover fitted at some stage ??
Just read you whole post again. I read it as you typed it as building it, but now seems a little more relevant. thanks for the effort on there, very
useful 
karlak - 21/4/11 at 07:08 PM
Bit more progress today. Stripped down the ancillaries and manifolds, all looked very clean. The only problem I have found is that the Sump has a
small crack right on the bottom, where I suspect it has been rested or put down a bit too heavily. No worries as the Sump will need to be chopped
anyway.
Will remove the head and sump on Saturday for a quick check, as well as degrease the outside and give a clean.
Also a couple of questions for you guys have done thje Duratec thing,, see below.. Photos are from phone, so a bit pants


Have you guys kept this plastic plate for the breather or is there an alternative out there?


Also, I assume this is an electronic thermostat. Is it the transit version that I replace this with ?

[Edited on 21/4/11 by karlak]
karlak - 29/4/11 at 07:06 AM
A tad more progress.
Had the Cam cover and Sump off to check the condition of things. No nasties in there  - Seems minimum wear to the Cams and no muck or rubbish at
the sump end, all seems very clean. The only problem is that the Sump has a small hairline crack at the drainplug area - I suspect where is has been
put down a bit heavily or perhaps on the crate in transit. No biggy really as it will be either shortened or replaced with a lower sump anyhow.
Next steps are to buy some bits and pieces - whether to stick with a cable clutch or go for a bellhousing that uses a hydraulic set-up. But then the
requirement for new pedal box and more expense.
I have bought a Omex 600, so that has effectively pushed me down the throttle body route. Can't really afford or justify Jenvey's etc at
the moment, so GSXR's it will be.


rusty nuts - 29/4/11 at 07:27 AM
Just a thought, the cam timing is now likely to be out due to the fact that the crank sprocket is not located on the crank and is free to rotate when
the crank pulley bolt is loosened. Make sure you retime using the correct tools before finally tightening the pulley bolt. Sorry if I'm teaching
you to suck eggs but it may save someone a lot of expense .
karlak - 29/4/11 at 07:39 AM
quote:
Originally posted by rusty nuts
Just a thought, the cam timing is now likely to be out due to the fact that the crank sprocket is not located on the crank and is free to rotate when
the crank pulley bolt is loosened. Make sure you retime using the correct tools before finally tightening the pulley bolt. Sorry if I'm teaching
you to suck eggs but it may save someone a lot of expense .
All input welcome, thanks for the input.
It has all been marked up and hopefully in order  . I have a chap assisting me who does mechanic work for race teams, so before I do anything I
pester him for some advice. Actually going to do the engine swap at his workshop, more space to do stuff. However, I want to do all aspects of the
job myself so I understand what is done and is a great way of learning.
The crank pulley front engine cover and cam cover were all in the parts washer yesterday, so should be nice and clean.
I was thinking of painting the 36-1 trigger wheel black - I am pretty sure it will not affect the sensor pickup. I reckon smooth black Hammerite will
be as good as anything. Also going to try and clean the engine block a bit - degrease it etc. But, I am not really too bothered about a concourse
looking engine bay, just want to get the enigne in and enjoy it.
flak monkey - 29/4/11 at 09:26 AM
Like rusty nuts said the crank cam chain gear isnt keyed to the crank on these engines, so as soon as the crank pulley is undone you lose your cam
timing completely. Its not difficult to put back.
There is a slot in the back of each cam. Slacken the bolts on the sprokets on the cams (hold on the hex/flats on the cam) Rotate the cams until you
can get a piece of plate in both slots simultaneously, I can't remember whether its a piece of 5 or 6mm plate which fits.
Then turn the crank until #1 cylinder is at TDC. Use a long 1/2" socket extension and a dial indicator.
Tighten the bolts in the cams, leave the plate in for now.
Refit the front cover without moving anything
Fit the crank pulley and tighten the bolt to the correct torque before rotating the engine, remove camlocking plate. Job done.
The correct sealant for the front cover and sump is Loctite 5900
As for the crank case breather. In that little elbow is a PCV valve which needs removing. Its an easy job and fairly self explanatory when you take
the elbow out. You basically need to use a drill bit to open out the hole where the ball sits until the ball and its spring comes out. Then you have a
normal open breather to connect to a catch tank. If you dont do this you will likely end up with high pressure in the crank case which will cause oil
leaks galore.
karlak - 12/7/11 at 06:08 PM
After somewhat of a delay for work and other things, I had a delivery today  (pretty much wiped out three months of overtime
  )
)

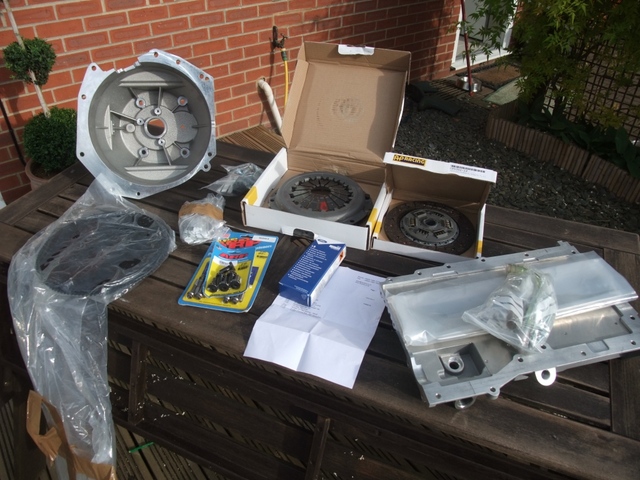
Description
So, hopefully I will now have some progress over the next couple of weeks...
Couple of questions though,
1) I need a Clutch Actuator for the Bellhousing (is it the Ford V6 one that is used)
2) Looking in the engine bay it seems that the gearbox could be shifted back by some distance. How easy is it to shorten an existing Prop shaft ?
Cheers
se7ensport - 17/7/11 at 12:24 PM
bloody expensive kit isn't it!
Prop shortening isn't really a DIY job, take it out, measure the new distance flange to flange and send it off to a company to shorten and
balance, guessing under £100.
You'll need longer bolts to mount the new alloy bellhousing as it is thicker than the cast one you'll be removing. I suggest buying 4
M12x50mm, with 1.5mm fine pitch thread and the standard 1.75mm thread (ford used both on the type 9 box for some reason). You'll struggle to
find the 1.5 pitch in most fastener companies, I used:
Ben Ballballsgrinding Ltd
unit k, chosen view road
Cheltenham
Gloucestershire
GL51 9LT
Tel: 01242 520293
In addition you'll also need a good mix of M10 bolts for the bellhousing to engine, overkill and you'll have some left over but I
suggest 3x40mm, 3x50mm, 3x60mm, 3x70mm, 3x80mm, 2x90mm, 2x100mm while you are at it. I had to shorten a few as most are odd lengths.
edit: bellhousing to engine are M10 not M12 as originally stated.
[Edited on 17/7/11 by se7ensport]
pjay - 17/7/11 at 07:05 PM
Nice collection of shiny new parts! I must buy some shares in Raceline...
All good kit but expensive! What finally made you decide to go the hyadraulic clutch route instead of cable clutch?
In terms of the hydraulic clutch actuator Flak Monkey mentions a Saab unit. Where did you get the bellhousing from since them or Chris/Pete at
Raceline should be able to advise on actuator needed (Raceline website mentions "Clutch actuator - Ford Duratec V6").
[Edited on 17/7/11 by pjay]
karlak - 17/7/11 at 07:12 PM
quote:
Originally posted by pjay
Nice collection of shiny new parts! I must buy some shares in Raceline...
All good kit but expensive! What finally made you decide to go the hyadraulic clutch route instead of cable clutch?
In terms of the hydraulic clutch actuator Flak Monkey mentions a Saab unit. Where did you get the bellhousing from since them or Chris/Pete at
Raceline should be able to advise on actuator needed (Raceline website mentions "Clutch actuator - Ford Duratec V6" .
.
[Edited on 17/7/11 by pjay]
The change to a Hydraulic set-up was partly due to the poor pedals that were fitted to my car, so I thought if it had to be changed then why not go
for hydraulic.
I think I have sorted the actuator issue. I was not aware that the shaft on the nose of the type 9 required cutting, so all should be good now 
DIYMAN - 23/7/11 at 07:36 PM
Changed my thermostat to the Cosworth version, which doesn't have the electrical connection.
Try these people. Got mine from them, they were very quick, helpful and the cheapest I could find.
http://www.part-box.com/coswort....16.html
pjay - 23/7/11 at 08:07 PM
Link doesn't seem to work. Did you mean this one?:
http://www.part-box.com/product_info.php?products_id=12116
Used this one from the Part Box guys (great outfit) myself and it's shorter than the transit one (IIRC) and therefore in a 7 config it gives more
room for pipework to the rad. Could of course cut the transit one:
Duratec mechanical thermostat & housing - kit car | eBay
DIYMAN - 24/7/11 at 11:31 AM
Thanks Pjay, thats the one. It was an old link, they seemed to have changed their website. Good company to deal with.
karlak - 2/8/11 at 06:28 PM
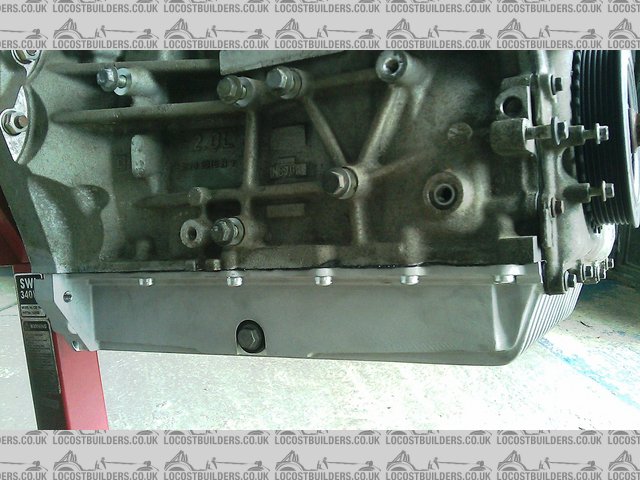
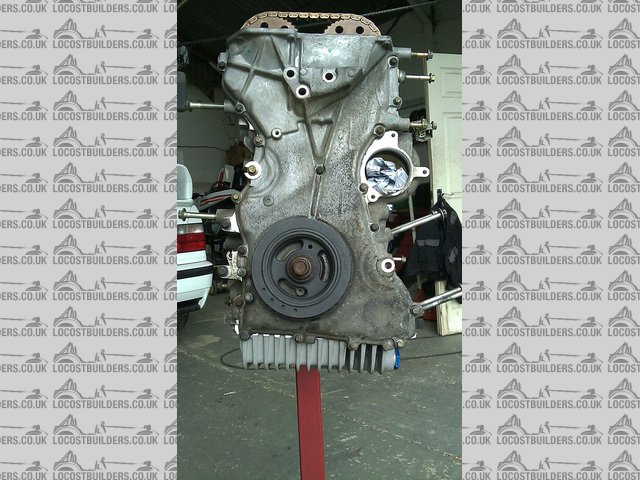
Raceline Sump fitted today, reset the timing and fitted the ARP Rod Bolts.

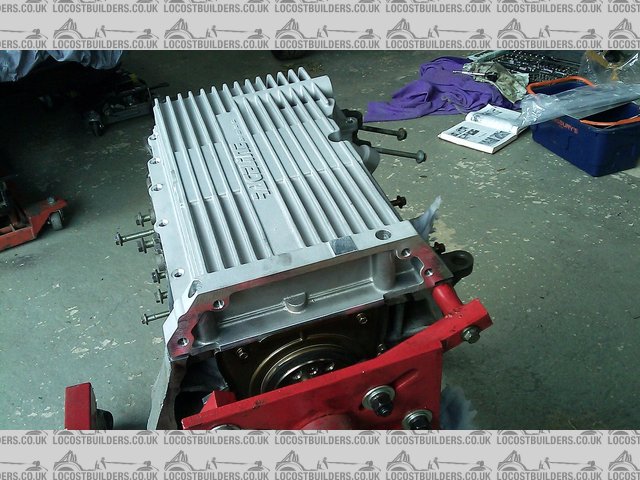
raceline Sump
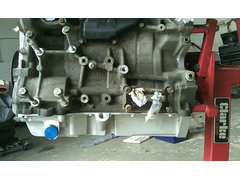

Raceline Sump 3

Raceline Sump 4

Raceline Sump 2
Next up is to trial fit the Bellhousing and Clutch setup...
big-vee-twin - 3/8/11 at 04:15 PM
Your gunna have the same issue as me the engine mount brackets stop the dip stick fitting down the hole
karlak - 9/8/11 at 07:06 PM
quote:
Originally posted by big-vee-twin
Your gunna have the same issue as me the engine mount brackets stop the dip stick fitting down the hole
Hmmm, Talking of engine mounts. The ones that I bought which I thought were a bargain are no good  - They are made so that they literally come out
horizontal from the mount points, meaning that the engine would be wayyyy too low. I guess others that have made teir own have "angled"
them down towards the mount point on the Chassis.
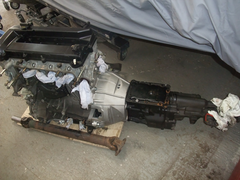
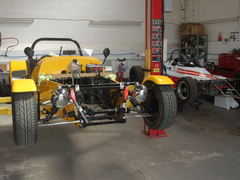
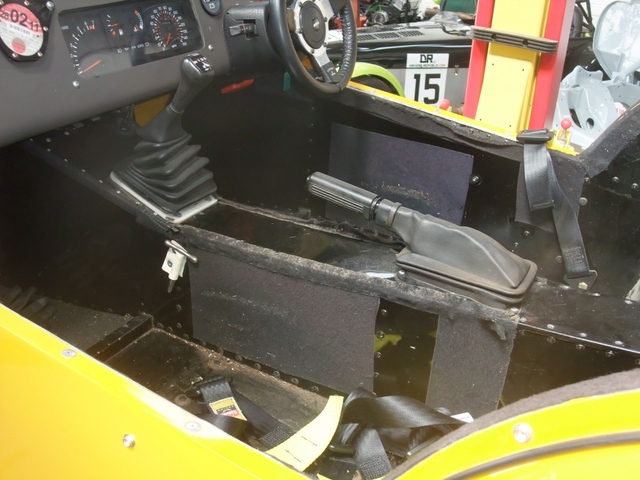
Anyway,, some progress was made anyway and a trial fitting shows that I can move the engine back quite a way, helping with the balance and also moving
the gearstick back to a more comfortable position.

Description
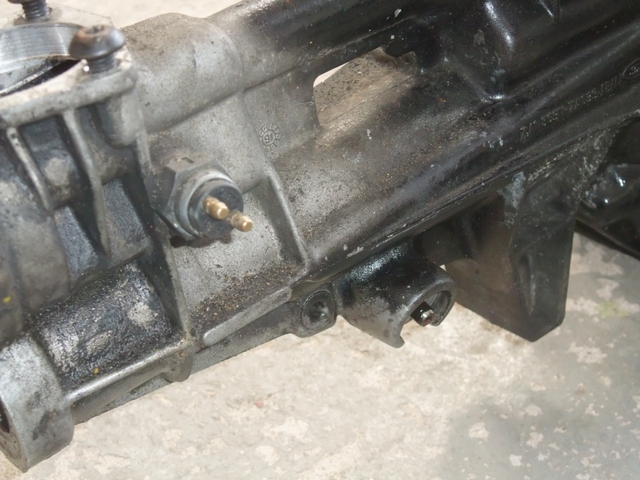
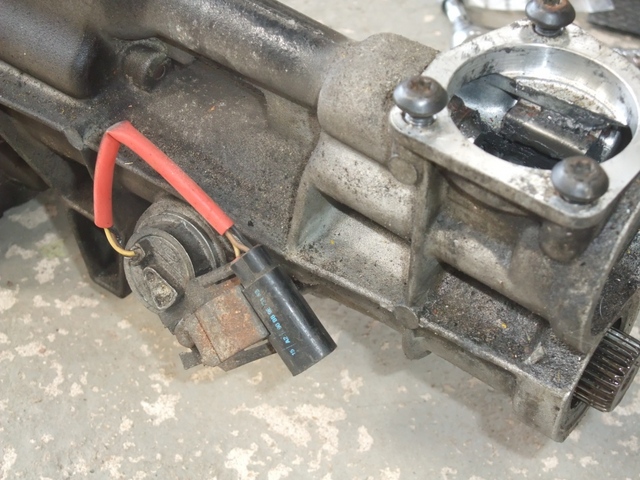
Also, a quick question about the gearbox. In the pictures below you can see on one side the mechanical speedo cable connector. What is the
electrical connection on the opposite side - Not connected to anything at the moment.

Description

Description
Am also going to strip and redo the seating area. Any recommendations for a good "low profile" seat runner that can be used.

Description

Description

Description
dave r - 9/8/11 at 07:54 PM
connector the other side of the speedo, looks like an electronic speedo output.... granada ??
redeye - 9/8/11 at 09:20 PM
The connector with two points not connected to anything is the reverse light switch.
Not sure what the connector on the otherside with the red sleave is though.....havent got it connected to anything on mine
[Edited on 9/8/11 by redeye]
karlak - 16/2/12 at 06:57 PM
Been a while since I updated this due to Money, time, other commitments, apathy.... 
Anyway, have decided to get it all sorted by a certain date (not gonna say what that is, as I know the Pi$$ taking on here when it sails past ).
So, engine is in and moved back a couple of inches, so the gear lever should be in a better place now. It did mean some moving of the mount plates,
but should be worth it. Also, will need the prop shaft shortening, but a balance woudl do it good anyway I guess.
Hopefully should have the new Pedal Box in soon - (that has been a bl@@dy nightmare), lots of cutting and welding required, but again should be better
than the original Sierra jobbies.
I have to get a loom sorted, new fuel lines for the injection setup, pump, some injectors and the Exhaust sorted.


Dan's Engine Mounts.


karlak - 9/3/12 at 09:21 AM
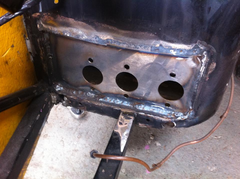
Bit of a Bulkhead chop.
The OBP pedals have a flat front plate where as the pedal bulkhead on my Indy is/was Curved. So rather than have a gap and to help with strength, the
curved bulkhead was removed and a flat steel plate put in place, with top and bottom "fillets" all welded in place to fill the gaps.
Picture below shows it un-painted and with the new cylinder holes cut in place. 

Description
karlak - 14/4/12 at 03:27 PM
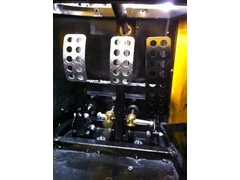
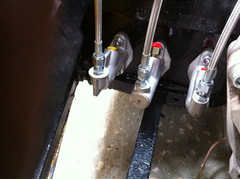
Just a couple of quick updates.
Have the OBP pedals now bolted in and the bulkhead adapted -

Description

Description
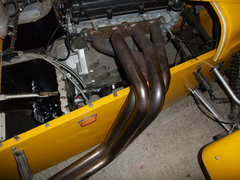
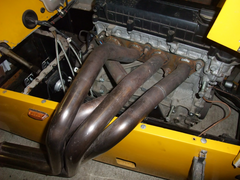
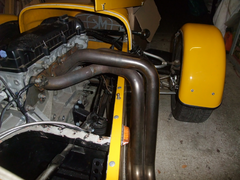
Also had my original exhaust Manifold adapted for the Duratec.

Description

Description

Description
big-vee-twin - 14/4/12 at 05:27 PM
Looking good mate


 . Oh well, I guess I can use the car at weekends to go and do the overtime that I am
obviously going to have to do.


 )
)  .
. 


