phelpsa
|
 posted on 1/9/06 at 07:13 PM posted on 1/9/06 at 07:13 PM |

|
|
Another Update
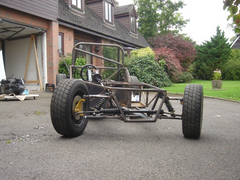
Well day started with me putting the steering rack in the right place! Basicall involved moving it down the bracket a bit. You can see in this that
the steering arm is now fairly in line with the bottom wishbone.
Description
Then after lunch.... the engine!
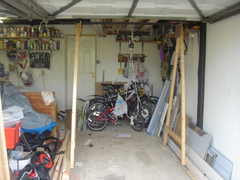
Started by preparing the engine hoist! My dad made it out of a few pieces of 2x2, some skirting board and a random piece of angle iron, but it seems
plenty strong enough!
Description
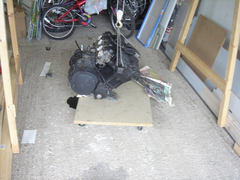
Next, wheeled the engine into place and started to lift. I thought that having had the sump off for over a year there wouldnt be any oil left in it!
So, bolted the sump back on and lifted it up..... and a massive pool of oil appeared! Visible in this picture!
Description
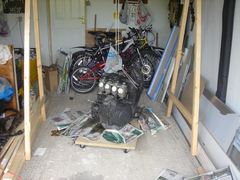
Up up up and lots of newspaper!
Description
Up up up and the car wheeled underneath.
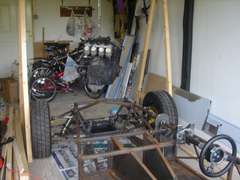 
Description
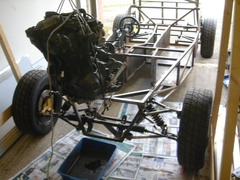 
Description
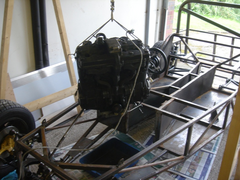 
Description
Down down down and into the bay!
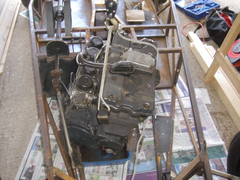 
Description
And roughly into position (will be a bit further to the o/s)
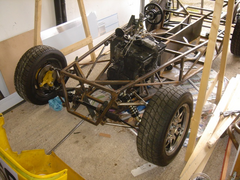 
Description
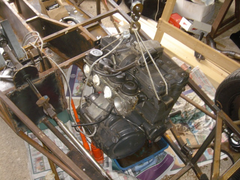 
Description
And some other random pictures I took 
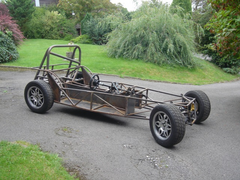 
Description
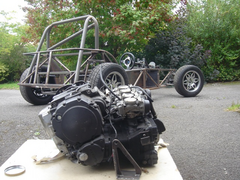 
Description
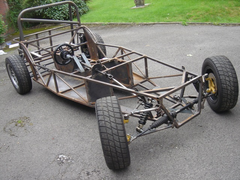 
Description
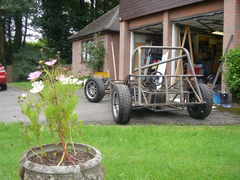 
Description
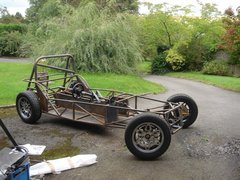 
Description
Enjoy!
Adam
|
|
|
|
|
nitram38
|
| posted on 1/9/06 at 08:18 PM |

|
|
Nice pictures.
As regarding your steering rack, it is more important that the steering knuckle (under the rubber bellows) intersect an imaginary line between the top
and bottom wishbone chassis mount pivot points (steering straight ahead).
This will ensure that the rack travels in the same arc as the wishbones and prevent bump steer.
Being parrallel with either wishbone is not as important (although they may end up parrallel with one of the bones).
Once you have the correct position and your suspension is set, then go about adjusting the length of the track rod ends.
Regards Martin
|
|
|
mark chandler
|
| posted on 1/9/06 at 08:36 PM |

|
|
I have to concur with Martin, If you jack the front up, remove the shocks, centre the steering then lift and drop the wheel hub assembly you will be
horrified by the amount of bump steer.
Now is the time to shorten the rack tube by 3" and the rack itself by 4" to sort this out.
Regards Mark
|
|
|
DIY Si
|
| posted on 1/9/06 at 08:48 PM |

|
|
Just out of curiousity, are you planning on putting any bars across the top of the engine bay? Just since you haven't got any at the mo.
Otherwise, looks good. Nice wheels too.
[Edited on 1/9/06 by DIY Si]
“Let your plans be dark and as impenetratable as night, and when you move, fall like a thunderbolt.”
Sun Tzu, The Art of War
My new blog: http://spritecave.blogspot.co.uk/
|
|
|
phelpsa
|
| posted on 1/9/06 at 08:51 PM |

|
|
I will weld the bar in once the engine's in and I know what space I have to work with.
Wheels are 6x14" KN Jupiters off a caterham. Very rare but quite unpopular apparantly!
|
|
|
DIY Si
|
| posted on 1/9/06 at 08:57 PM |

|
|
I had a feeling that'd be the answer! Is the chassis pretty standard or strenghtened ala cymtriks? Is the chassis pretty standard or strenghtened ala cymtriks?
“Let your plans be dark and as impenetratable as night, and when you move, fall like a thunderbolt.”
Sun Tzu, The Art of War
My new blog: http://spritecave.blogspot.co.uk/
|
|
|
gazza285
|
| posted on 1/9/06 at 08:59 PM |

|
|
At this rate you'll be finished when you're about forty! Pick it up Phelps.
DO NOT PUT ON KNOB OR BOLLOCKS!
|
|
|
phelpsa
|
| posted on 1/9/06 at 08:59 PM |

|
|
Well, most of its tig welded but other than that I think its fairly standard! The rear is stiffened massively by the IRS and roll bar, front is
standard!
|
|
|
phelpsa
|
| posted on 1/9/06 at 09:00 PM |

|
|
quote:
Originally posted by gazza285
At this rate you'll be finished when you're about forty! Pick it up Phelps.
Sorry but I've got GCSEs to worry about!  Hopefully it'll pick up a bit soon.... but I sad that last time :p Hopefully it'll pick up a bit soon.... but I sad that last time :p
The difficult bit (IRS) is done!
|
|
|
DIY Si
|
| posted on 1/9/06 at 09:02 PM |

|
|
Just curious to see who's going extra strong and who's using book chassis's, and what's considered "enough" for
typical se7en use. Mainly because I'm was going extra extra strong but cheated and brought a car!
“Let your plans be dark and as impenetratable as night, and when you move, fall like a thunderbolt.”
Sun Tzu, The Art of War
My new blog: http://spritecave.blogspot.co.uk/
|
|
|
DIY Si
|
| posted on 1/9/06 at 09:04 PM |

|
|
quote:
Anything over 450kilos
        Most becs probably weigh 450-500 kgs. I know Hellfire's car weighs in at 480kg. I think. I know the smaller cars such
as the striker weigh less, but they are tiny cars. Most becs probably weigh 450-500 kgs. I know Hellfire's car weighs in at 480kg. I think. I know the smaller cars such
as the striker weigh less, but they are tiny cars.
“Let your plans be dark and as impenetratable as night, and when you move, fall like a thunderbolt.”
Sun Tzu, The Art of War
My new blog: http://spritecave.blogspot.co.uk/
|
|
|
phelpsa
|
| posted on 1/9/06 at 09:06 PM |

|
|
quote:
Originally posted by hicost
Looks like a good car in the making.
Just a quick one regarding weight, surprised to see a steel floor in a BEC.
I have been involved in discussions this week regarding BEC Dax cars running R1 Turbos.
Target weight 380 kilos!!!
Anything over 450kilos and you should be putting a CEC in it as the BEC is no longer providing any benefit.
So cut that floor out and put an ally one in. 
I am tempted! It pops when I sit on it and it does seem unnecessarily thick (3mm!). It must weigh a ton!
|
|
|
DIY Si
|
| posted on 1/9/06 at 09:09 PM |

|
|
If it's 3mm, I would take it out! Probably weighs as much as you do!!! 2-3mm ally would do much better. Oh, and remember you won't
actuall spend much time stood on it, so don't worry too much about it popping. I would suggest soem extra steel strips under the seat mounts
though, especially for comp use. 2-3mm ally would do much better. Oh, and remember you won't
actuall spend much time stood on it, so don't worry too much about it popping. I would suggest soem extra steel strips under the seat mounts
though, especially for comp use.
“Let your plans be dark and as impenetratable as night, and when you move, fall like a thunderbolt.”
Sun Tzu, The Art of War
My new blog: http://spritecave.blogspot.co.uk/
|
|
|
phelpsa
|
| posted on 1/9/06 at 09:11 PM |

|
|
Thats exactly what I was thinking! The guy who built most of the chassis had a bad experience in his previous locost with an ali floor where a stone
went straight through it! I think 3mm steel is overkill though 
[Edited on 1-9-06 by phelpsa]
|
|
|
DIY Si
|
| posted on 1/9/06 at 09:12 PM |

|
|
Well make it 2mm then! I have no idea what mine is though. Probably 16 swg! I have no idea what mine is though. Probably 16 swg!
“Let your plans be dark and as impenetratable as night, and when you move, fall like a thunderbolt.”
Sun Tzu, The Art of War
My new blog: http://spritecave.blogspot.co.uk/
|
|
|
phelpsa
|
| posted on 1/9/06 at 09:14 PM |

|
|
You were too quick off the mark. I typed ali when I meant steel 
Whats the best way to bond on an ali floor?
Adam
|
|
|
JoelP
|
| posted on 1/9/06 at 09:15 PM |

|
|
i used to think 16g steel or 3mm ally was the norm, but then a few people piped up saying they had used 16g ally!  Serious weight to be saved
there. Serious weight to be saved
there.
My friend fortunately now owes me a sheet of kevlar carbon composite though, so thats my next floor sorted. 
|
|
|
JoelP
|
| posted on 1/9/06 at 09:16 PM |

|
|
rivet and sikaflex.
|
|
|
DIY Si
|
| posted on 1/9/06 at 09:17 PM |

|
|
vhb tape (Very High Bonding) ad rivets in the corners to stop it peeling up. 3M make some stuff, various sizes and roughly £25-30 a roll, but
that'll do just about the whole car.
“Let your plans be dark and as impenetratable as night, and when you move, fall like a thunderbolt.”
Sun Tzu, The Art of War
My new blog: http://spritecave.blogspot.co.uk/
|
|
|
phelpsa
|
| posted on 1/9/06 at 09:19 PM |

|
|
I think I will cut it out then and get some 16swg ali in there! There aren't usually many big stones to be kicked up at a hillclimb / trackday!

|
|
|
DIY Si
|
| posted on 1/9/06 at 09:21 PM |

|
|
If the stone's big enough to go through the floor, you should be able to see it coming! Even if it does, the chassis rails should stop it
doing much damage. Just avoid catching too much air. Even if it does, the chassis rails should stop it
doing much damage. Just avoid catching too much air.
Also, 16 swg ally should be roughly 1/6th the weight of the 3mm steel.
[Edited on 1/9/06 by DIY Si]
“Let your plans be dark and as impenetratable as night, and when you move, fall like a thunderbolt.”
Sun Tzu, The Art of War
My new blog: http://spritecave.blogspot.co.uk/
|
|
|
nitram38
|
| posted on 1/9/06 at 09:52 PM |

|
|
The aerial atom floor is basically a cradle for the seats and a thin fibreglass/composite 'cup'.
I have been in the latest TVR's with fibreglass floors.
Basically your floor is a rain sheild!!!!!
|
|
|
Ivan
|
| posted on 2/9/06 at 07:09 AM |

|
|
I notice your tie rod and rack are in a (almost?) straight line at full lock. In this situation it could happen that they flip over centre in bump
which will lock up your steering - not a pleasant experience at speed!
This happened twice on my cobra when parking and once to a cobra on the track which led to a meeting with a wall. The easy solution is plates to limit
the turning circle.
I'm not saying it will happen - just check it out on full lock and at all ride heights - turn the wheel to full lock and try to knock the tie
rod over centre - if you can you have a problem.
|
|
|
Guinness
|
| posted on 2/9/06 at 08:34 AM |

|
|
A mate of mine was overtaking a skip wagon once, in his Caterham, when a brick fell out! Hit the road in front of him, luckily went under the front,
smashed the sump in, then bounced up into the ally floor a couple of times. The second bounce came up right under his bench seat! He only had a bit
of 3mm ally and a bit of 12mm ply between his knackers and the brick! The ally deformed but the ply took the impact!
I would have a steel floor if you intend sitting on it, or if you are having an ally floor then make sure there is a gap between your arse and the
floor. Tritons seats have about 1" under them and I'm sure most of the other fibreglass ones do too!
Anyway Adam, get back in the garage and get that engine installed!
Mike
|
|
|
phelpsa
|
| posted on 2/9/06 at 09:51 AM |

|
|
quote:
Originally posted by Guinness
Anyway Adam, get back in the garage and get that engine installed!
Mike
I will... in about 20 minutes  I think I will weld in two pieces of box section to mount the seat onto I think I will weld in two pieces of box section to mount the seat onto
|
|
|


