garyt
|
| posted on 23/11/14 at 05:31 PM |

|
|
[img]
Description
[/img]
|
|
|
|
|
garyt
|
| posted on 23/11/14 at 05:34 PM |

|
|
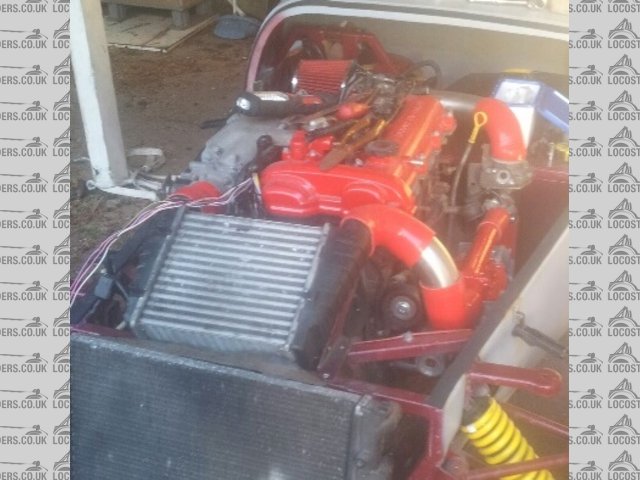
it will look neater once I get the exhaust manifold wrapped, but happy moving forward a wee bit at a time 
Gary
|
|
|
dubzter
|
| posted on 23/11/14 at 07:53 PM |

|
|
looking good indeed, so is your SC mounted under the exhaust manifold? the mx5 installs I've see all seem to be mounted at the level of the
rocker cover.
|
|
|
garyt
|
| posted on 23/11/14 at 08:31 PM |

|
|
yes it is down under the manifold on the mx5 they mount it over the exhaust manifold, where they have room to do it, If following this route a large
clearance hole would be required in the bonnet ( there is an example on a locost usa site ). They also have heat exchange issues despite wrapping the
manifold and using reflective sheet between the two, being mounted lower just above the chassis rails means that I have more air space between the
heat source and the s/c body it does mean that you have to be quite creative with the pipe work and redesign the ex manifold. The intercooler is vw
Passat and lined up with the t/b nicely also just cleared under the nose, re. airflow through the intercooler, the airflow through the rad and fan
should give negative pressure behind the I/c (also will "dam" the edges) so should work ok as with most things room is at a premium... so
there are always compromises to be made.
With the airflow meter being at the rear of the engine I will retrace the wires back shorten and rewrap, the air temp sensor will now live on the I/c
outlet giving the most accurate reading again the wires will be retraced shortened to keep it all tidy.
The radiator return will need some thought as to its new route and I turned the front rad outlet to point to the nearside thus giving a neater run to
the rad top hose.
Next problem is where and how to plumb the header, as the scuttle area is getting full with battery, heater etc living there.
It is a challenge but hey if it was easy ............
gary 
|
|
|
garyt
|
| posted on 15/3/15 at 08:06 AM |

|
|
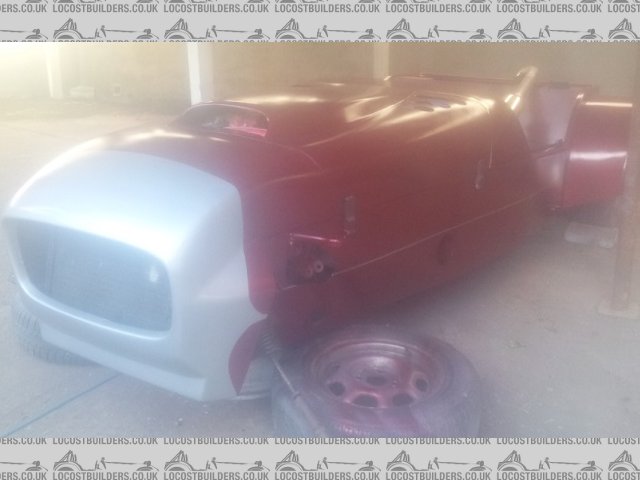
ok so the weathers warming nicely , days are stretching, suns out and trina is away for a few weeks visiting family , soooo put some paint on and
hopefully get a bit of a push these next few weeks .
and no that's not the new exhaust position 
[img]
Description
[/img]
|
|
|
garyt
|
| posted on 15/3/15 at 08:07 AM |

|
|
another pic
[img]
Description
[/img]
|
|
|
garyt
|
| posted on 28/3/15 at 06:05 PM |

|
|
well absolutely frozen but happy messed about finishing the manifold and got some alterations to the wiring (but nae finished that one yet...)
firewall made battery in a tempory earth , connected the instruments turned the key and ............ nothing. 
went over and over it, had coffee and more coffee. so went and rechecked it all and found 1 connecter off the back of the main fuse block, took it off
to put through the firewall. reconnected it and the battery ..... BINGO lights on the dash and engine turns over. so T time. with a big smile 
so hopefully tomorrow will run some tempory wiring to the pump and add a couple gallons of petrol and see if we can get fuel pressure and if so we
will go for a start up 
|
|
|
garyt
|
| posted on 29/3/15 at 01:25 PM |

|
|
ok so after working out ive fuel engine cranking but nothing else panicking that its an ammobiliser fault , I found 2 wires that should be connected
so joined them and away she went a splutter and died an adjustment on the throttle cable to the 2nd tb and she is running. 
absolutely awesome to hear it now I need to finish the cooling system and tidy all the tempory wiring.
https://www.youtube.com/watch?feature=player_detailpage&v=ZkL9IioRExQ
if this link disnae work go to you tube and enter "its alive Haynes first start up "
very very happy
|
|
|
big_wasa
|
| posted on 29/3/15 at 01:45 PM |

|
|
I love the sound 
|
|
|
dubzter
|
| posted on 29/3/15 at 02:42 PM |

|
|
quote:
Originally posted by garyt
ok so after working out ive fuel engine cranking but nothing else panicking that its an ammobiliser fault , I found 2 wires that should be connected
so joined them and away she went a splutter and died an adjustment on the throttle cable to the 2nd tb and she is running. 
absolutely awesome to hear it now I need to finish the cooling system and tidy all the tempory wiring.
https://www.youtube.com/watch?feature=player_detailpage&v=ZkL9IioRExQ
if this link disnae work go to you tube and enter "its alive Haynes first start up "
very very happy
Sounds awesome, I really must come a visit some time
_______________________
Blog
Facebook Build Thread
Haynes Forum Build Thread
Locost Builders Build Thread
|
|
|
garyt
|
| posted on 5/4/15 at 08:46 PM |

|
|
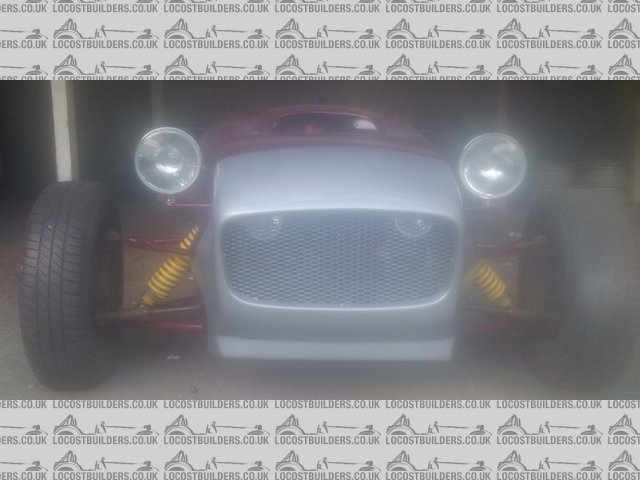
well spent the day doing wiring and headlights up front , been busy most all day but not a lot to see.
just need to figure out mazdas headlight wiring now.
day off tomorrow so hope to get the rear lights wired up and headlights working got side and flash but dip/main are awol somewhere. 
[img]
Description
[/img]
|
|
|
garyt
|
| posted on 11/4/15 at 05:09 PM |

|
|
HA HA lights working thought I was going crazy , I mean how hard can 4 wires be.................. eventually discovered I had stalks that were wired
differently  oh the joy oh the joy  and that mx5 stalk changes the earth not the feed any way got side dip main n flash now so happy.. and result got a pair
of westy leather seats n runners for a bargin £, so these should be here end of the week and that mx5 stalk changes the earth not the feed any way got side dip main n flash now so happy.. and result got a pair
of westy leather seats n runners for a bargin £, so these should be here end of the week  so onto the indicators next...... wonder what lies ahead
there lol so onto the indicators next...... wonder what lies ahead
there lol
|
|
|
garyt
|
| posted on 11/4/15 at 05:13 PM |

|
|
just looking back next weekend is a year since I started ,, how time flies when your having fun 
|
|
|
garyt
|
| posted on 2/5/15 at 07:10 PM |

|
|
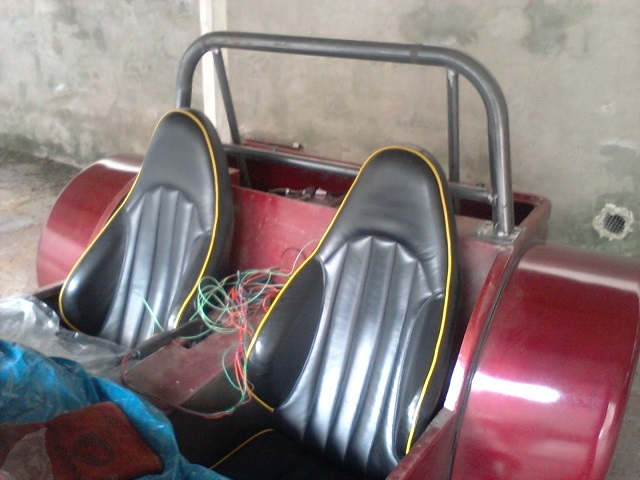
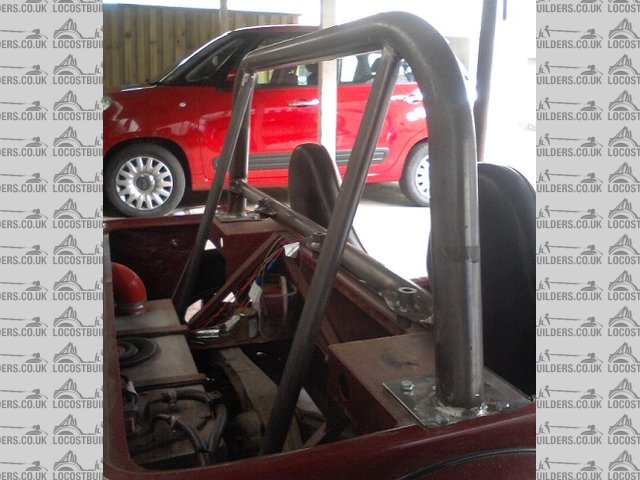
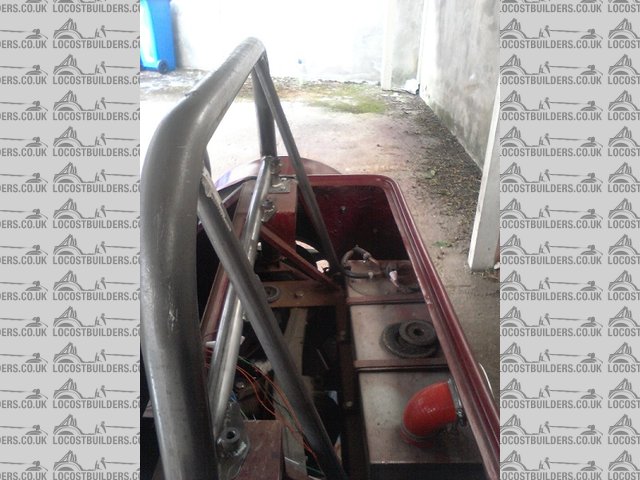
had a good day , got the roll bar done and seats in , they will have to come out but couldn't resist putting them in, leather westie seats 
[img]
Description
[/img]
[img]
Description
[/img]
[img]
Description
[/img]
[img]
Description
[/img]
[Edited on 2/5/15 by garyt]
remember we are not mad just creatively insane !!!!!
|
|
|
garyt
|
| posted on 16/5/15 at 06:27 PM |

|
|
[img]
Description
[/img]
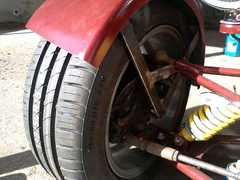
well we had sun, rain, sun, hailstones and sun today, but got my wing stays made up and attached fixed the wings on with tiger seal and will glass
over this once dry, wasn't happy with my rad mounts so going to redo them tomorrow and hopefully some wiring
used 30 x 6 ms so hopefully shouldn't flex... too much  picked up on the top and bottom ball joints and on the top caliper bolt... so we will
see. picked up on the top and bottom ball joints and on the top caliper bolt... so we will
see.
Gary
remember we are not mad just creatively insane !!!!!
|
|
|
garyt
|
| posted on 16/5/15 at 06:29 PM |

|
|
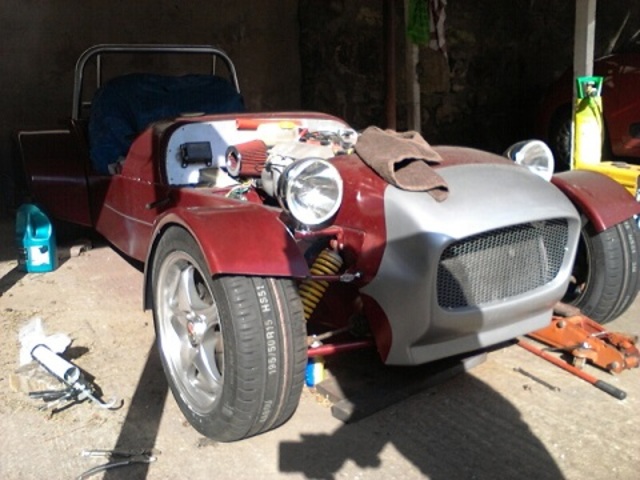
excuse the mess....
[img]
Description
[/img]
remember we are not mad just creatively insane !!!!!
|
|
|
garyt
|
| posted on 23/5/15 at 07:39 PM |

|
|
got rad mounts redone and fan wired up , got the front wing stays made, painted, fitted ran the engine up properly to working temps, a small drip
from a hose joint, tightened, and then discovered I had a rather large hairdryer the fan was blowing not sucking, swapped wires round temps were
centre of the gauge , happy and I love that supercharger noise  next some more wiring, got some rdx switches today need to get their flasher unit as
it lets you mix n match bulbs/leds , ran out of connectors so will nip into town tomorrow , hopefully try and get the wiring tidied in the next week
or so. and do some work on the dash/ trim. next some more wiring, got some rdx switches today need to get their flasher unit as
it lets you mix n match bulbs/leds , ran out of connectors so will nip into town tomorrow , hopefully try and get the wiring tidied in the next week
or so. and do some work on the dash/ trim.
Ordered a westie wide screen , so when it arrives will report back on any mods / fit etc, got a pair of uprights/ mirrors as well.
Gary
remember we are not mad just creatively insane !!!!!
|
|
|
prawnabie
|
| posted on 23/5/15 at 09:02 PM |

|
|
Nice build - are you using ms pnp?
|
|
|
garyt
|
| posted on 23/5/15 at 09:12 PM |

|
|
Thanks. Probably will do once completed ive got it running but will need to get it set up mapped properly once finished may piggy back for now. Tbh
spending money on everything else just now lol so will way up the benefits later
[Edited on 23/5/15 by garyt]
remember we are not mad just creatively insane !!!!!
|
|
|
dubzter
|
| posted on 5/6/15 at 08:10 PM |

|
|
Hey Gary did your donor come with an OBD port? If so are you intending on keeping it?
_______________________
Blog
Facebook Build Thread
Haynes Forum Build Thread
Locost Builders Build Thread
|
|
|
garyt
|
| posted on 5/6/15 at 08:33 PM |

|
|
Hi Yes it had one on the loom most of it is cut out now down to 6 wires, shortened those as far as possible I've left the plug for now... the
donor switches were proving a pain to use that's the problem of not having 1 donor, so bought new rdx ones got those wired in, I resorted to
cutting most of the wires out and then wiring in new circuits for what I needed !!!! so at least i'm moving forward with the wiring, got all the
wires down the tunnel tidied , taped and fastened, finished the rear tub area wiring the same, incidentally I used the rdx relay which sees normal and
led bulbs so don't need ballast resistors ( so got 4 new ones if anyone wants them ) .
still waiting for my screen so, went and got some thin sheet and lined the inside of the outside if that makes sense trimmed it with some maroon
leathercloth and some rubber matting , pass side done so tomorrow will do the drivers side and rear panel behind the seats, ordered some harness so
waiting on them aswell
How are you getting on?
Gary
remember we are not mad just creatively insane !!!!!
|
|
|
dubzter
|
| posted on 5/6/15 at 08:37 PM |

|
|
quote:
Originally posted by garyt
Hi Yes it had one on the loom most of it is cut out now down to 6 wires, shortened those as far as possible I've left the plug for now... the
donor switches were proving a pain to use that's the problem of not having 1 donor, so bought new rdx ones got those wired in, I resorted to
cutting most of the wires out and then wiring in new circuits for what I needed !!!! so at least i'm moving forward with the wiring, got all the
wires down the tunnel tidied , taped and fastened, finished the rear tub area wiring the same, incidentally I used the rdx relay which sees normal and
led bulbs so don't need ballast resistors ( so got 4 new ones if anyone wants them ) .
still waiting for my screen so, went and got some thin sheet and lined the inside of the outside if that makes sense trimmed it with some maroon
leathercloth and some rubber matting , pass side done so tomorrow will do the drivers side and rear panel behind the seats, ordered some harness so
waiting on them aswell
How are you getting on?
Gary
Sounds like you are making good progress.
I'm ashamed to say that I have done next to f-all. With the arrival of daughter number 2 it all went a bit pear shaped. at 10 weeks old she
still isn't settling in the evenings so I'm not getting out to the garage. Fingers crossed that settles soon and I can make a start.
_______________________
Blog
Facebook Build Thread
Haynes Forum Build Thread
Locost Builders Build Thread
|
|
|
garyt
|
| posted on 5/6/15 at 08:49 PM |

|
|
nothing to be ashamed of family comes first , the weathers just warming nicely so plenty of time to get on 
Yes Im making some headway, the wiring had me in knots at times, really need to get the screen so that I can get on there.
by the way for future reference if doing a screen and wipers an mgb '72 - 73 wiper motor has the flexi drive and with an extra earth lead
attached and the clip cut off the mx5 plug, it is plug n play so 2 speed intermittent and wash wipe .
72 british to 03 Japanese I was impressed  just need to find a gap for the washer bottle.... oh the challenges just need to find a gap for the washer bottle.... oh the challenges
Hope the family settles soon , I'm sure she will.
remember we are not mad just creatively insane !!!!!
|
|
|
garyt
|
| posted on 9/6/15 at 07:22 PM |

|
|
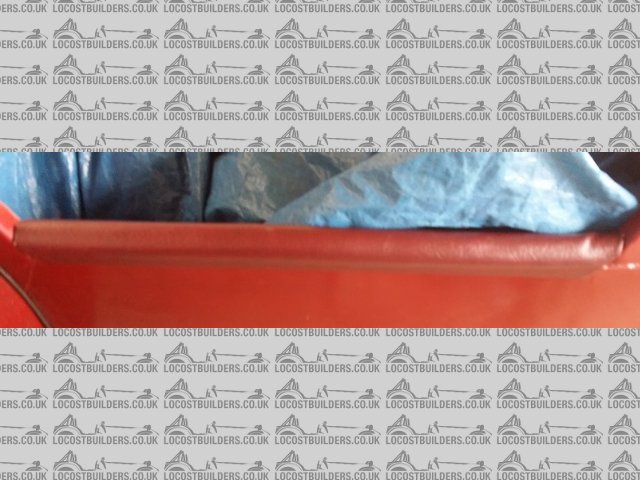
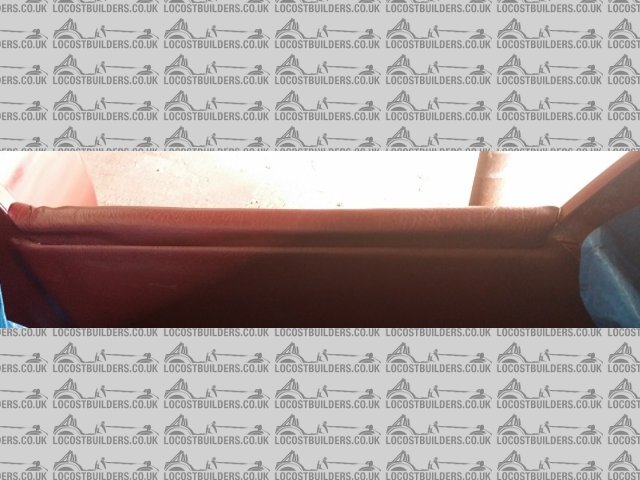
Hi , I made these "arm rests" to finish off the top edge of the sides. I used some U aluminium section, a length of pipe insulation cut in
half lengthways, and some leathercloth to match the trimming .
Quite pleased with how it turned out and finishes off the edge nicely
[img]
Description
[/img]
[img]
Description
[/img]
[Edited on 9/6/15 by garyt]
remember we are not mad just creatively insane !!!!!
|
|
|
garyt
|
| posted on 14/6/15 at 07:19 PM |

|
|
so its warm and sunny so went out and got some more wiring done all switches in. and the symbols light up when lights are on but no instrument lights
grrrrrrr... afte much faffing about they will only work when the dimmer switch is connected, then I had dim instruments and bright switches or vice
versa so swap a couple of wires ... sorted padded and trimmed the tunnel top just need to add gaiters to finish then i'll post a pic. padded and trimmed the tunnel top just need to add gaiters to finish then i'll post a pic.
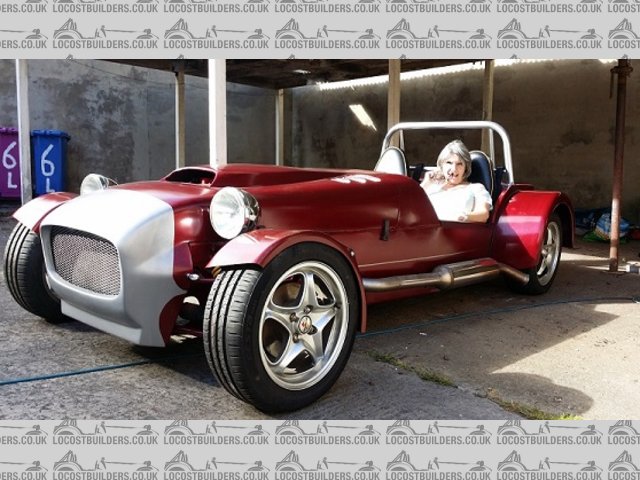
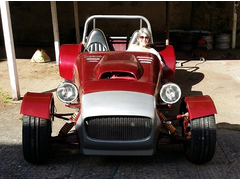
Trina decided that as it was nice she would come and help...... although her idea of help was to try it for size, sit in it have her photo taken, make
some supportive noises and then go make tea..... still she doesn't complain when I disappear for hours or when boxes arrive 
[img]
Description
[/img]
[img]
Description
[/img]
[Edited on 14/6/15 by garyt]
[img]
Description
[/img]
[Edited on 14/6/15 by garyt]
remember we are not mad just creatively insane !!!!!
|
|
|


