Gav
|
| posted on 27/10/05 at 02:16 PM |

|
|
How to make a loom?
Gonna start wiring up my fireblade as soon as ive got my cradle finished, however after looking that the wiring diagrams in the haynes manual it dosnt
look to hard(!?) i know i could buy a blade loom and pretty much plug everything in but id like to do it all myself so i know exactly where everything
is.
Whats the best solution to do a home made loom? a load of chocy blocks? or is their a better alternative?
gav.
|
|
|
|
|
adam_moore
|
| posted on 27/10/05 at 02:19 PM |
|
|
I made my own loom for a fireblade using shorty's very useful diagram but you will still need a donar loom for the special plugs for the CDI
etc...Otherwise, its not too hard. I've never done it before and managed it (with a large supply of spare fuses!)
My connections arounf the chassis are just clear plastic insulated bullet terminals (inslustion needed to keep the moisture out and keep the SVA man
happy.
I tried to get the plugs from breakers but they don't want to waste a whole harness cutting individual plugs from them. You can however get the
rectifier plug and the alternator plug from here
http://www.hondaspares.com/newparts/default.asp?mydep=260
[Edited on 27/10/05 by adam_moore]
|
|
|
Hellfire
|
| posted on 27/10/05 at 02:23 PM |
|
|
Gav - if you have got the blade loom already then all you need is the time and appropriate wire (but you could prolly get that from work  ) )
It is pretty easy - the hard(est) part is splicing the blade to sierra loom for ignition, hazards and fog.
I've done it (twice) only popping one fuse if you're careful.

|
|
|
Gav
|
| posted on 27/10/05 at 03:33 PM |
|
|
No Blade loom, no Sierra loom.
oh boy i do like a challenge 
|
|
|
serendipity123
|
| posted on 27/10/05 at 03:48 PM |
|
|
i havent got my zrf1000 loom or donor loom either, , , fancy going in on a few 100 fuses with me lol?
|
|
|
shortie
|
| posted on 27/10/05 at 04:09 PM |
|
|
Don't worry about the sierra loom assuming you are not using sierra colum switches. You will however def need a blade loom, much easier to buy
a complete blade loom otherwise all the bits bought seperately will cost far more than the loom itself!
My advice is get a blade loom including coils\plug leads\rectifier and CDI unit, these can be bought on ebay but try to make sure you match it with
the engine age you have otherwise it could be a pain.
These can also be got from Colibriman on here which is the easy option.
Then you have two choices, either take all bits you need from the fireblade loom and buy a load of wire and build your own loom fitting the fireblade
plugs\connections where required or you can just literally extend the fireblade loom and add the wires that don't exist such as handbrake
warning\side repeaters etc.
Don't use choc blocks, they are not good in auto wiring and can cause problems in the future. Buy decent multiplugs and use them where you want
to, I used multiplugs so that the engine wiring is easy to unplug if the engine ever needs removing but you don't have to do it like that.
Where possible solder the wires, failing that get a decent rachet crimping set and use insulated crimp connectors. Soldering is best but to be honest
I found it a pain and ended up crimping most of mine, it was noticeable that when I stripped the blade loom the connections were only crimped anyway
so I figured what's good for a production bike should be ok for my kit car.
Vehicle Wiring Products are excellent although make sure you try to get as much as you can at once
otherwise postage can get expensive.
When extending wires (or fitting new ones) make sure you work out the current that the wire needs to carry and get the correct dia wire.
A new fusebox is farily easy to wire and fit, most have push on blade type connections but it's handy if you can get the type whereby you can
put two fuses together in the box as it means less wires.
I ran all mire wires in split convoluted tubing and where I couldn't and needed to come out the tubing I wrapped it in harness tape secured with
a small bit of insulating tape at the end.
To be honest I had no idea when I started but after a while I really got into it and it seems to have turned out ok. I found a wiring diagram helped
ALOT so I drew one, which took ages!!
Wiring a car is actually very logical, positive to switch to bulb then to negative (chassis).
I hope that helps, if you want to chat about it then I am more than happy to speak over the phone or on here.
Please don't think I am an expert as I am most definitely not but I have been through it and I reckon it was definitely worth wiring it all
myself as I learnt loads and if it goes wrong then I have some chance of fixing it!
HTH,
Rich.
|
|
|
David Jenkins
|
| posted on 27/10/05 at 04:14 PM |
|
|
I agree strongly with Rich - spend a LOT of time working out your wiring diagram (read up, do on-line research, etc.), then spend another heap of time
drawing a physical layout diagram. Every hour you spend doing the drawings will save 10 hours wiring the car.
I then laid out the wires around the chassis, holding them in place temporarily using tie-wraps (the sort you get with kitchen plastic pags). Once I
was happy with the layout I could then start to connect things up.
I did my drawings commuting on the train! They're now a great reference if I wish to change anything.
Have fun...
David
|
|
|
Aboardman
|
| posted on 27/10/05 at 04:24 PM |
|
|
lot easier to solder with a small gas torch rather than an electric solder. and then heat shrink over the joint.
|
|
|
shortie
|
| posted on 27/10/05 at 04:25 PM |
|
|
Couldn't agree more David, it may have taken ages to draw but it's saved me hours and hours in the garage and I now have it forever as a
reference. Also if ever you sell the car then it shows that you took time with the wiring and is very useful for the new owner.
|
|
|
Gav
|
| posted on 27/10/05 at 07:14 PM |
|
|
I think its probably best to buy a blade loom then 
|
|
|
tks
|
| posted on 27/10/05 at 07:26 PM |
|
|
yup
Just buy an usefull blade loom,
hook negative to chasis,
connect the original fusebox to the battery.
Buy an extra fusebox en hook it to the battery and do the trick sepparate,
that's atleast as what i should do.
Also i would solder all the wires and use crimpharness....
I spliced my loom to, and took out everything i couldn't use.
Then later on you just reuse the plastic and use new tape..to keep everything togetther...
Tks
i used those "things" ?? to temp have the wire close to each other..
i didn't liked the idea of cutted wires in the loom...
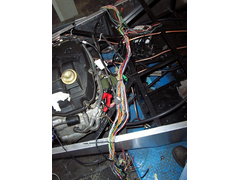 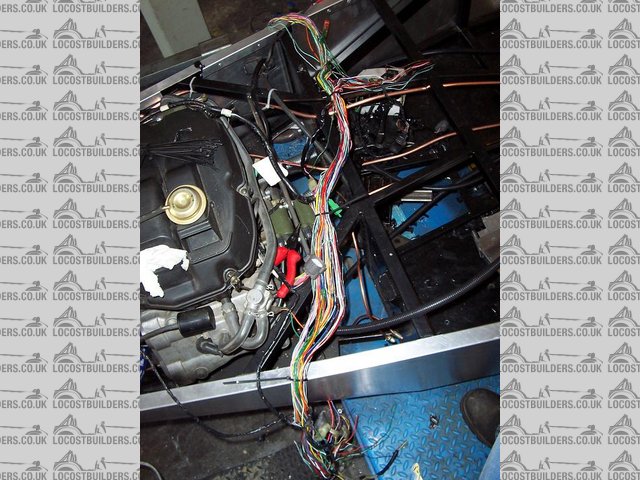
Rescued attachment Car 003 small.JPG
The above comments are always meant to be from the above persons perspective.
|
|
|


