(haynes is making my eyes hurt
 )
)
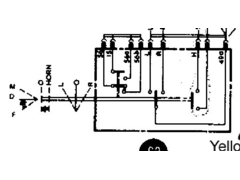
Anyone got a big and clear diagram showing the wiring of mk2 escort steering column stalk switch for the headlamps?
(haynes is making my eyes hurt  )
)
This any help?
http://locostbuilders.co.uk/viewthread.php?tid=39154
Not a wiring diagram, but colour codes.
The black/brown wire which isnt on the list is the switched live feed for the main beam flash switch.
David
Along with this


Rescued attachment light switch.jpg
And this (wiper and side lights switch) labelled.jpg)
hmmm, looks like someone has scanned the haynes 
I've got the book at work so will photocopy it to A3 to see if that helps.
.... and it did!! well I'm blowed; I expected it to be a blurred mess;
[Edited on 17/2/06 by 02GF74]
That not big enough?
What do you need to work out? I should be able to help, as I have spent a week or so figuring it all out.
David
quote:
Originally posted by flak monkey
What do you need to work out? I should be able to help, as I have spent a week or so figuring it all out.
David
 and then joined to other wires in mysterious fashion!!
Ok, on the light stalk;
terminals 15 and 30 are the live feeds (both originally red)
Terminal 58K is the headlight on feed which should be connected to the dipped light/main beam switch in the feed position. (originally black/white)
Terminal 554 is the sidelight feed. Should go to the fuse box. (originally grey)
So if you get a multimeter out, in position 1, terminal 30, should connect to 58K. And position 2 should connect 15 to 554.
On the dipped/main beam light switch (which should be an on-on single pole switch):
The black/white from the light switch forms the feed. Terminal 56 on the switch.
Yellow is the dipped beam feed
Blue/White is the main beam feed.
Bear in mind that the haynes manual wire colours are wrong for these switches!!
Hope that helps,
David
[Edited on 17/2/06 by flak monkey]
blimey - that is helpful!
I have scanned manual; http://www.locostbuilders.co.uk/upload/lampWiring3.jpg; if you can or want to, then could you mark up the traces that are
powered when the dip head lamps are on; stalk in position 2? Don't worry if you can't or don't want to.
No problem.
Have tried my best to highlight the wires on this pic:
http://gtslocost.locostsites.co.uk/trace.jpg
thanks a lot!!
you must be less busy than me! 

Sorry, the sidelights circuit remains live when the dipped beam circuit is live as well. If you want me to add the traces for that, just say.
Cheers,
David
PS I got the white/black and blue/white muddled. But have corrected them in the list above. Sorry.
[Edited on 17/2/06 by flak monkey]