
Securing bodywork?
coozer - 3/3/07 at 09:03 PM
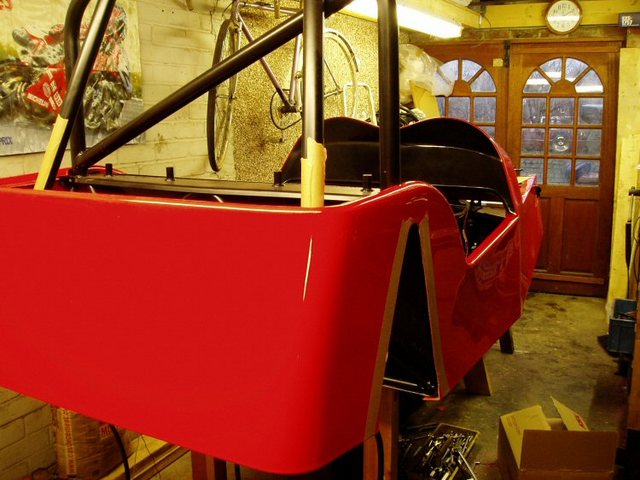
I've fitted the bodywork today, by myself! Couldn't get any hands to help due to excess alcohol last night.
Question is how do I secure it? Rivit round the V at the back and any fixings along the length of the 'lip' underneath???
I realise the top will be fixed by the scuttle and nose cone.
I've looked on the build sites of some of you and can't get a clear indication.
Regards,
Steve
scoey m - 3/3/07 at 09:16 PM
I fastened mine with 6 rivits ni total, 2 back,2 middle,2 front and top held in place with scuttle as you say seems very secure to me
Hope this helps
Martin
Kev99 - 3/3/07 at 09:31 PM
tiger seal and two rivets at front 
chockymonster - 3/3/07 at 11:33 PM
I fixed it just in front of the rear wheel arches and halfway between the kink and the front.
5mm hole and M6 tap in the chassis rail then a cap head bolt with washer to hold it in place
Agriv8 - 4/3/07 at 11:43 AM
Personally.
Remeber the body is designed so the shutlines are spot on so your scutle, bonnet and nose will depict where the tub needs to be fastened. mine has a
couple of rivets at the very front to stop it flapping about. Everything else is held on be the other bodywork.
regards
Agriv8
coozer - 4/3/07 at 02:07 PM
Thanks for the help chaps, at the moment I'm making a right balls of it, getting carried away with the dremel.
Taking it nice and easy now though as I've cut too much off the body round the roll bar. Some rubber trim will fill the gaps!
ChrisGamlin - 4/3/07 at 03:45 PM
Could you make it quick release just in case you need to do any work on inaccesible areas in future?
Im not sure how the MNR tub compares with a Westfield tub thats a single piece along each side and around the rear, but the other weekend I helped a
mate of mine make his Westie tub quick release using Dzus fasteners, meaning he can now take off the entire tub / rear arches in about 15 minutes if
he needs to do any work that requires access into the side of the engine bay or the rear end.
coozer - 4/3/07 at 05:21 PM
I'm currently attaching it all slowly to get it right. Regular coffee breaks to keep meslf calm and give me a few minutes to think about what
I've just done.
The scuttle's on now with 8mm bolts ans the nose cone will use the same. I'm going to use 5mm bolts along the bottom so the body will come
off if required
By 10pm tonight it should be on.

Rescued attachment Body040307.jpg
coozer - 4/3/07 at 10:43 PM
I've done it. its on and thats that.
Whats best for getting the scratches out of the gel coat as I have managed to bounce both the nose cone and bonnet off the concrete. DOH!
God I hate body work! Bring on the engine!!
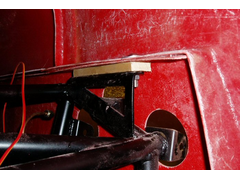
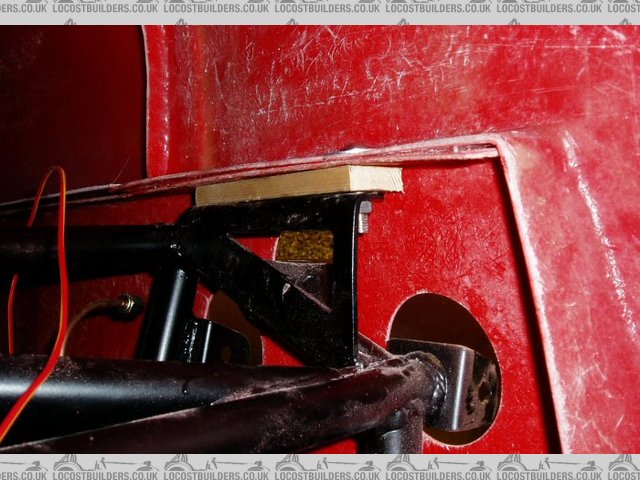
Anyway I frigged about with the sides at the front, lining the nose cone up made the sides spread away from the body at the back and the sides look
odd and buckled. The holes I'd cut from the scribe marks didn't line up with the brackets either. In the end I discovered the brackets at
the front on top of the chassis were too low.
Wood working skills to the rescue and it was all together in a flash.
My blogs updated with the details of the last couple of days.
Anybody had to do this before:
Rescued attachment Body5.JPG
TimC - 5/3/07 at 07:45 AM
Extremely useful stuff this! I see you went for the 2-tone dash/scuttle as well.
Definately the future!
road warrior - 5/3/07 at 08:55 AM
My car was built for track use only so quick removal of everything is important.
The front panels are joined together at the correct width with a piece of alloy angle 25x25x1mm and rivnuts. Two rivnuts hold the alloy angle to the
chassis. It's neater than it sounds. The nose is held on with slide clips and can be removed in a jiffy. As is the scuttle. The bonnet is held on
by dzus fasteners.
Two M5 stainless buttonheads hold the tub on, one each side, tapped into the chassis just in front of the rear wheels.
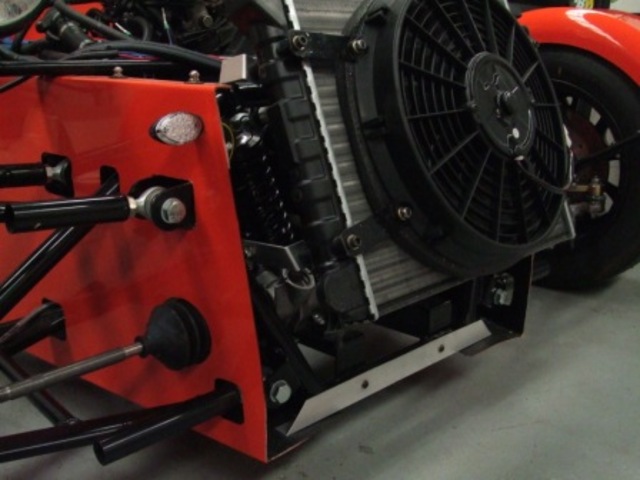
The radiator is also mounted on rubber lined 25mm P-clips the idea being that they stop a bit of vibration and save drilling holes in the chassis. It
was worthwile when I needed to change the angle slightly due to hot weather.
TimC - 5/3/07 at 09:04 AM
Any pics?
road warrior - 5/3/07 at 09:46 AM
Hi Tim
I will take some pics and post them tomorrow.
G.Man - 5/3/07 at 04:03 PM
quote:
Originally posted by road warrior
My car was built for track use only so quick removal of everything is important.
The front panels are joined together at the correct width with a piece of alloy angle 25x25x1mm and rivnuts. Two rivnuts hold the alloy angle to the
chassis. It's neater than it sounds. The nose is held on with slide clips and can be removed in a jiffy. As is the scuttle. The bonnet is held on
by dzus fasteners.
Two M5 stainless buttonheads hold the tub on, one each side, tapped into the chassis just in front of the rear wheels.
The radiator is also mounted on rubber lined 25mm P-clips the idea being that they stop a bit of vibration and save drilling holes in the chassis. It
was worthwile when I needed to change the angle slightly due to hot weather.
How do you remove the tub without removing the wishbones and suspension pushrods?
road warrior - 5/3/07 at 11:18 PM
Hi G Man
The tub will never come off easily. I just hope it doesn't need to be taken off frequently. I have a lot of experience with open wheelers and it
is the same for them so you just tape it up on race day and fix it later.
Tim, buy a dremel with some of the sandpaper barrels and also invest in the diamond cutting wheel. It will last forever if your careful with it. A
stepper drill bit is also a must. Above all, take your time and you will be happy in the end. Also when you come to each section check the old posts
here, it helped me out and I didn't need to call MNR except for one or two things.
My new chassis has just arrived and I'm not sure how the P-clip radiator mounts will go with the new chassis being so low at the front. (You can
see them in suspension photo) If it was the same as the old one I could send bracket drawings. They are very secure and I can't see them breaking
for a while but I will keep an eye on them anyway.

front suspension
[img]/upload/MNR0050 012.jpg[/img]
[img]/upload/2MNR0050 002.jpg[/img]
First go at posting pics so if they don't turn out they are in my archive.
Sonja


