smart51
|
| posted on 31/10/08 at 12:25 PM |

|
|
headlights without glass front
My new build will have "normal" car headlights. rather than seven style lights on sticks. Ordinary cars have lights mounted on a grey or
silver plastic moulding with a glass or polycarbonate front cover. I've decided that making a PC front cover will be too difficult in the
available time so I'm just going to make a plastic back with the glass of the lamps exposed. The problem is that mostly these look awful and a
bit "kit car".
Can any of you think of an example of headlights that don't have the transparent cover but still look good?
|
|
|
|
|
Mr Whippy
|
| posted on 31/10/08 at 12:31 PM |

|
|
what the blubs exposed? but they'll shatter it rains from thermal shock
Fame is when your old car is plastered all over the internet
|
|
|
andyharding
|
| posted on 31/10/08 at 12:37 PM |

|
|
Think he means projector lamps....
Are you a Mac user or a retard?
|
|
|
smart51
|
| posted on 31/10/08 at 12:39 PM |

|
|
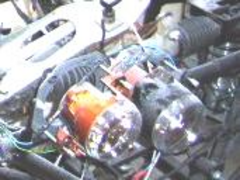
No, not the bulbs. There are separate lamps that will be mounted to a plastic shell to make 1 big headlight unit.
[Edited on 31-10-2008 by smart51]
 
Rescued attachment temp.jpg
|
|
|
smart51
|
| posted on 31/10/08 at 12:43 PM |

|
|
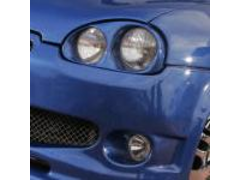
This is what I'm trying to avoid
 
Rescued attachment temp.jpg
|
|
|
smart51
|
| posted on 31/10/08 at 12:47 PM |

|
|
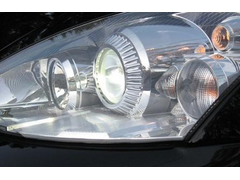
You can see here the separate lamps on a silver background. Over the top of the whole thing is a clear polycarbonate cover.
 
Rescued attachment temp.jpg
|
|
|
Mr Whippy
|
| posted on 31/10/08 at 01:09 PM |

|
|
oh sorry forgot is was for the wee car
It's dead easy to vacuum for plastic btw, I've done it loads of times for my model planes, some canopies Iíve done are over a foot
long.
You just make a airtight box with a hole in the side for the vacuum cleaner nozzle, and drill lots of small 2mm holes in the top. Mount a sheet of
plastic in a wooden frame that has sticky back foam door seal round the edge so it forms a seal with the top of the box. You then carve a mould (I use
balsa) with a knife, flapper wheel is itís a biggy. Then once smooth put the mould on the top of the box, heat the plastic till rubbery with a heat
gun, switch on the vac, place the plastic over the box and watch it suck round the mould. You can then put the mould aside and use it in the future is
a lamp cover is cracked. To do something like your lights would take me about two nights if I was starting from scratch.
Fame is when your old car is plastered all over the internet
|
|
|
Mr Whippy
|
| posted on 31/10/08 at 01:26 PM |

|
|
there you go a linky to DIY the covers, my vac box is half as thick as that though! 
Note : the thicker the plastic you use the less smooth the mould needs to be. Don't use varnish as it melts in the heat and stick to the plastic
spoiling it
Vac forming how to...linky
another good site -
linky 2
[Edited on 31/10/08 by Mr Whippy]
Fame is when your old car is plastered all over the internet
|
|
|
russbost
|
| posted on 31/10/08 at 03:01 PM |

|
|
Apologies for the blatant plug (but I AM a registered trader now ) )
but would these help
Link
I can also do some single 80mm units without the bodies which do both dip & main beam (so comes out a lot cheaper). Pic in my archive
I no longer run Furore Products or Furore Cars Ltd, but would still highly recommend them for Acewell dashes, projector headlights, dominator
headlights, indicators, mirrors etc, best prices in the UK! Take a look at http://www.furoreproducts.co.uk/ or find more parts on Ebay, user names
furoreltd & furoreproducts, discounts available for LCB users.
Don't forget Stainless Steel Braided brake hoses, made to your exact requirements in any of around 16 colours.
http://shop.ebay.co.uk/furoreproducts/m.html?_dmd=1&_ipg=50&_sop=12&_rdc=1
|
NOTE:This user is registered as a LocostBuilders trader and may offer commercial services to other users
|
triumphdave
|
| posted on 31/10/08 at 07:11 PM |

|
|
quote:
[
I can also do some single 80mm units without the bodies which do both dip & main beam (so comes out a lot cheaper). Pic in my archive
These dont seem to be there?
If you always do what you have always done you will always get what you have always got
|
|
|
robertst
|
| posted on 31/10/08 at 09:13 PM |

|
|
quote:
Originally posted by Mr Whippy
there you go a linky to DIY the covers, my vac box is half as thick as that though! 
Note : the thicker the plastic you use the less smooth the mould needs to be. Don't use varnish as it melts in the heat and stick to the plastic
spoiling it
Vac forming how to...linky
another good site -
linky 2
[Edited on 31/10/08 by Mr Whippy]
i wonder if i can make a plastic nosecone using this method...
Tom
|
|
|
russbost
|
| posted on 2/11/08 at 08:16 AM |

|
|
quote:
--------------------------------------------------------------------------------
[
I can also do some single 80mm units without the bodies which do both dip & main beam (so comes out a lot cheaper). Pic in my archive
--------------------------------------------------------------------------------
These dont seem to be there?
Dunno what was going on there, but I've put some fresh copies of the pictures on there now - bottom pics here's one
 
They measure just 80mm across the lens
I no longer run Furore Products or Furore Cars Ltd, but would still highly recommend them for Acewell dashes, projector headlights, dominator
headlights, indicators, mirrors etc, best prices in the UK! Take a look at http://www.furoreproducts.co.uk/ or find more parts on Ebay, user names
furoreltd & furoreproducts, discounts available for LCB users.
Don't forget Stainless Steel Braided brake hoses, made to your exact requirements in any of around 16 colours.
http://shop.ebay.co.uk/furoreproducts/m.html?_dmd=1&_ipg=50&_sop=12&_rdc=1
|
NOTE:This user is registered as a LocostBuilders trader and may offer commercial services to other users
|
Ninehigh
|
| posted on 3/11/08 at 01:45 AM |

|
|
Is there any legal thing about where they're positioned? I wouldn't mine to be fitted just inside the nosecone unless it's illegal
or looks stupid...
I'm liking the idea of them being "hidden" though

|
|
|


