kango
|
| posted on 22/5/05 at 11:28 AM |

|
|
Side panel meets rear panel
I am looking for some photoes/advice as to where does the side panels stop and where does the rear panel start. How does the part enclosing the stocks
top mount get covered?
|
|
|
|
|
kango
|
| posted on 22/5/05 at 11:30 AM |
|
|
What I have at the moment.
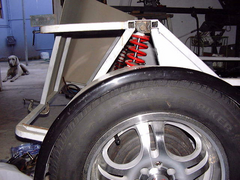 
Rescued attachment side 1.JPG
|
|
|
Fred W B
|
| posted on 22/5/05 at 05:42 PM |
|
|
Like your new wheels Kango!
Have you gone to have a look a Aubrey's latest progress?
Cheers
Fred W B
|
|
|
Cita
|
| posted on 22/5/05 at 06:48 PM |
|
|
Completely off topic but...is that nice looking dog in the background a Weimaraner?
|
|
|
DarrenW
|
| posted on 23/5/05 at 02:07 PM |
|
|
I joined mine in the centre of the top plate where the roll bar will fit (virtually straight up from the shocker mount).
Are you using fibreglass or ally body? Ive seen a fibre glass body joined and then the small gap filled with gel coat - you could hardly see the
joint, i was convinced it was a one piece rear tub (Westfield stylee).
|
|
|
kango
|
| posted on 23/5/05 at 06:23 PM |
|
|
1) Yes it is a Weimaraner and I have 2 of them.
2) I am using ali.
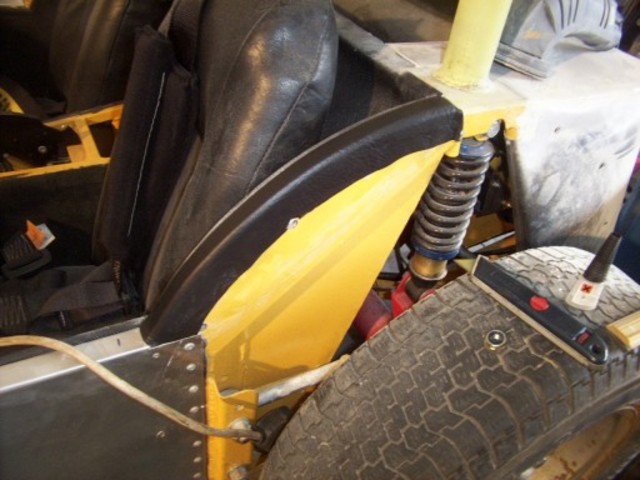
How do I get the bolt holding the shock out or in once the area is covered with ali? I have braced the top mounting plate on the other side to the
inner tube running down to the fuel tank support (as shown in the BOOK)
Any photoes of the side with out the fender fitted.
I have looked in just about every Photo archive for such a pic.
|
|
|
Mark Allanson
|
| posted on 23/5/05 at 06:29 PM |
|
|
This any good?
Rescued attachment Inner Arch.jpg
If you can keep you head, whilst all others around you are losing theirs, you are not fully aware of the situation
|
|
|
Mark Allanson
|
| posted on 23/5/05 at 06:31 PM |
|
|
And filler etched
Rescued attachment Inner Arch2.jpg
If you can keep you head, whilst all others around you are losing theirs, you are not fully aware of the situation
|
|
|
kango
|
| posted on 23/5/05 at 06:37 PM |
|
|
Check out my pic.
My fender only needs to go up about 30mm. Then there is still another 50 mm to the top frame. Bottom line, the fender is not going to cover the bolt
in/out area. It sits smack in the middle of the area above the fender.
|
|
|
kango
|
| posted on 24/5/05 at 06:09 PM |
|
|
Please a photo of the rear wheel arch before the fender is fitted.....somebody must have such a photo..
Thanks
|
|
|
Fred W B
|
| posted on 25/5/05 at 05:50 AM |
|
|
HI Kango
I think you are going to have to panel the whole area behind the wheel, then hole saw a hole for access to the bolt, and cover it with a grommet.
Then mount the fender to the panel
Cheers
Fred WB
|
|
|
kango
|
| posted on 25/5/05 at 10:05 AM |
|
|
I thought of that, but dont see any other cars with a grommet there....so how did they do it or is every body just fitting their fenders to cover the
bolt.
What about turning the shock 90 deg???
|
|
|
DarrenW
|
| posted on 25/5/05 at 10:42 AM |
|
|
My bolt is fitted 90 degrees to yours, i can get access from the boot area. This is a good idea but will mean you having to turn your bracket
round.
Will you need to remove bolt later?? Hopefully not but i see your dilemma. What about finishing the side and rear panels short then rivetting a second
piece in the centre. Worst case is you will need to drill out the rivets to remove panel in the event you need bolt access (you could also use self
tappers for these additional panel). Im saying this without knowing if you can fix the panels in this way.
Grommet doesnt sound like a bad idea. Yes - no-one else seems to do this but there are no hard and fast rules. Maybe know one else has given it the
same thought as you.
I cant think of any other solutions that will look OK.
HTH,
Darren.
|
|
|
kango
|
| posted on 2/6/05 at 04:14 AM |
|
|
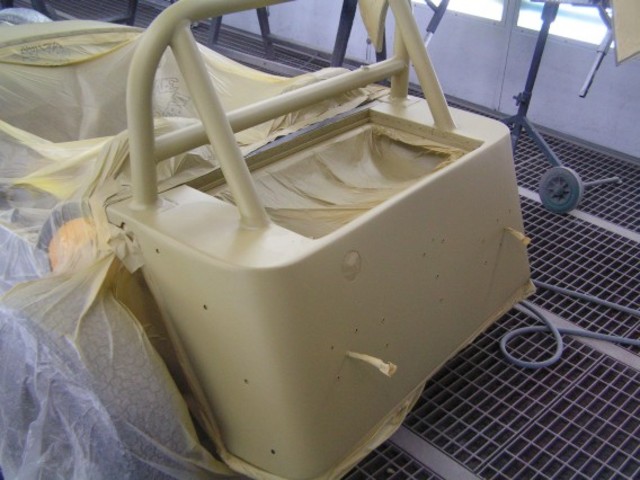
I sorted the problem out by removing "W1 & 2" and making them bolt onto "O" and "V". Now I can put the top
shock bolt in from the inside and have the nut on the side next to the rear panel skin.
Any comments? 
|
|
|
DarrenW
|
| posted on 2/6/05 at 07:54 AM |
|
|
quote:
Originally posted by kango
I sorted the problem out by removing "W1 & 2" and making them bolt onto "O" and "V". Now I can put the top
shock bolt in from the inside and have the nut on the side next to the rear panel skin.
Any comments?
Im not sure what you mean about W1 & 2 and O and V, but it sounds like you simply turned the bolt round to enter from other side. This sounds like
a very good simple solution. Did you make the nut captive or will you have enough space to slip a spanner onto it later. Only downside might be
getting the nut back into the tight space later with the side panel on. Also watch the length of bolt sticking through nut. You need enough to be
secure ( 2 or 3 threads should do it if youve chamfered end) but not to rub on the panel.
I like simple solutions - didnt see that one!
|
|
|
kango
|
| posted on 2/6/05 at 10:44 AM |
|
|
W1 and W2 are the 2 triangulating members from the inside top shock mount to the bottom member of the back panel. Look in the book page 64.
|
|
|
DarrenW
|
| posted on 2/6/05 at 10:54 AM |
|
|
Thats why i didnt know - i dont have the book. Im building with a bought chassis.
Looks like a good solution tho to me.
|
|
|