deezee
|
| posted on 13/2/13 at 08:23 PM |

|
|
I've included the full address of the photos 
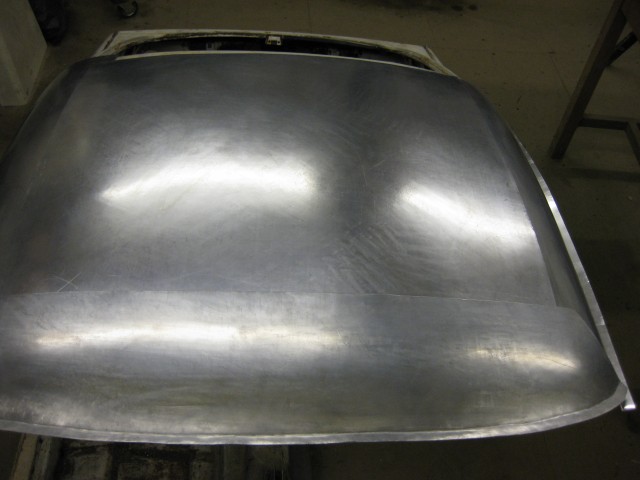
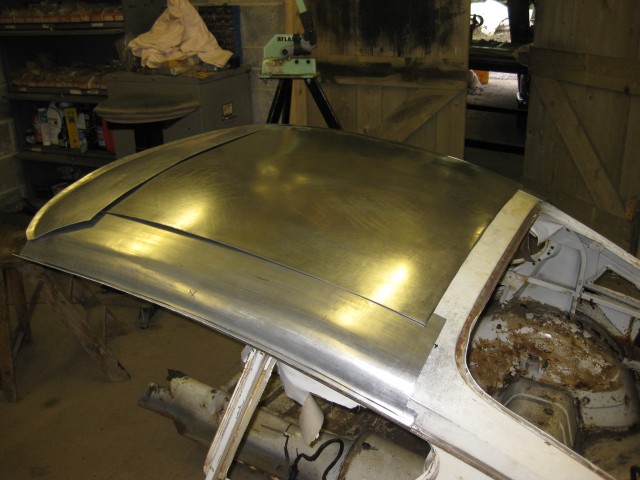
|
|
|
|
|
Riskyshift
|
| posted on 13/2/13 at 09:03 PM |

|
|
Like it. Subscribed to the thread.
Ian
|
|
|
John Bonnett
|
| posted on 13/2/13 at 09:49 PM |

|
|
quote:
Originally posted by Riskyshift
Like it. Subscribed to the thread.
Ian
Thank you Ian. There will be a bit of a break now for a few weeks because a couple of holidays are getting the way 
|
|
|
John Bonnett
|
| posted on 14/2/13 at 04:11 PM |

|
|
quote:
Originally posted by deezee
I've included the full address of the photos 


Thank you very much for doing that. If you could tell me how you did it I'll be able to upload more pictures.
regards
John
|
|
|
40inches
|
| posted on 7/3/13 at 09:03 PM |

|
|
I used to think I was a bit too fussy getting things correct, your work makes everything that I have ever done look like a bodge
|
|
|
John Bonnett
|
| posted on 7/3/13 at 09:12 PM |

|
|
quote:
Originally posted by 40inches
I used to think I was a bit too fussy getting things correct, your work makes everything that I have ever done look like a bodge
Now, come on. I've been looking through your photo archive and your workmanship is of the highest quality and something to be very proud of.
On my project, I've been beavering away slowly but making progress. The gutter under which the tailgate fits has slowed me down while trying to
find a way to make it using my limited skills but I hope I've come up with the answer.
I've just two pieces left to make before the panels that I've made can be welded together to make a complete roof.
I've been able to upload the pictures now so thank you Chris for sorting out that little problem but I've forgotten how to include a
fullsize picture in my post.
Ah, now sorted
[Edited on 9/3/13 by John Bonnett]
[Edited on 9/3/13 by John Bonnett]
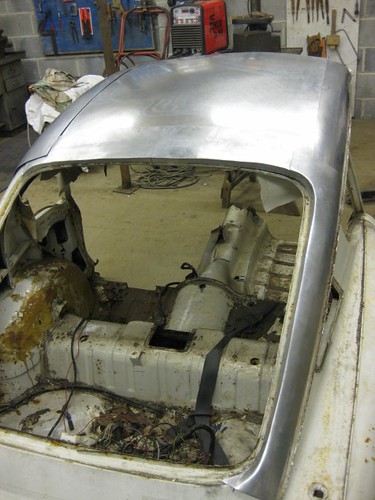
[Edited on 9/3/13 by John Bonnett]
[Edited on 9/3/13 by John Bonnett]
[Edited on 9/3/13 by John Bonnett]
|
|
|
John Bonnett
|
| posted on 14/3/13 at 09:16 PM |

|
|
I was hoping to have all the roof panels finished by now and ready for welding but have suffered a bit of a delay.
I'm getting a bit old and senile and the first thing I didn't notice was that I had turned the flange for the gully (N/S tailgate gully)
up instead of down and to make matters worse, the lower wheel on the jenny had slipped backwards so that I had two knife edges top and bottom instead
of just at the top. Result was a wonderfully crisp fold but a deep score as well. So no chance of reversing the fold and therefore, I had no choice
but to bin the panel and start again. The good news is that its replacement completed in a fraction of the time, is actually a truer shape than its
predecessor and the flange turned down properly this time; nice fold and the right way. So not all bad. Just the lower horizontal to make now and then
time for trimming and welding.
|
|
|
Volvorsport
|
| posted on 15/3/13 at 12:29 AM |

|
|
what wheeling machine do you have ?
any pics ...?
www.dbsmotorsport.co.uk
getting dirty under a bus
|
|
|
Not Anumber
|
| posted on 15/3/13 at 09:23 AM |

|
|
+ 1
It would be very good to see the equipment you are using to fabricate these remarkable curved panels and even better to have a few pictures of you
actually using it.
|
|
|
John Bonnett
|
| posted on 15/3/13 at 12:59 PM |

|
|
I'm afraid my equipment's not very impressive 
But in my workshop I have an Edwards wheeling machine, a shrinker/stretcher and a beading machine or jenny. I don't have any motorised or power
tools like and Eckold or Pullmax.
Anyway here is my E.Wheel
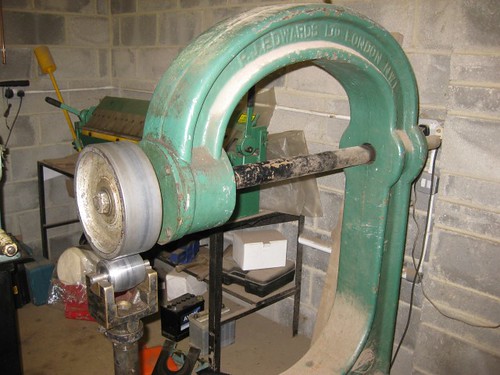
And a couple of pictures showing the lower tailgate aperture panel being developed. I wheeled a bit of curvature into it before turning the flange on
the jenny.
This is a picture showing the jenny with the side panel.
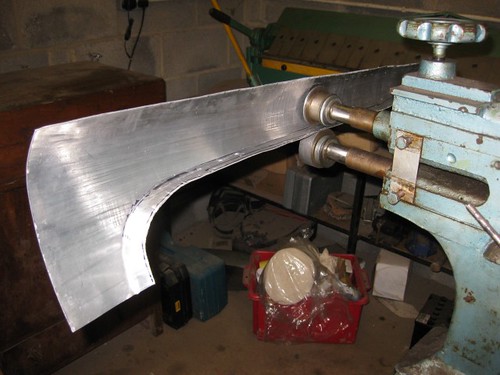
Pictures of lower panel
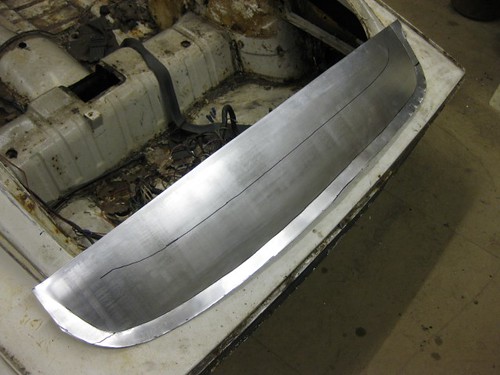
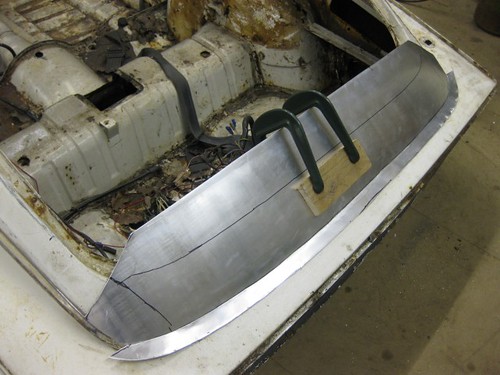
The next thing is to trim and turn down the flange for the gutter
|
|
|
John Bonnett
|
| posted on 15/3/13 at 05:18 PM |

|
|
Well it started off quite well but went wrong at the end. I may be able to save it but most likely will start again after a bit of a rest.
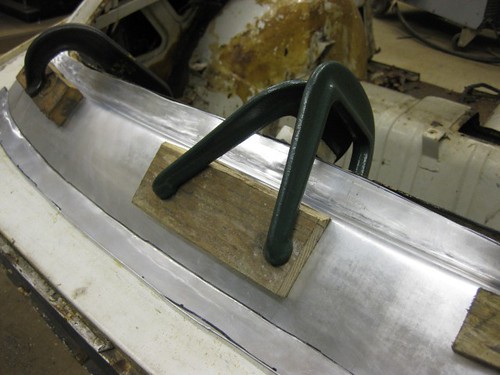
http://farm9.staticflickr.com/8365/8560351208_4efec61f07.jpg
[Edited on 15/3/13 by John Bonnett]
|
|
|
John Bonnett
|
| posted on 18/3/13 at 02:01 PM |

|
|
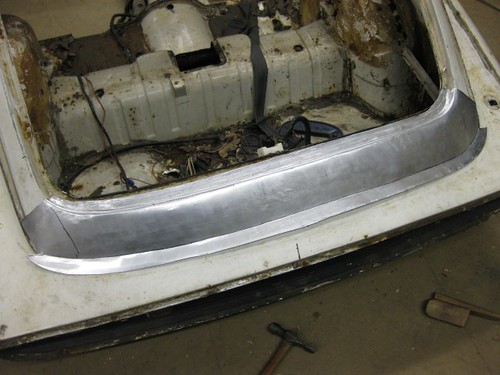
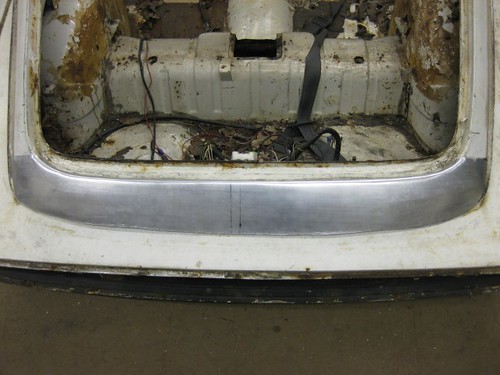
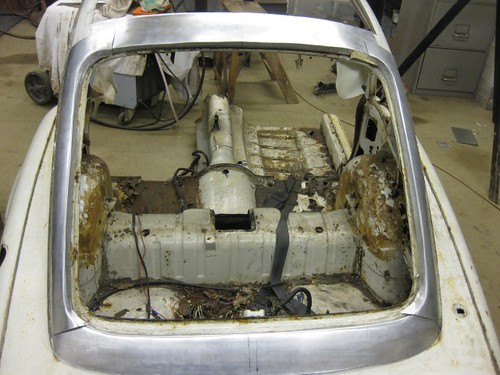
I have indeed started again and changed the approach to make it a bit easier. The crease on the bottom edge will now be in the deck panel rather than
this one. This has simplified things no end because the gutter return and the crease no longer have to be perfectly aligned.
|
|
|
John Bonnett
|
| posted on 24/3/13 at 09:54 AM |

|
|
Suffered a small set-back after having welded the lower gutter section onto the side roof panel I noticed that along its entire length, the weld was
full of porosity; loads of tiny pinholes. Serves me right for using four year old flux! The odd thing is that the test pieces were fine.
I mentioned this to Trev D and strangely enough, using the same make of flux, he has also had problems but in his case cracking of the weld.
I've been recommended a really good flux from TM Technology which I have just ordered up This is coming from the States so there could be a
delay before I can crack on.
|
|
|
boober
|
| posted on 24/3/13 at 06:30 PM |

|
|
hello john
is the crack at the start of the weld bead,or further in.
|
|
|
John Bonnett
|
| posted on 25/3/13 at 07:37 AM |

|
|
quote:
Originally posted by boober
hello john
is the crack at the start of the weld bead,or further in.
Trev didn't say but no crack on my weld Mark, just porosity.
There are many variables which will affect the weld and apart from the flux and filler not the least is the preparation of the material prior to
welding. I perhaps wasn't meticulous enough in removing every trace of aluminium oxide. So, from now on I'll be more aggressive with the
stainless steel wire brush and be absolutely certain that every trace of oxide has been removed.
[Edited on 25/3/13 by John Bonnett]
|
|
|
ceebmoj
|
| posted on 25/3/13 at 09:27 AM |

|
|
Do you have photos of the weld and other progress? I ask because I have no idea how a body is made like this and have found this a very interesting
thread.
|
|
|
John Bonnett
|
| posted on 25/3/13 at 11:11 AM |

|
|
quote:
Originally posted by ceebmoj
Do you have photos of the weld and other progress? I ask because I have no idea how a body is made like this and have found this a very interesting
thread.
If you look at the pictures I posted earlier in this thread, you will see that the roof is made up of a series of sub-panels which are welded together
and then planished (smoothed) to finish the complete panel. Gas welding is preferred because the weld bead is soft and malleable and can be easily
flattened back into the parent material.
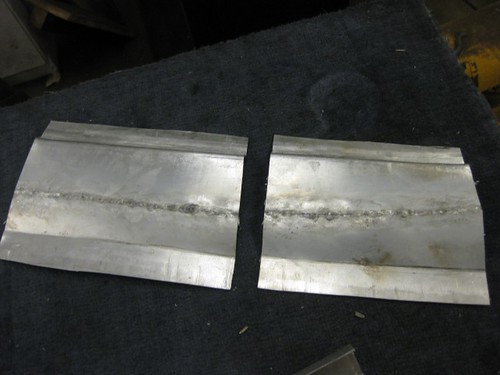
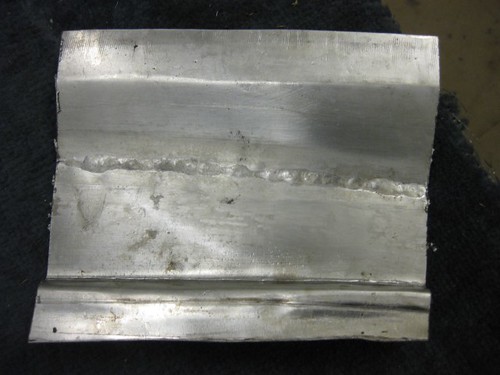
Here are a couple of pictures of a weld I did on a test piece. The second picture shows good penetration on the reverse side of the weld.
|
|
|
John Bonnett
|
| posted on 26/3/13 at 05:46 PM |

|
|
quote:
Originally posted by John Bonnett
Suffered a small set-back after having welded the lower gutter section onto the side roof panel I noticed that along its entire length, the weld was
full of porosity; loads of tiny pinholes. Serves me right for using four year old flux! The odd thing is that the test pieces were fine.
I mentioned this to Trev D and strangely enough, using the same make of flux, he has also had problems but in his case cracking of the weld.
I've been recommended a really good flux from TM Technology which I have just ordered up This is coming from the States so there could be a
delay before I can crack on.
My good friend Mark has let me have a sample of the TM Technology flux which I have now tried and not only has the porosity problem disappeared, the
resulting weld has never been brighter or cleaner. So, that little problem seems to be behind me.
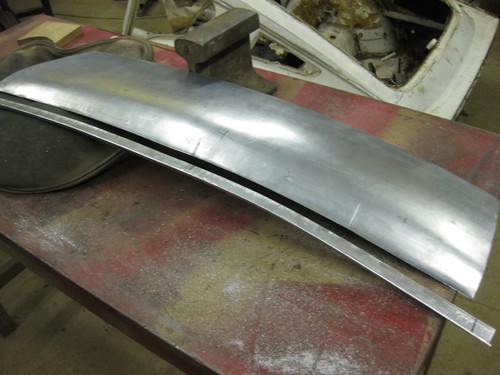
I managed to salvage the roof side panel and just needed to cut off the gutter just above the weld line. Picture attached showing new lower gutter
ready to be welded on.
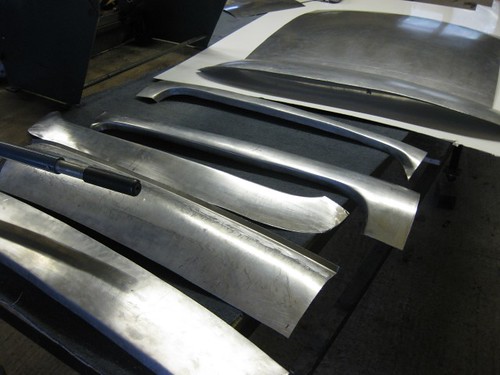
Once done, the rest of the roof panels will be finally trimmed and ready to be welded together.
|
|
|
boober
|
| posted on 26/3/13 at 05:50 PM |

|
|
good camera skills john do you do weddings
|
|
|
John Bonnett
|
| posted on 26/3/13 at 05:51 PM |

|
|
quote:
Originally posted by boober
good camera skills john do you do weddings
I do a good Best Man's speech!
|
|
|
ceebmoj
|
| posted on 26/3/13 at 09:07 PM |

|
|
How do you chose where to join the panels? when you flatten the welds does that not reshape the panel?
|
|
|
John Bonnett
|
| posted on 26/3/13 at 09:38 PM |

|
|
quote:
Originally posted by ceebmoj
How do you chose where to join the panels? when you flatten the welds does that not reshape the panel?
Good questions, both of them. I'm only a self-taught amateur and we'd need Trev D to provide a complete answer. But I do know that
choosing where to put the joints needs a bit of thought and planning. For minimum distortion during welding it's best to put the join on a curve
but it needs to be an outward curve to be able to planish it. If it were an inward curve it would be impossible to use a body file. Generally, from a
shaping point of view, joins would be needed in areas where there is a severe change in curvature or where a large amount of shrinking or stretching
is needed. or just to reduce the size of the panel into a manageable piece. So there are a number of factors that contribute to the decision.
The second question is also bang on the nail. Flattening the welds and pushing the metal back into itself can easily stretch the material and change
its shape. So it's good to keep the weld bead and the penetration to a minimum during welding and to file off the the bits of the bead that are
proud before planishing. This leaves the minimum of work to do with a hammer and dolly.
|
|
|
John Bonnett
|
| posted on 3/4/13 at 01:17 PM |

|
|
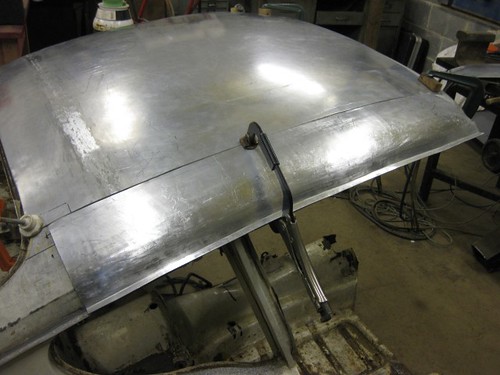
With all the roof panels formed, I'm now at the welding together stage so progress is being made; albeit slow.
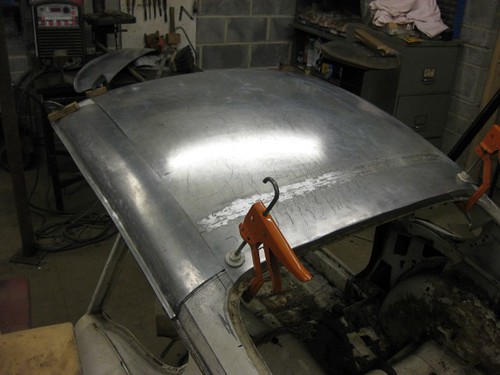
|
|
|
John Bonnett
|
| posted on 6/4/13 at 04:41 PM |

|
|
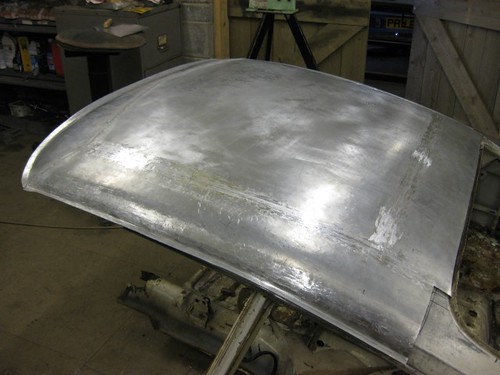
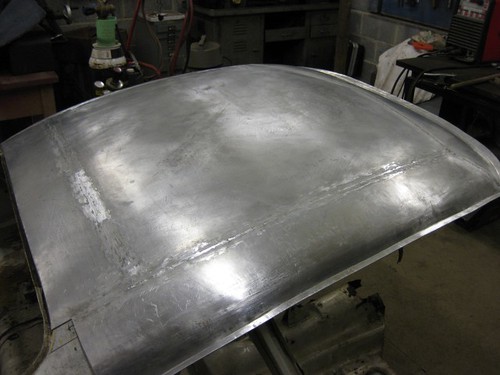
I've just completed welding the roof panels together and, amazingly, the assembly fits the buck so, happy days. There was hardly any distortion
during the welding process which was an unexpected bonus.
I'm now faced with a job that I find really challenging; even more than the welding. The metal finishing, bringing up the lows and planishing to
a nice smooth curvature. Hammer and dolly in the hands of a professional looks so easy but what job doesn't when carried out by a skilled
man?
|
|
|
John Bonnett
|
| posted on 20/4/13 at 02:43 PM |

|
|
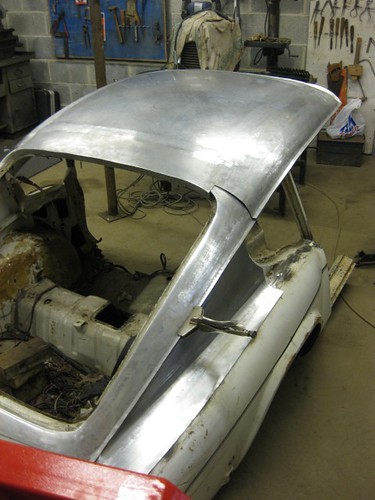
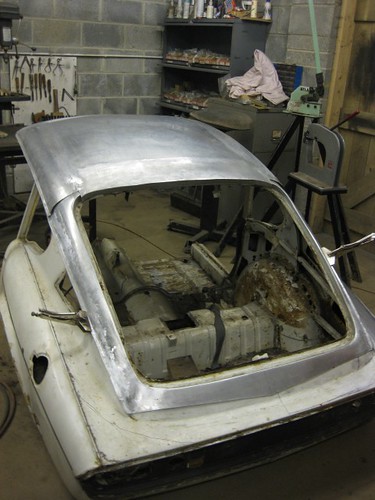
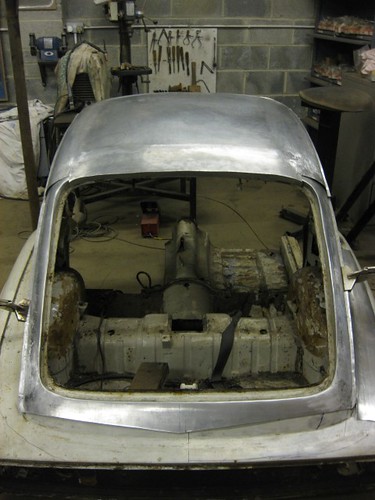
Work has been progressing steadily with many hours spent bringing up the lows on the roof. We are not quite there yet but there has to be a point at
which one says, that's good enough. I'm not quite at that point yet but not far off.
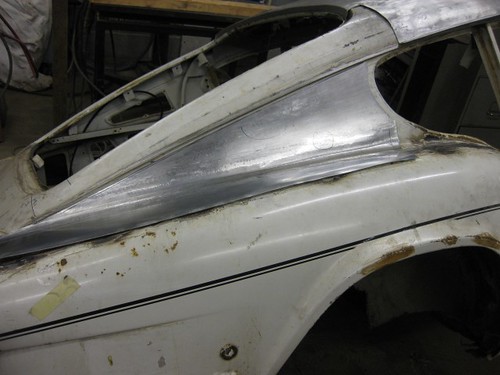
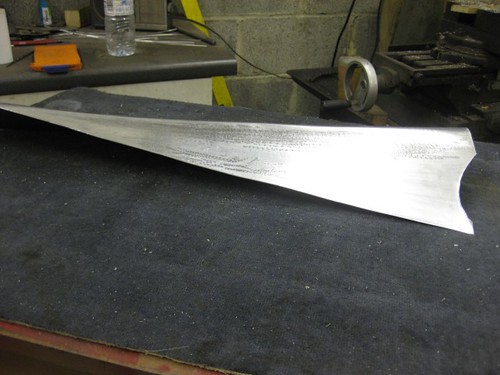
The panel rear of the quarter light was an interesting one to make with the reverse curve. I managed that one okay but I now have to make another one
for the other side and I always find the second one more difficult.
The three tailgate aperture panels are now welded but I can't weld them to the roof until I've finished the planishing but more
importantly until the panels immediately beneath are in place to provide rigidity.
A few pictures attached.
|
|
|


