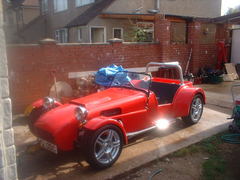
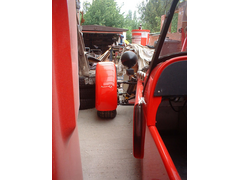
Does anyone have any idea how to make them from aluminium? I can't figure out how to make the varying radius.

[Edited on 9/3/05 by Mave]

The Dax Rush optionally has some sidepanels next to the enginebay, which are open to the rear, like pictured below. They have a curvature, which has a
radius of about 30 mm at the opening, going to a raius of about zero near the front suspension.
Does anyone have any idea how to make them from aluminium? I can't figure out how to make the varying radius.

[Edited on 9/3/05 by Mave]
The radius doesn't change, the top and bottom are cut off at an angle.
Are you sure? I'm pretty sure the radius does change.
Besides, if it wouldn't change, the panel could not fit so close to the top chassis rails at the front.
Looks to me like they bend it over the chassis, then pull it out 30mm at the back. Leaving the front against the chassis.. Obviously the bend over is longer to reach the chassis.
Nope, the radius of the bend is really something like 30 mm, so then the tube would have to have a 60 mm diameter.
Well they just use a bending machine to put a radius at the back, taking it as far forward as possible.. then doing the final bending at the front to
match the chassis...
Wouldn't be very difficult i'd imagine. Even using a wood with a 60mm diameter (tube shape) to do the bending.
Just give it a try, and see how it goes!
Don't make it too simple Ben. He obviously wants a complicated way of doing it. Too easy to whack it round the chassis member, scribe a line on it and cut off the excess. We did it on one 4 years ago and fastened the panel with rivnuts to make it removable. It finished in a straight line at the front but you don't see that behind the wheel.
We made some of these for my mates pre-lit westy a coulpe of summers back. Like the dax ones, they reduce to zero radius in order to fit over the
square tubes at the front. The dax ones go to square top and bottom cos their bottom chassis rails match the top rails. On a westy/locost the bottom
rails taper inwards more and get out of your way so to speak, so the bottom of the panel can just be a constant radius. Hope that makes sense.
We made a variable radius wooden former which sounds much more complicated than it is. Was very easy to make with some wood and a plane. The other
side of the former is for doing the bottom and is just a constant radius as I said above.
Before forming, the rear edge of the panel was folded over itself 180 degrees to give a blunt edge, as much for the stiffness of the final panel as
for Mr SVA. Turned out very well and I will be doing the same for my car.
Liam
EDIT: For some reason I cant attach pictures at the moment or I could show the former and the results. Oh well.
[Edited on 10/3/05 by Liam]
im making some grp louvred ones - similar but not exact .
Oh they were too big. Former pic...
Rescued attachment DSCF0016.JPG
Westy...


Rescued attachment DSCF0053small.jpg
Westy again...


Rescued attachment westy4small.jpg
Thanks Liam, that looks great; exactly what I'm looking for! I'll have to give it a try. Do you remember how thick the aluminium was?
Cheers,
Marcel
Not totally sure. 16 guage probably. I remember finding it a bit harder to bend than would have been ideal and thinking 18 guage would probably have
been better.
Liam
Am I right in assuming that 18 gauge is about 1 mm? And 16 gauge about 1,4 mm? (now where's the logic in that?)
Thanks again,
Marcel
16swg is 1.6 and 18gauge 1.2 iirc
do a search on "swg conversion" on google for more info..
Ned.
Thanks Ned, you're right. 18 gauge is 1,21 mm, 16 gauge is 1,6 mm.