
The trials and tribulations of a cack-handed car painter!
gingerprince - 12/5/10 at 06:39 PM
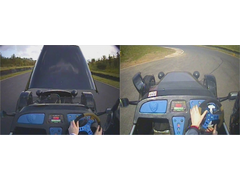
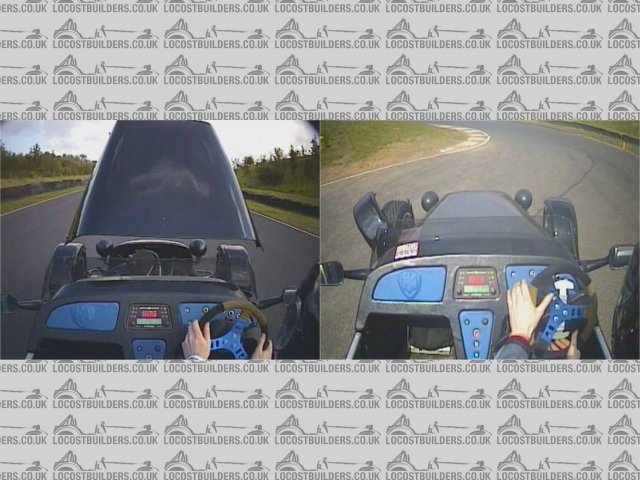
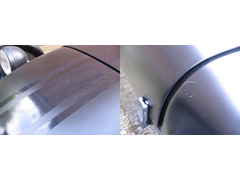
Some of you may recall I've had a couple of "incidents" involving losing parts of my car (bonnet and wing) on track days, ahem: -
Description
This resulted obviously in gashes, scratches, crazing from stress etc etc, leaving the bonnet for example with this sort of wound: -
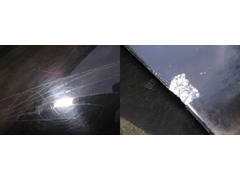
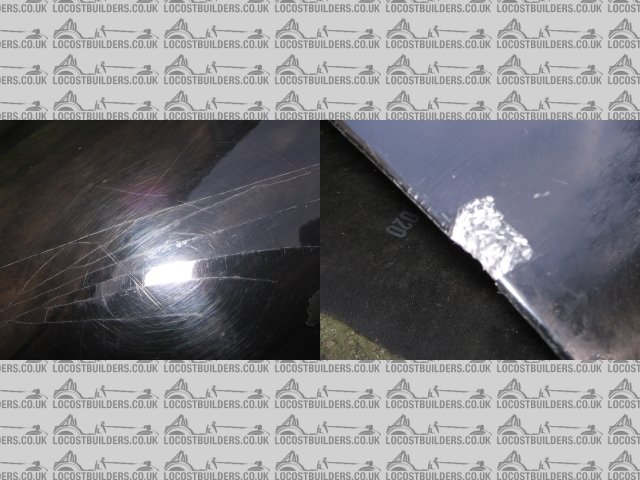
Description
So this winter I decided I'd have a go at repairing and painting it. Having never done anything like this before, I decided that a Matte finish
would be easier and more forgiving for the amateur. What a class-A plonker I really am! Rodney would have made a better decision!
Anyway, I took my inspiration from the Lotus Exige Stealth and set to work: -
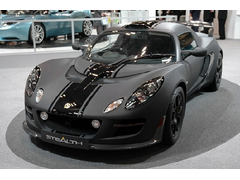

Description
Plan was to do front wings, rear wings, bonnet and nose-cone initially to make it all seem "designed" without having to paint every single
panel. Never got round to the rear wings in the end so they're still on the to-do list.
Wings had crazing, chipping on the edge and mis-shapen from where bolts had warped them over time. Bonnet was more of the same. So, knowing that
"preparation is 95%" I set to work. Extra fibreglass behind the strenghten where work was to be done, angry grind out the cracks, P40 annd
P38 fillers and knifing putty. High build primer. Missed a bit. More grinding, glassing, filling, priming, sanding etc etc, until I had a primer I
could eat my dinner off. Quite chuffed with myself.
So to the top-coat. I bought some matte black "military vehicle" paint from eBay, which is oil-based and hopefully more amateur friendly
(no drying-edge issue to worry about). Set out my garage ready for painting. Panel wiped, tack wiped and started painting. C*CK. I'd missed a
craze-crack, which hadn't shown through even the primer!! Figured that paint being oil-based rather then cellulose would "flow"
better, and sure enough it disappeared after a couple of coats. Fully expect it to come back though. Bonnet, wings and nose painted. Now to leave
to dry. All day to even be touch-dry (oil based, 5-6 hours "handle dry" ) . Return to garage late evening to remove parts to spare room to
fully cure for a few days (hard cure in 5-7 days apparently) only to find it'd attracted dust, flies etc!! Grrr. I'd wet the garage
walls, floor etc to hold as much dust as possible but clearly wasn't enough. Anyway, take stuff upstairs to see that it's not as
"handle dry" as I'd hoped, because there's now finger prints indents on the end of the bonnet!
Decide I'll try again in a few days. This time plastic sheeting "door" in front of garage door to minimise dust. Flat back paint a
bit to key it, prepare painting area. Paint mixed ready to go and notice a "gash" in one of the wings where the paint was too soft to
really flat back. Try to "feather" it out and paint, knowing really that it'll never work and will show, but I had the day off work
and I was painting that day! Sure enough it did. As did the bead of sweat that fell on the nose-cone (DOH!) As did the bit of the bonnet
where I caught my gun hose!!!!! What more could go wrong...?
Evening comes and I decide to "park" items in kitchen overnight to save getting fingerprints carrying upstairs. In the morning, don
oven-gloves to "spread the load" and carry everything upstairs, only to notice my big-ass belt buckle had taken a gash out of the bonnet!!
GRRRRRRRRRRRRRRRRRRRRRR!!!!
Leave things a couple of days to calm down and persuade the mrs to let me try and "touch up" the imperfections in the spare room (which is
due for a new carpet and paint so it don't matter  ) Level out imperfections, panel wipe and apply thin coat locally. One of the wings
crinkles!!! Probably due to solvent in panel wipe reacting with "soft" paint underneath top-coat!! Wait a few days more, try to fix.
Fail. And of course the texture of the touch-up is now slightly shinier than the rest of the paintwork. Decide "feck it" and just put car
back together and drive the blasted thing!
) Level out imperfections, panel wipe and apply thin coat locally. One of the wings
crinkles!!! Probably due to solvent in panel wipe reacting with "soft" paint underneath top-coat!! Wait a few days more, try to fix.
Fail. And of course the texture of the touch-up is now slightly shinier than the rest of the paintwork. Decide "feck it" and just put car
back together and drive the blasted thing!
Leave it all about 10 days in total ("hard" cure is 5-7 days according to book). Paint is still soft. Scratches easy. Create numerous
gashes when lining up bonnet etc. Bumcake. Think I've probably applied it too thick or something.
Obviously, being matt paint I can't just sand and polish them out, because it'll not be matt anymore!! Wish I'd just tried
"regular" paint which I could have buggered up and flat-sanded to perfection
Stripes arrive in post. Decide even though paint is sub-optimal to apply them anyway. They're cheap enough and at least it'll be obvious
what I'm "trying" to achieve rather than just have a sh1t flat front-end of car.
Apply stripes with supplied squeegie. Squeegie creates more scratches on bonnet and stripes - guess I pressed too hard!!!!
Anyway, paint is still soft, and I've not done the rear wings and that's now an autumn or next spring job probably (together with fixing
what I've already done!) Will probably see if it cures more over the summer, then flat it back just to see what happens - perhaps it'll
look okay, or perhaps I'll barcoat it and topcoat with something regular. Or perhaps I'll have to remove the bloody lot back to primer and
start over! Who knows...
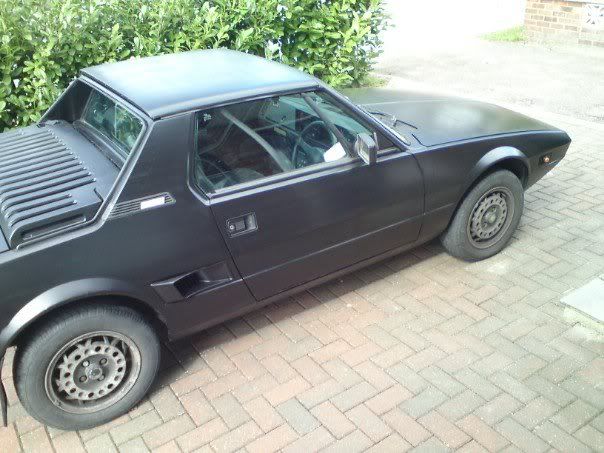
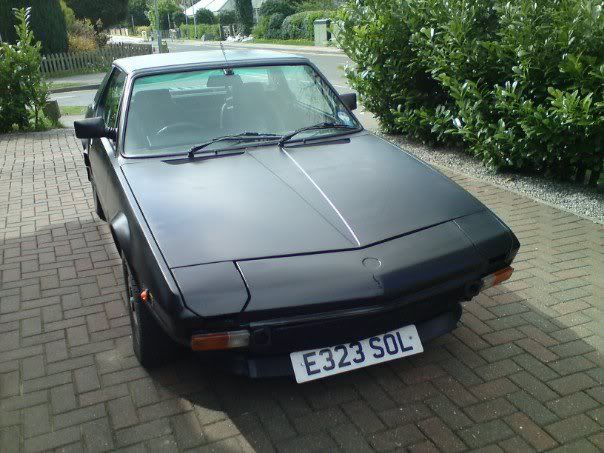
So this is the end result: -

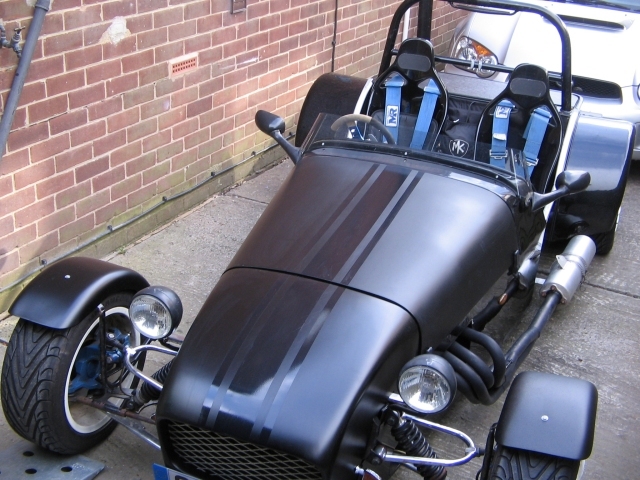
Description
Looks okay from a distance, but up close, scratches gallore: -
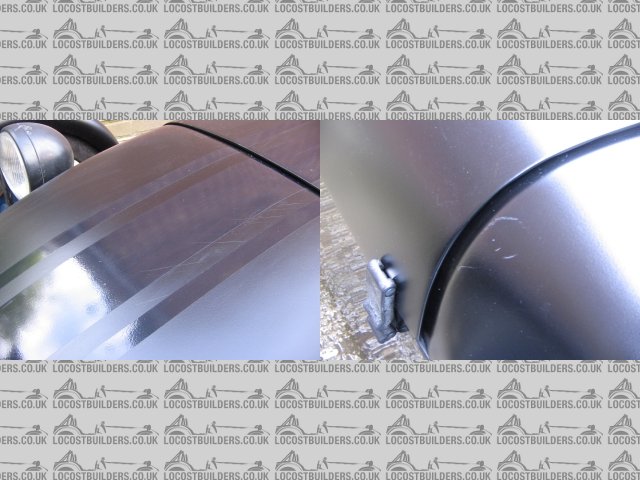
Description
All was done with one of these HVLP guns (with a smaller 1.5mm tip ordered separately): -
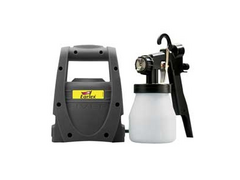
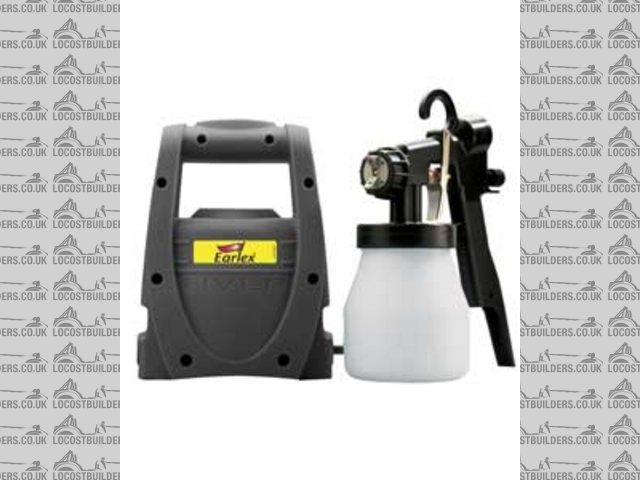
Description
I think the gun can turn out a decent job - the primer coat I was able to get looking pretty lovely with a bit of wet-sanding. Compressor setup would
mean less wet-sanding etc but no space and can't justify cost of decent setup.
So it's been an interesting learning experience! On the plus side it does look a little different from the ordinary, and I suppose with the
scratches it looks like I've had it like that "a while"
Time to forget about it for a few months and drive the t1ts off it
daniel mason - 12/5/10 at 06:45 PM
well done mate, a nice finish!
Coopz - 12/5/10 at 06:53 PM
I like it nice job
dlatch - 12/5/10 at 07:02 PM
love the bonnet flying off pic must have been a real oh S&*@%%it moment
Stuart_B - 12/5/10 at 07:05 PM
i like it, it is relay cool
stuart
55ant - 12/5/10 at 07:05 PM
to be honest i think it looks the nuts! really like that, and having the gloss arches is all good! so good effort.
dont intend on winding you up, but this is the x19 that needed a recoat, �22.00 of satin black rattle cans, one roll of masking tape and a windy day
later, got a rather nice finish, and its even been through a car wash!
COREdevelopments - 12/5/10 at 07:09 PM
Well done. It looks great.
Rob
A1 - 12/5/10 at 07:20 PM
thats f*cking nice!! love it!
ps. isnt it the elise scura?
r1_pete - 12/5/10 at 07:38 PM
Looks well, credit to your perseverance with that spray kit.
Just one word of advice for next time, you shouldn't wet sand primer, it is porus and holds onto moisture, which can cause bubbling in the top
coat.
Ivan - 12/5/10 at 08:22 PM
Think it looks great - remember - 98% of the people looking at it won't even notice the blemishes and the 2% that do will think they are just
normal war wounds.
Don't let the few blemishes spoil the car for you - it looks brilliant so get out there and use it as it is meant to be used, its a track and
twisties terror and not a trailor queen after all.
MikeRJ - 12/5/10 at 08:44 PM
quote:
Originally posted by Ivan
Don't let the few blemishes spoil the car for you - it looks brilliant so get out there and use it as it is meant to be used, its a track and
twisties terror and not a trailor queen after all.
Exactly, looks great in the pictures, and whilst your using it no-one can give it a close inspection 
It is annoying though when you've put so much work in and want it to be as close to perfect as possible.
[Edited on 12/5/10 by MikeRJ]
bi22le - 12/5/10 at 09:34 PM
Ah that story made me laugh (and cry!), what a rollercoaster!
That looks really nice, good effort.
Now get out there and DRIVE IT!!
[Edited on 12/5/10 by bi22le]
BenB - 12/5/10 at 10:44 PM
I was expecting something really pants looking. That looks very smart!!!
RK - 13/5/10 at 01:06 AM
I can totally relate to all that! I did my rear wings with so so results, much improved with polish later. The nose cone has been done twice and never
seems to look right, but I'm not putting a lot of worry into it! Put vinyl on the sides and bonnet. Should match everything one day, but not or a
while!
speedyxjs - 13/5/10 at 06:16 AM
That looks fantastic! Good work
jabbahutt - 13/5/10 at 06:47 AM
that looks superb
gingerprince - 13/5/10 at 08:06 AM
Thanks for the comments guys It does seem like I was ranting a bit, but I'm just a bit disappointed I've managed to scratch it. I guess
overall I should be pleased, it's a million times better than it was!!
quote:
Originally posted by r1_pete
Just one word of advice for next time, you shouldn't wet sand primer, it is porus and holds onto moisture, which can cause bubbling in the top
coat.
Really? How would you prep the primer for painting then? Dry sanding would just clog, and you'd still need to rinse it to get rid of the dry
powder from the sanding. Would you expect the finish from a high-build to be perfect enough out of the gun to paint straight on top with no further
prep?
r1_pete - 13/5/10 at 10:23 AM
If the primer is thoroughly dry it doesn't clog, just don't use too much pressure.
Use a panel wipe to get the dust off, this is solvent based so evapourates, then a final wipe over with a tac cloth.
02GF74 - 15/5/10 at 09:17 AM
quote:
Originally posted by gingerprince
Obviously, being matt paint I can't just sand and polish them out, because it'll not be matt anymore!!
how is the paint looking now?
I ask as I have used a mix of blackboard paint (matter than matt from the bible) and satin/matt on my land rover and is is porous - needs to be to be
matt although if used for balckaboards, it should be cleanable i.e. get rid of the chalk - so it tends to collect dust/mud/clay very nicely.
not a bov 2 me but probs not good on yer 7. (<-- my wee poor txt tl8k)
gingerprince - 15/5/10 at 09:30 AM
quote:
Originally posted by 02GF74
quote:
Originally posted by gingerprince
how is the paint looking now?
I ask as I have used a mix of blackboard paint (matter than matt from the bible) and satin/matt on my land rover and is is porous - needs to be to be
matt although if used for balckaboards, it should be cleanable i.e. get rid of the chalk - so it tends to collect dust/mud/clay very nicely.
not a bov 2 me but probs not good on yer 7. (<-- my wee poor txt tl8k)
I haven't got it proper dirty yet, but since it hasn't been polished in any way the surface still repels water (like an oily paint would)
so it certainly isn't porous. Hoping to go for a play this afternoon so will have to see how mucky I can get it
gingerprince - 15/5/10 at 09:30 AM
quote:
Originally posted by r1_pete
If the primer is thoroughly dry it doesn't clog, just don't use too much pressure.
Use a panel wipe to get the dust off, this is solvent based so evapourates, then a final wipe over with a tac cloth.
I'll do that next time, cheers.
stevegough - 15/5/10 at 08:25 PM
Another vote for an excellent job - shame you're not too happy with it yourself due to the scratches - we humans are our own worst critics!
I applaud your painstaking work, it is really something of a unique finish (even if it has a passing resemblance to the rust - bucket Fiat X19) !!
Well done!
Benzine - 15/5/10 at 08:36 PM
Didn't see this thread before, nice work! I'm about halfway through painting my MK matt black


