Theshed
|
| posted on 19/11/13 at 05:29 PM |

|
|
pdf to dwg cad question
I need to make up a new front plate for my gearbox. there are about 15 mounting holes in what appear to be random places. It has been very difficult
to do accurate measurements by my traditional means of using digital calipers and plotting in cad - printing out then comparing. There is not much
room for error here and I will be drilling holes in a big (expensive) chunk of metal.
I have priced out using a CMM machine and it would cost about £400. I am looking for a locost solution.
I was thinking about putting the part (it has a flat side) on the office photocopier and scanning into a pdf. Thereafter using a pdf - dwg convertor
(which I do not have but some shareware out there). Has anybody tried this? Better still does anybody have a CMM machine in their shed and want
beer?
Whilst I have a fairly large milling machine this part will be 450mm squared. I was half thinking of a bit of subcontracting - any recommendations for
cnc milling shops with a tolerance of mad people?
|
|
|
|
|
minitici
|
| posted on 19/11/13 at 06:00 PM |

|
|
Photo copiers (& printers) tend to shrink/elongate in at least one axis, therefore not an accurate way to do this.
|
|
|
nick205
|
| posted on 19/11/13 at 07:11 PM |

|
|
Also, most copier scanners are A3 max unless you have access to a larger machine.
Thinking aloud....could you turn down some bolts to make centre points, then fit them into the part, then lay if carefully on a sheet of MDF To get
accurate hole centre measurements?
Once you have the centres you should be able to use trig to work out the true positions relative to each other for drawing purposes. Your 1:1 print
method would then work a sad double check.
|
|
|
Theshed
|
| posted on 19/11/13 at 07:42 PM |

|
|
I have used the pointy peg method before and fair dues it is quite accurate - I am probably looking for a lazy shortcut. Reverse engineering some bits
is easy bolts in a line or in whole mm's or inches. This part - which is off an Xtrac sequential box was a one off and seems to have a
combination of inch and metric spacings at downright weird angles.
The part would fit on the copier but if the x/y scale was off I would be back to square one.
Thanks for the help so far.
|
|
|
Fred W B
|
| posted on 19/11/13 at 07:59 PM |

|
|
I presume you saying you will CNC the final part? Measure it as best you can, and then make a test part in MDF to test fit before you cut the real
part?
Cheers
Fred W B
You can do it quickly. You can do it cheap. You can do it right. Pick any two.
|
|
|
scimjim
|
| posted on 19/11/13 at 08:07 PM |

|
|
Photocopy it and transfer that straight to MDF or alloy, then fine tune?
|
|
|
me!
|
| posted on 19/11/13 at 09:01 PM |

|
|
What about taping some graph paper to it and using that to work out the positions? Depends how accurate it needs to be really- is it supporting
bearings/shafts etc or just a cover plate? Then as Fred said, try first in MDF!
|
|
|
v8kid
|
| posted on 19/11/13 at 10:47 PM |

|
|
quote:
Originally posted by Theshed
I have used the pointy peg method before and fair dues it is quite accurate - I am probably looking for a lazy shortcut. Reverse engineering some bits
is easy bolts in a line or in whole mm's or inches. This part - which is off an Xtrac sequential box was a one off and seems to have a
combination of inch and metric spacings at downright weird angles.
The part would fit on the copier but if the x/y scale was off I would be back to square one.
Thanks for the help so far.
Why not use the pointy peg method to transfer the points to a large sheet of graph paper? Then just count squares. How much lasier can you get
You'd be surprised how quickly the sales people at B&Q try and assist you after ignoring you for the past 15 minutes when you try and start a
chainsaw
|
|
|
Theshed
|
| posted on 20/11/13 at 07:32 AM |

|
|
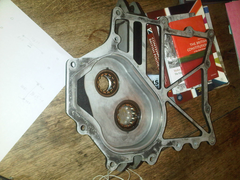
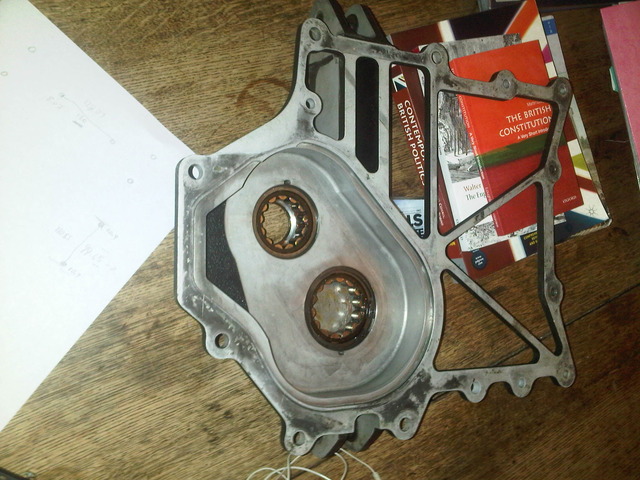
Its a question of accuracy. The plate supports the input shaft for the transaxle. Some of the bolt holes are easy - nice logical pattern. others are
weird. Perhaps a picture might help...
 
transaxle front cover
I would like to do a bit better than +/- 0.1mm which I find tricky with paper method.
You can see that the bottom wishbone mountings attach to the plate.....in the wrong place. I have obtained a nice magnesium oil tank/bellhousing which
fits the engine and has a "add on" plate where adjustable suspension mountings bolt on. I have not decided whether to use a thin (circa
20mm) adapter plate and preserve the bearing housing - wish I could do manually on my mill or to make up a whole new plate incorporating new mountings
- which I would need to have made.
|
|
|
Fred W B
|
| posted on 20/11/13 at 07:42 AM |

|
|
I'd be suprised if that assembly relies on the securing bolts for proper alignment on assembly, it looks like their are some dowels that do
that? Those are the holes to worry about, id think +/- 0.1 should be plenty good enough for the bolt holes
If no dowels maybe it locates on the recess in the lip of the casing?
cheers
Fred W B
You can do it quickly. You can do it cheap. You can do it right. Pick any two.
|
|
|
me!
|
| posted on 20/11/13 at 07:49 AM |

|
|
I'm sure you've tried this already, you say it's a one off- do you know who made it? They might still have the cad/drawings
available. Also I assume XTrac would be able to give you the positions of the bearing housings vs the bolt holes + dowels on the cover plate, even if
they aren't responsible for the rest of it.
|
|
|
davidimurray
|
| posted on 20/11/13 at 08:40 AM |

|
|
Have you got access to a milling machine with a DRO? You could simply get a electrical touch probe, touch off 3 points in every hole and record the
coordinates then transfer it over to CAD to get accurate positions. You wouldn't neccesarrily need a big mill as you could do overlapping
sections which you could combine in CAD to mkae the whole unit.
Gallery 1 http://www.facebook.com/media/set/?set=a.116893465324.130778.601005324
Gallery 2 http://www.facebook.com/media/set/?set=a.245243755324.181913.601005324&l=a9831a9319
Gallery 3 http://www.facebook.com/media/set/?set=a.440671625324.232627.601005324&l=3f0d42c523
Gallery 4 http://www.facebook.com/media/set/?set=a.490098255324.297598.601005324&l=efb083b7df
Gallery 5 http://www.facebook.com/media/set/?set=a.10150244028550325.366987.601005324&l=583fd5cd3a
Gallery 6 http://www.facebook.com/media/set/?set=a.10150550640070325.430417.601005324&type=3&l=fe779b358c
Duratec Engine Swap https://www.facebook.com/media/set/?set=a.10152527759580325.1073741828.601005324&type=1&l=40aae5e72f " target="_blank"> https://www.facebook.com/media/set/?set=a.10152527759580325.1073741828.601005324&type=1&l=40aae5e72f
|
|
|
mcerd1
|
| posted on 20/11/13 at 10:41 AM |

|
|
quote:
Originally posted by Theshed
Thereafter using a pdf - dwg convertor (which I do not have but some shareware out there). Has anybody tried this?
Used that stuff for some old drawings at work - its ok for what we needed at the time, but I wouldn't say it was accurate enough for machining

they tend to convert most things to hundreds of 'L' shaped lines - including circles!
so you might be better off with the low tech methods 
-
|
|
|
gremlin1234
|
| posted on 20/11/13 at 05:51 PM |

|
|
if you do scan it on a copier or similar, then also scan a scale (ruler)
|
|
|


