dave1888
|
| posted on 9/4/04 at 03:49 PM |

|
|
rear beam bushes
Anyone tried fitting the large insulator bushes on the sierra rear beam ( the large donut bushes). I have been trying all day with no luck 
|
|
|
|
|
givemethebighammer
|
| posted on 11/4/04 at 09:36 AM |
|
|
I fitted the poly bushes from Chester sports cars to my Cat E1 as follows:
1. Swore loads cutting the old ford ones out !!!
2. Made a "press" as detailed in the picture below, using 5mm steel plate, M10 stud and some nuts. The spacer tube was an old "pipe
coupling" slightly wider than the hold in the beam. I got this from the scraps bin of the local steel supplier. It has a wall thinness of about
4mm and is threaded on the inside. I sure a piece of thick walled pipe would do the same job though. I'll take a picture if you need further
clarification.
3. Lubricated the bush with a little GT85 teflon spray (could use washing up liquid).
4. Tightened the top nut until the bush popped into place - very scary like loading up a crossbow, keep yourself well out of the way of the ends of
the stud in case it breaks and launches it self at you.
PS - when you fit it to the car make a soild steel plate (4mm or 5mm) to cover the entire top of the bush. This will stop the bush pulling through the
beam under extreme loading. I use the same plates as I made to pull the bushes into the beam.

 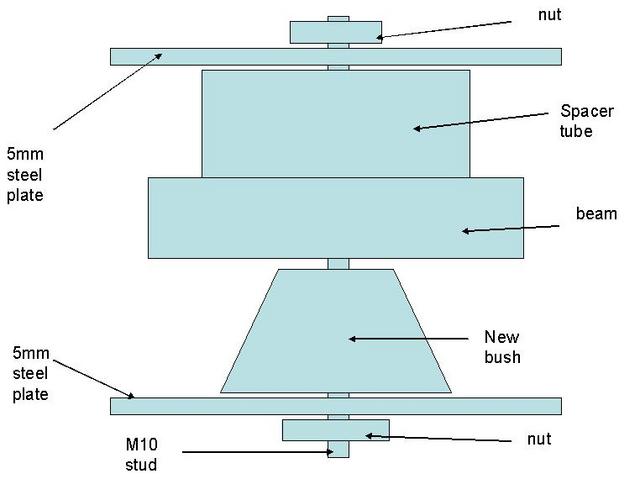
Rescued attachment bush.JPG
|
|
|


