
3D printed wheel centre caps..Possible?
tims31 - 6/7/20 at 11:05 AM
Hi following on from locking my wheel hub, I have been thinking about wheel centre caps but when I have looked previously I had no luck in finding any
for my wheels.
This has got me wondering if it would be possible to get some 3D printed. I have no idea about 3D printing and don't know if the locating tabs
shown in the attached image would allow the flexibility to keep the cap located without snapping off.
It seems like someone else has already tried judging by this image but could any of those that are experienced in 3D printing tell me if its possible.
Also, what programme would I need to use to produce a file so these could be printed. As you can probably tell, I have no idea about 3D printing but
would like to get to know more.

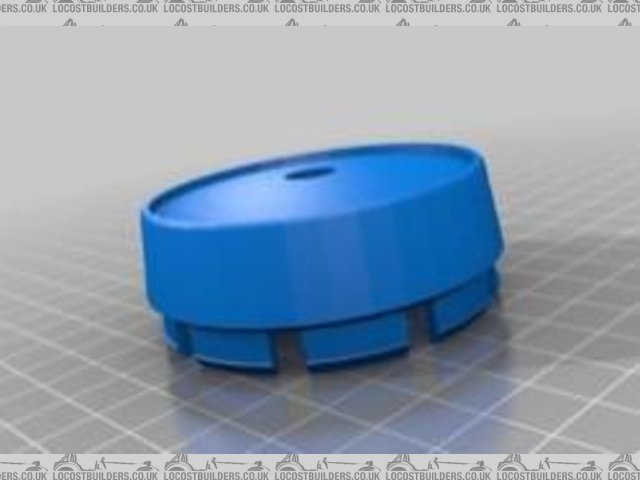
Description
I would need my caps to be deeper than the one above as the shaft and nut protrude through the centre of the wheel.

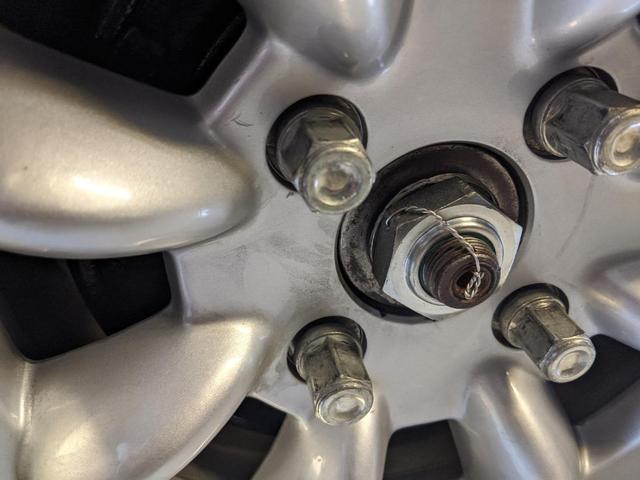
Description
Something like this

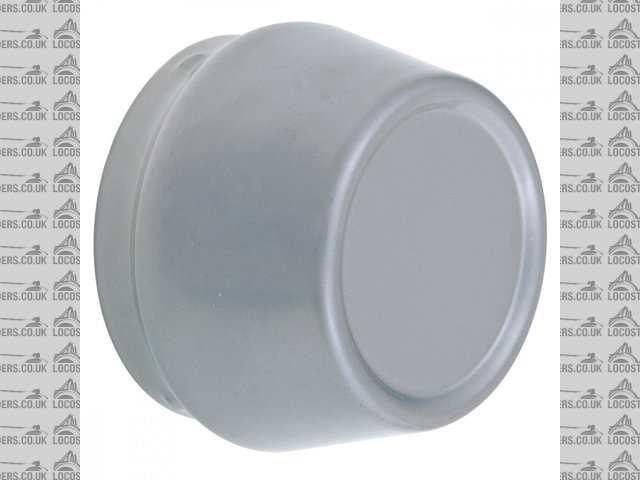
Description
David Jenkins - 6/7/20 at 11:28 AM
There's no reason why it shouldn't work - the hardest part would be to get the design files drawn up. Usually the design software would
generate a STL file that could be processed and printed.
If you have a STL file then there are lots of 3d printing agencies who could print the parts for you - I found loads with a Google search.
A decent agency should be able to print in something durable, such as ABS or Nylon. ABS is printable on a home printer, but it can be a real PITA at
times. Nylon is only for really skilled folk as it requires a much higher print temperature than found on a run-of-the-mill home printer. Don't
use PLA as it degrades over time, and softens at quite low temperatures.
tims31 - 6/7/20 at 12:07 PM
quote:
Originally posted by David Jenkins
There's no reason why it shouldn't work - the hardest part would be to get the design files drawn up. Usually the design software would
generate a STL file that could be processed and printed.
If you have a STL file then there are lots of 3d printing agencies who could print the parts for you - I found loads with a Google search.
A decent agency should be able to print in something durable, such as ABS or Nylon. ABS is printable on a home printer, but it can be a real PITA at
times. Nylon is only for really skilled folk as it requires a much higher print temperature than found on a run-of-the-mill home printer. Don't
use PLA as it degrades over time, and softens at quite low temperatures.
Thanks for that, guess i'll do some reading up and see where I get. Any suggestions on programs to do the design in?
nick205 - 6/7/20 at 12:10 PM
Echoing David's comments, there's no reason it shouldn't work. Getting the 3D model produced might be the costly part. The spring
tabs you need to secure the cap in place could be reinforced with ribs inside to stop the snapping off too easily. If you find a 3D modeller with
some plastic component design experience they'll understand this aspect and should be able to design the features in for you. You'll need
to have accurate measuremants of the wheel centre where the part has to fit into as well.
watsonpj - 6/7/20 at 12:19 PM
Hi
yes I'm about to do some myself in either abs or petg either will be good. I'll do one of mine as a try out and share some images. I was
going to make some flexures with tunable bumps on the bottom to hold them in as that seems to be the normal way of holding them in.
Once I'm happy with mine if you want to supply some dimensions I can print some for you if you want.
The shape/design can be anything you want i hadn't model anything but just knocked something together quickly like below..
doesnt even have to be completely cylindrical could be fluted on the side or if you want writing or logo it can be in any orientation, so straight
across or around the perimeter.

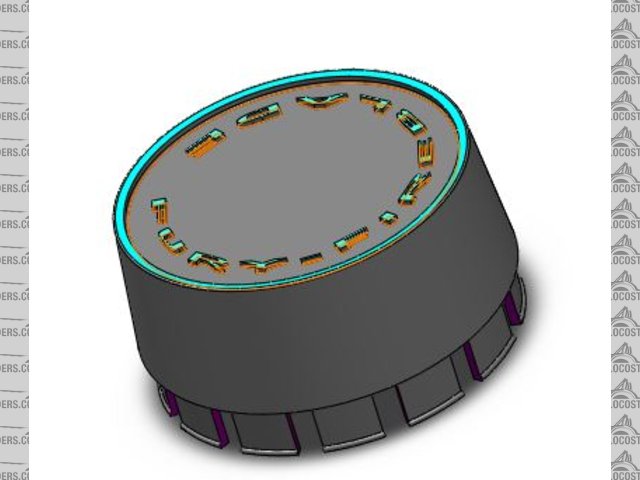
fury hub cap
Pete
tims31 - 6/7/20 at 12:59 PM
quote:
Originally posted by watsonpj
Hi
yes I'm about to do some myself in either abs or petg either will be good. I'll do one of mine as a try out and share some images. I was
going to make some flexures with tunable bumps on the bottom to hold them in as that seems to be the normal way of holding them in.
Once I'm happy with mine if you want to supply some dimensions I can print some for you if you want.
The shape/design can be anything you want i hadn't model anything but just knocked something together quickly like below..
doesnt even have to be completely cylindrical could be fluted on the side or if you want writing or logo it can be in any orientation, so straight
across or around the perimeter.


fury hub cap
Pete
Excellent, thats exactly what I would be after. I was thinking of using the Fury badge logo I have and creating an outline of this in Illustrator to
go in the centre cap.
I'll get some dimensions and send onto you Pete, thanks. Obviously add some beer tokens for your work...


Description
[Edited on 6/7/20 by tims31]
r1_pete - 6/7/20 at 01:11 PM
Car SOS had some printed for a mk1 astra gte with the cross pattern wheels, so yes perfectly doable.
tims31 - 6/7/20 at 02:33 PM
quote:
Originally posted by r1_pete
Car SOS had some printed for a mk1 astra gte with the cross pattern wheels, so yes perfectly doable.
I should have looked on Youtube first, there are loads of posts about printing wheel caps....
BenB - 6/7/20 at 07:35 PM
If you haven't got a 3d printer this is an excellent reason to get one. I use mine weekly. All kinds of projects lend themselves to 3d printing.
The average sit-on-a-sofa-watching-netflix type person would never use it but I reckon on this forum most people would find one very helpful.
I've recently discovered PETG and it's good! ABS I liked for a while but without a heated enclosure it's hard work due to delamination.
PLA is rock hard but brittle and UV destroys it. I still use ABS for small stuff when the delam isn't going to be an issue.
nick205 - 7/7/20 at 07:03 AM
quote:
Originally posted by BenB
If you haven't got a 3d printer this is an excellent reason to get one. I use mine weekly. All kinds of projects lend themselves to 3d printing.
The average sit-on-a-sofa-watching-netflix type person would never use it but I reckon on this forum most people would find one very helpful.
I've recently discovered PETG and it's good! ABS I liked for a while but without a heated enclosure it's hard work due to delamination.
PLA is rock hard but brittle and UV destroys it. I still use ABS for small stuff when the delam isn't going to be an issue.
Well said!
I too think many LCB forum members would enjoy having one and make regular use of it. There would probably be a fair bit of design sharing going on
between members as well.
Guy I work with (for example) wanted a replacement knob for his gas BBQ. Couldn't get one from Homebase or the BBQ manufacturer, but it could
have been 3D printed pretty easily giving his BBQ a few more seasons use.
tims31 - 7/7/20 at 07:05 AM
Thanks Ben, I'm not one for sitting around on the sofa watching tele much. I'll be looking into 3D printers soon but for now I dont really
have the funds to buy one.
Will give me time to do my research and find out more about them.
Mr Whippy - 7/7/20 at 07:56 AM
If you have windows 10 it may have Paint 3D on it which allows you to design things with solid shapes and then has the option of sending the models to
Companies who can then print them. I haven't used it myself other than model a few parts but looked quite good.
SteveWalker - 7/7/20 at 09:09 AM
You can download AutoDesk's Fusion 360 free, for non-commercial use. I can't remember if it is a 12 month licence or not.
HowardB - 7/7/20 at 09:40 AM
fusion 360 gets good reviews - there are many others sketchup is the most oft picked web tool. TinkerCAD is used by some big players for 3d printing
trial parts.
There are many more some are available for 7day trials but may not allow saving out of parts.
I like Solidworks 
David Jenkins - 7/7/20 at 09:48 AM
I use OpenSCAD - but that's a nightmare unless you're used to writing programs!
It's free though, and runs on almost any platform.
tims31 - 7/7/20 at 10:00 AM
quote:
Originally posted by HowardB
fusion 360 gets good reviews - there are many others sketchup is the most oft picked web tool. TinkerCAD is used by some big players for 3d printing
trial parts.
There are many more some are available for 7day trials but may not allow saving out of parts.
I like Solidworks 
I have used skecthup for some design things but never something that would be made from the file and a while since I used it. I'll look at a few
of these suggested and see where I go. Have replied to your U2u Howard, thanks.
nick205 - 7/7/20 at 10:03 AM
Many many years ago I used Solid Edge 3D CAD at work, but then moved to a sales role. Now I ask favours of our CAD engineer if I need/want things
modelled for a look-see. He's pretty fast and has a good understanding of injection moulded plastic design and sheet metalwork as well. It
often helps save time and effort before I start hacking at bits of material to see my ideas will work.
I have tried using Sketchup, but must admit I lost patience with it. I think I felt I should have been getting quicker results (perhaps too impatient
to spend time learning how to use it effectively).
BenB - 7/7/20 at 12:00 PM
I use Freecad as it's free and open source. I looked at alternatives but decided if I was going to learn a whole CAD system it would have to be
one which I could use long term. It's actually good. I don't have anything to compare it with but so far so good! Only limitation is it
doesn't do threads but I cut them.
tims31 - 7/7/20 at 12:06 PM
quote:
Originally posted by nick205
Many many years ago I used Solid Edge 3D CAD at work, but then moved to a sales role. Now I ask favours of our CAD engineer if I need/want things
modelled for a look-see. He's pretty fast and has a good understanding of injection moulded plastic design and sheet metalwork as well. It
often helps save time and effort before I start hacking at bits of material to see my ideas will work.
I have tried using Sketchup, but must admit I lost patience with it. I think I felt I should have been getting quicker results (perhaps too impatient
to spend time learning how to use it effectively).
Agree with you about Sketchup but there are lots of quick tutorials on Youtube that got me started and enough for what I needed to do but not what I
would call a complete CAD solution but okay for computer modelling.
pmc_3 - 7/7/20 at 12:33 PM
quote:
Originally posted by tims31
Thanks Ben, I'm not one for sitting around on the sofa watching tele much. I'll be looking into 3D printers soon but for now I dont really
have the funds to buy one.
Will give me time to do my research and find out more about them.
We've got one at the office Martin, Joe is always making bits with it. I'll find out what software we use and drop you a message.
tims31 - 7/7/20 at 12:49 PM
quote:
Originally posted by pmc_3
quote:
Originally posted by tims31
Thanks Ben, I'm not one for sitting around on the sofa watching tele much. I'll be looking into 3D printers soon but for now I dont really
have the funds to buy one.
Will give me time to do my research and find out more about them.
We've got one at the office Martin, Joe is always making bits with it. I'll find out what software we use and drop you a message.
Thanks Pete, that would be good. Hope to speak to you soon....
loggyboy - 7/7/20 at 01:14 PM
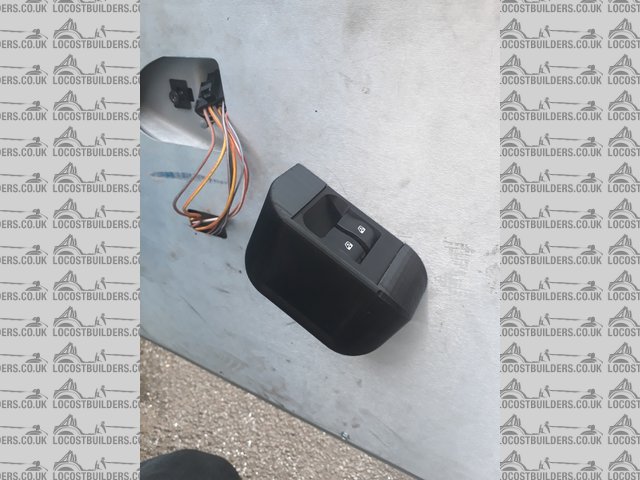
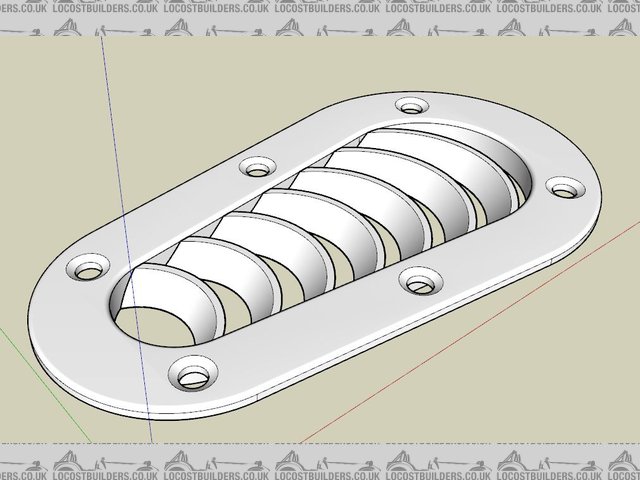
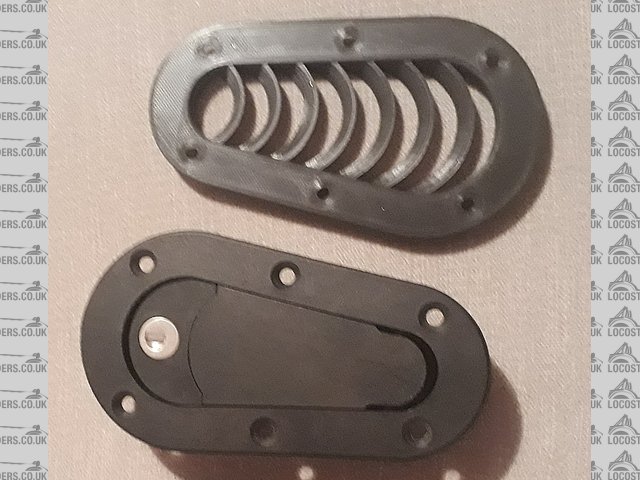
IMO Sketchup is superb, especially for 3d printing. Apart from some basic questions asked from a colleague, I picked it up really easily and found it
one of the most intuitive and simple design programs id used. (compared to Autocad, revit, fusion etc).
I do all my 3d printing with sketch up and have mocked up some pretty good and complex designs from it.


Description

Description

Description

Description

Description
With regards to centercaps, there's a guy on cliosport done some recently, but in PLA i suspect they wont weather well (PLA is prone to warping
with heat and moisture). However once designed the price to print is so low they could be considered disposable, or you could prime and paint them to
seal them better.
https://cliosport.net/threads/3d-printed-speedline-2118-centre-caps-%C2%A320-25-posted-set-of-four.832908/ (not sure if that link will work for non
members)
David Jenkins - 7/7/20 at 01:15 PM
tims31 - you're probably starting to realise what a can of worms you're opening!
The real hard work in 3D printing is the design of the part, followed by the inevitable redesign when the part doesn't quite fit properly, or
doesn't do what it is supposed to do. This means that it is way cheaper to learn how to design your own parts, rather than pay someone to do it
for you. The actual printing is just a mechanical process that's easily learned, and that usually takes very little time. It's just a craft
- the more you do it, and the more care you take with experience, the better your end-products will become.
motivforz - 7/7/20 at 01:31 PM
I've offered on here before, but if anyone wants a small CAD design job done FOC then drop me a line. Happy to do anything to help out on LCB as
I've had so much info from this forum. I did the gearstick and handbrake trim surround on my old Fury which turned out alright. Modellers putty
and gloss black paint meant you almost couldn't tell it was 3D printed (almost - not quite!).
harmchar - 7/7/20 at 04:40 PM
I started to dabble in the 3D printing after getting a deal on an Aldi special. A Balcho Touch. £149 iirc.
I also used Fusion 360 as it's very well supported on YouTube with helpful videos.
Problem I can see with the design above is printing the raised lip (highlighted in green). If printed as it's modelled, the internal would have
to be solid or infill. If printed the opposite way with the green highlight on the print bed, the centre with the logo/writing would be floating off
the bed, which can't be done.
Would be interested how another printer/designer would get round this.
Good luck with the project.
motivforz - 7/7/20 at 05:28 PM
I would print this in the orientation like a cup rather than a hat to minimise the use of support material. This makes the words really hard to
achieve though on the outside and because of the size of the font I'd suspect you wouldn't be happy with the resolution - i'd expect it
to look a little grainy. Generally the bolder the better.
Overhangs (such as the snap in tangs) are generally possible without support material up to an angle of 45° from vertical, but reducing the angle and
overhang by design is best where possible.
tims31 - 7/7/20 at 06:14 PM
quote:
Originally posted by David Jenkins
tims31 - you're probably starting to realise what a can of worms you're opening!
The real hard work in 3D printing is the design of the part, followed by the inevitable redesign when the part doesn't quite fit properly, or
doesn't do what it is supposed to do. This means that it is way cheaper to learn how to design your own parts, rather than pay someone to do it
for you. The actual printing is just a mechanical process that's easily learned, and that usually takes very little time. It's just a craft
- the more you do it, and the more care you take with experience, the better your end-products will become.
I'm quite pleased actually David, I know nothing about it, but it has sparked an interest and another possible hobby to dable with over the
winter months when the weather is crap.
There is some really useful information and tips coming out, the comment about the cap that has been designed with the lettering and printing up the
other way is interesting. I guess you can only print (cup down) orientation with the support printing otherwise it collapses and has nothing to print
onto. Hadn't even thought about that.
As for finish, what product gives the best smoothest finish, and can it be sanded and painted afterwards.?
David Jenkins - 7/7/20 at 07:41 PM
quote:
Originally posted by tims31
As for finish, what product gives the best smoothest finish, and can it be sanded and painted afterwards.?
Most plastics can be given a nice finish as long as you're prepared to fill and paint - a lot of people do this.
Another trick with ABS is to put the piece in a container that has a puddle of acetone in the base (the piece doesn't actually touch the piece).
The vapour softens the ripples on the surface and smooths them out. There a load of videos on YouTube about this. The problem is that ABS can be a
PITA to print at home unless you've got more advanced kit, e.g. a heated chamber in which the parts are built up.
In my experience, ABS can sometimes just work and give a nice result, and on another day trying to print the same part on the same printer with the
same filament just won't work. Most of the time I stay away from it! There's another filament called PETG that's easier to print, but
needs practice to make a decent print. I don't know how weather-resistant that stuff is though, but I believe it's good.
watsonpj - 7/7/20 at 11:42 PM
The model i put up is to be printed in the orientation shown with infill. The reason for this is to get the best surface finish especially around the
detail which will be the Fury emblem. Printing it that way up could pose a problem so it will use a 30% infill but with either a brim or a full
elephant foot at the base of each flexure to ensure adhesion . I did try to print in abs tonight (as i had it loaded for something else) without the
brim but as expected it had a bed adhesion problem so I will swap to PETG tomorrow as its a bit better to deal with and I have that in black (abs
purple). Layer height is likely to be 0.2 so probably a 3-4hrs per part.
The part is 31g but with infill is 67g so there is a lot of infill so it over doubles the cost of the part but the extra 93p saves a lot of clean up
afterwards so is worth it .
The modeling is the easy bit trying to work out the best way to orient a part or to change the design to minimise support (time/cost) and also ensure
the cosmetic faces are tops or sides to get the best quality. sometimes its just easier to make it as more than one part which still may happen here
as then I can print the logo on a fine setting and the main body on a coarse but upside down so no infill is required.
Pete
loggyboy - 8/7/20 at 12:04 AM
quote:
Originally posted by watsonpj
The model i put up is to be printed in the orientation shown with infill. The reason for this is to get the best surface finish especially around the
detail which will be the Fury emblem. Printing it that way up could pose a problem so it will use a 30% infill but with either a brim or a full
elephant foot at the base of each flexure to ensure adhesion . I did try to print in abs tonight (as i had it loaded for something else) without the
brim but as expected it had a bed adhesion problem so I will swap to PETG tomorrow as its a bit better to deal with and I have that in black (abs
purple). Layer height is likely to be 0.2 so probably a 3-4hrs per part.
The part is 31g but with infill is 67g so there is a lot of infill so it over doubles the cost of the part but the extra 93p saves a lot of clean up
afterwards so is worth it .
The modeling is the easy bit trying to work out the best way to orient a part or to change the design to minimise support (time/cost) and also ensure
the cosmetic faces are tops or sides to get the best quality. sometimes its just easier to make it as more than one part which still may happen here
as then I can print the logo on a fine setting and the main body on a coarse but upside down so no infill is required.
Pete
That must me some pretty dense support infill?. you could get away with 5% support infill with a support roof, with 1mm roof (8 layers at my setting
of 0.12 layer height) it should allow a good bridge to the infill. I've just done a basic cup design through Cura and 5% support only adds 7grams
to a 15gram base model.
For ABS make sure the fan is turned off and keep the bed temp the same throughout the print, and use some pritstik on the bed, that should assist with
adhesion and warping.
AntonUK - 8/7/20 at 02:29 PM
I did some for the ginetta. Worked well but didn't get the retaining clip quite right and I lost one...
reminds me to print another
ken555 - 8/7/20 at 05:10 PM
I made in a sort of top hat shape, that can't escape from the front, only the back.
Bluemoon - 12/7/20 at 09:00 PM
If you get a printer I am very happy with my "Ender 3", which seems a good cheap place to start printing..
I have been rather impressed with the quality of the printer for the price, very well packaged, and quality for the money has surprised me, 3D
printers have come a long way since RepRap.
Only printed PLA so far, quite impressed by what is possible.
Mine came from Amazon, seller Comgrow, had to contact their support much to my surprise they responded in 7 hrs and their advice fixed my issues other
cheaper suppliers out there but support may be patchy.
Dan
[Edited on 13/7/20 by Bluemoon]
watsonpj - 13/7/20 at 10:49 AM
Loggyboy yes it is quite dense and I can reduce it but when i use petg I find that it doesn't bridge well so 5% gives a very poor surface finish
above.
I was only doing this as a quick test in abs anyway so I just used a dense support and some brims to stick it to the bed which it did but then failed
see below.
That said I haven't had a successful print since (until last night) when i found that the print head cooling fan had failed so everytime I
printed the extruder would clog. This was happening 10 -20 layers into the print which was how long it took the heat to get past the heat break and
make the filament too soft to drive, obviously I didn't work this out until the 4th strip down as the fan is completely silent in operation
normally and it wasn't until then that I tried to strip it immediately rather than wait for it to cool and found a plate that is always only warm
burning my fingers.

I final got a petg test cube out last night after fixing the fan issue so I will try again tonight to get a first off wheel centre in petg.
watsonpj - 13/7/20 at 05:17 PM
So the trial part is hot off the machine and fits the wheel but could probably do with being a little bit tighter so I'll do with the next part
with an extra 0.5mm on the flexures or I could try building this one up by 0.1-0.2 steps in epoxy until it feels good. . The petg has been out for
other a month so probably need drying before I do the real parts which has probably lead to a few zits.
Really annoyingly its meant to be random start but simplfy3d has done all the top surface starts in a line but this will be covered over by the insert
with the Fury Logo on.
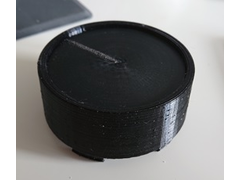

rp_wheel centre 2
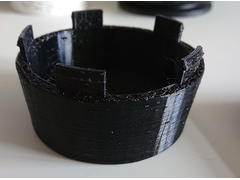

rp_wheel_centre_3
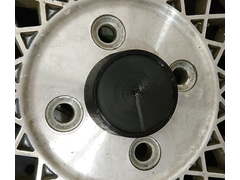

rp_wheel_centre
I went for a custom support in the end so model in a support frame and then used 15%, this used about the same material as 5% infill but had 15% to
support the roof.
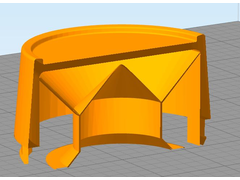

wheel_centre_custom_support
I'm going to put some holes through the top to give the adhesive something to stick to for the fury logo. Ill model the logo next
tonight/tomorrow and get it made.
Pete
steve m - 13/7/20 at 05:28 PM
Only an idea, and I know 100% of nothing about 3d printing, !!
If you were to have a central shaft of say 10 mm that was around 100mm long, you could spin them on a drill to clean the outside up to an acceptable
finish, and then break the shaft off ?
as said, only an idea
steve
watsonpj - 13/7/20 at 08:32 PM
yep that would work but as its not a plastic moulding the inside and outside walls don't need to be parallel so i can pop it on the lathe as the
inside faces are parrallel whilst the outer ones are angled.
BenB - 13/7/20 at 09:14 PM
PETG sands and polishes quite nicely in my experience. Should make it look reet good.
watsonpj - 13/7/20 at 10:54 PM
OK centre logo is modeled now and it looks pretty good hope it prints as well.
The different colours are on different levels 0.2mm apart so should be able to paint then ok.
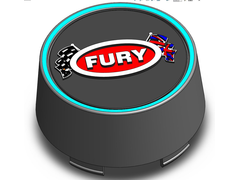

Wheel_cap_assy
will try tomorrow
tims31 - 14/7/20 at 11:16 AM
quote:
Originally posted by watsonpj
OK centre logo is modeled now and it looks pretty good hope it prints as well.
The different colours are on different levels 0.2mm apart so should be able to paint then ok.


Wheel_cap_assy
will try tomorrow
Looking really good. I need to measure my wheels and get the design sorted for mine. I had a llook at the weekend and the rear center is very tight to
the washer that sits behind the nut. Could turn that down on a lathe I guess to provide some clearance. Fronts just need to be a flat cover rather
than a cap like this.


