wilkingj
|
| posted on 23/4/06 at 05:04 PM |

|
|
Waiting for SVA - Please comment - new Pics at the bottom.
EDIT:
SVA is now next Tuesday. I have deleted these Pics and put new ones at the bottom of the thread.
All coments gratefully rec'd.
Geoff
[Edited on 3/5/2006 by wilkingj]
1. The point of a journey is not to arrive.
2. Never take life seriously. Nobody gets out alive anyway.
Best Regards
Geoff
http://www.v8viento.co.uk
|
|
|
|
|
Johnmor
|
| posted on 23/4/06 at 06:10 PM |
|
|
SVA
Looks good. I think you may have to cover the edge of the front suspension mounting brackets, i have see people using the plastic edge trim, and maybe
the heads of the bottom ball joint mounting bolts.
Also, how have you fixed the adjustment on the brake bias bar?
I am also building a Viento, rare breed now, Hope all goes well
|
|
|
bob
|
| posted on 23/4/06 at 06:21 PM |
|
|
Depends which side of the bed your SVA man got out of geoff, my boot locks were like yours and they failed on radius.
Anyway the top wishbones where they c bolt onto the chassis bracket are contactable with the sphere they use on the test,i put rubber edging around
mine.
bottom shocks on the adjuster i put a gator round,should be some pics in my archive.
I used round nut covers from tifosi as i didnt think the ones you have used were any different in radius from an actual nut.
|
|
|
wilkingj
|
| posted on 23/4/06 at 06:24 PM |
|
|
yes, I know about the suspension mounts.
The Balance bar has to be Roll Pinned as per the manual. If I read it correctly, you can have it adjustable, but not past certain limits.
I am hoping I can adjust on the SVA rollers and then pin them up.
I have two sets of spare nuts (7/16UNF) already drilled with roll pins to suit.
I have the hole in the nut to use a a guide or it will be a pig to do in situ.
ie lock up the holed nut with another nut to stop it moving when drilling through the bar using the nuts hole as a guide.

1. The point of a journey is not to arrive.
2. Never take life seriously. Nobody gets out alive anyway.
Best Regards
Geoff
http://www.v8viento.co.uk
|
|
|
rusty nuts
|
| posted on 23/4/06 at 07:08 PM |
|
|
Geoff the lower spring adjustor needs to have cover, If I get a chance will take them off of my car for you or use radio controlled car tyres
|
|
|
smart51
|
| posted on 23/4/06 at 07:37 PM |
|
|
My SVA man wouldn't let me drill and pin my bias bar on site. I'd already failed on emissions though. You might be lucky.
|
|
|
Marcus
|
| posted on 23/4/06 at 07:40 PM |
|
|
I'd be a little worried about the radius on the bottom of the dash panel - needs to be 19mm (I think).
They don't like pipe lagging anymore, unless covered with vinyl and glued on to make it permanent.
Marcus
Marcus
Because kits are for girls!!
|
|
|
darrens
|
| posted on 23/4/06 at 08:15 PM |
|
|
Looks good, like the red interior btw. Curious how you got your rad fans to fit behind the rad, I couldn't fit mine in (bought thin ones
as-well)
Concure with advise on top suspension bracket..
Things you have to do!!!!
|
|
|
Mark Allanson
|
| posted on 23/4/06 at 08:17 PM |
|
|
Geoff, mentioned before but the adjusting ring of the front suspension shocks need to be covered, I used a suitably trimmed steering rack boot, only
£3 a pair

[Edited on 23/4/06 by Mark Allanson]
If you can keep you head, whilst all others around you are losing theirs, you are not fully aware of the situation
|
|
|
wilkingj
|
| posted on 23/4/06 at 09:59 PM |
|
|
quote:
Originally posted by darrens
Curious how you got your rad fans to fit behind the rad, I couldn't fit mine in (bought thin ones as-well)
Got a couple of fans from Stoneleigh last year £15 each, and brand new. not thin, and didnt quite fit. Made up some brackets and jiggled them about
until it fitted. (Used a Large hammer and a Bread knife from my Land Rover toolkit really ) )
AS for the Shocks, I know I have to do the covering, and the brackets as well. they are 2 1/4" springs, so I cant use the normal dodges, I think
a CV joint rubber may be better.
Rust nuts, dont take your tyres off... I have 2 1/4" shocks.. Thanks for the offer, I will sort something out.
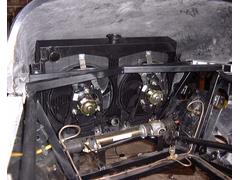 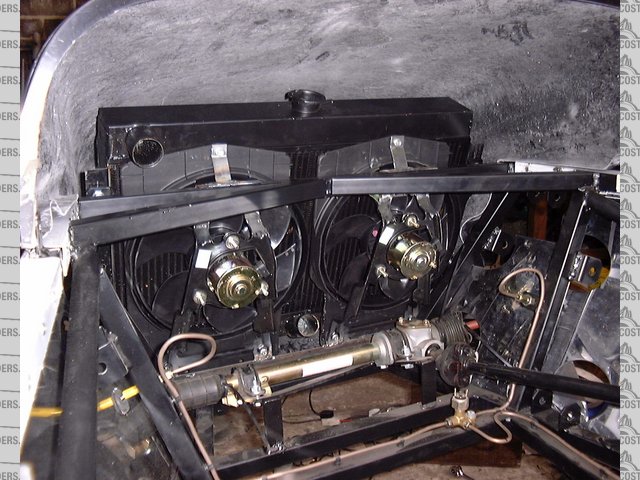
Twin Fans & Rad Fitted
[Edited on 23/4/2006 by wilkingj]
1. The point of a journey is not to arrive.
2. Never take life seriously. Nobody gets out alive anyway.
Best Regards
Geoff
http://www.v8viento.co.uk
|
|
|
Donners90
|
| posted on 24/4/06 at 09:35 PM |
|
|
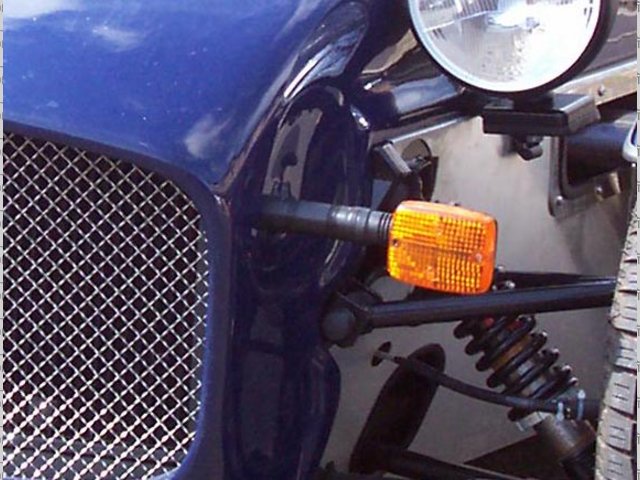
Front indicators
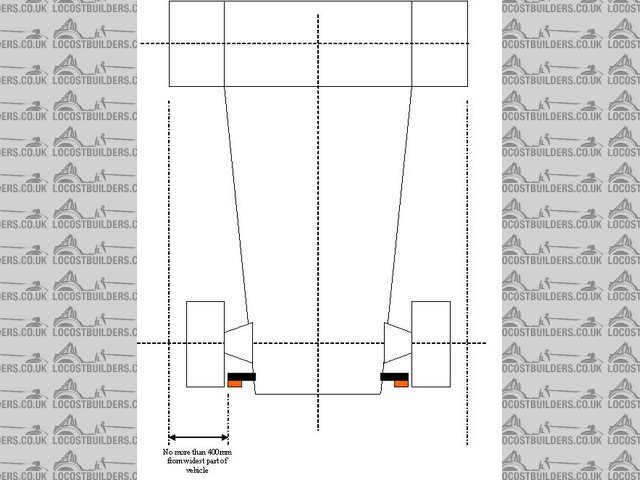
Can't see tham in your pics, but make sure they extend far enough. I had to add a 100mm spacer so they were more than 400mm from the widest part
of the car. (Which is the rear wings NOT the front wings as I originally had!)
Also, my examiner got his radius tool into the gap either end of the exhaust manifold, and there are no internal radius'!
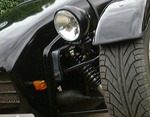
Note also, the rubber strip around the bottom of the headlight bracket. Not radiused as standard
Re-SVA on May 5th so fingers crossed!
HTH
James
[Edited on 24-4-2006 by Donners90]
Rescued attachment indicator stalk.jpg
|
|
|
wilkingj
|
| posted on 24/4/06 at 10:07 PM |
|
|
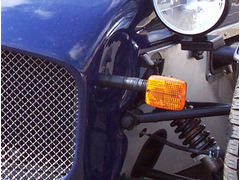
Indicators
As requested... indicators I think they are OK, where is the 400mm measured from I know its the extreme outside of vehicle to where?? edge, centre,
or inner edge of the light??
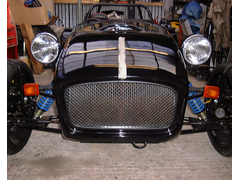 
Ebay Grill
1. The point of a journey is not to arrive.
2. Never take life seriously. Nobody gets out alive anyway.
Best Regards
Geoff
http://www.v8viento.co.uk
|
|
|
jos
|
| posted on 25/4/06 at 08:06 AM |
|
|
Suspension strut top mounting could do with some cover
Leading & protruding edge of chassis member infront of top suspension pick up needs covering too IMHO
Top suspension arm pickup needs cover
Check radius of bottom of dashboard. How thick is your dash and how hard is it. If its harder than the stiffness of an eraser it will need a 19mm
radius. If its softer it only needs a 5mm radius (IIRC). Eitherway I think your examiner may view your radiussing efforts as temporary and will
probably fail you on it.
I think the collar on your steering column needs to be shoved down against the bush to stop the bush from riding up the column
Check with another builder of your car whether they used locknuts or split pins on your brake bias bar.
.: Motorsport / motor racing circuit / track wall art Apex Traxs :.
|
|
|
Donners90
|
| posted on 25/4/06 at 08:11 AM |
|
|
Measured to the outside edge of the indicator.
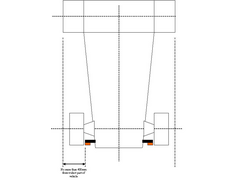 
Rescued attachment indic.JPG
|
|
|
Dave J
|
| posted on 25/4/06 at 01:50 PM |
|
|
Hi Geoff,
My bottom edge of the dash is the same as yours. The SVA inspector took quite a long time prodding it and squeezing it and took quite a lot of
convincing that the 'give' in it was the same as the padding on the steering wheel. He eventually let it go after consulting with a
colleague.
I was told by Luego that it would be ok, as there is sufficient forward backwards movement on the dash. I put this point to the inspector. He said
that is not what they are looking for. It is to protect the legs in the vertical plane should you have a shunt and your legs go upwards and hit the
dash.
It was really touch and go.
Make sure you take plenty of rubber trim and super glue with you and you'll be fine.
Nice build BTW, I like the polished sides.
The very best of Luck
Dave
|
|
|
wilkingj
|
| posted on 26/4/06 at 10:15 PM |
|
|
Thanks this is all useful stuff..
Brake Bias Bar MUST be Roll Pinned as per the SVA manual Split pins and lock nuts / Nyloc's are considered temporary and should fail. I have pre
drilled my nuts, so hopefully should only need to drill the bar and insert the roll pins once balanced up.
1. The point of a journey is not to arrive.
2. Never take life seriously. Nobody gets out alive anyway.
Best Regards
Geoff
http://www.v8viento.co.uk
|
|
|
Tiger Super Six
|
| posted on 28/4/06 at 12:58 PM |
|
|
Also, the chasis rail under the scuttle will need to have pipe lagging run across it.
Mark.
Mark
Tiger Avon
|
|
|
chockymonster
|
| posted on 29/4/06 at 03:38 PM |
|
|
any better pictures of the front cycle wings?
They look a bit short from what I could see in the picture
|
|
|
wilkingj
|
| posted on 3/5/06 at 09:16 PM |
|
|
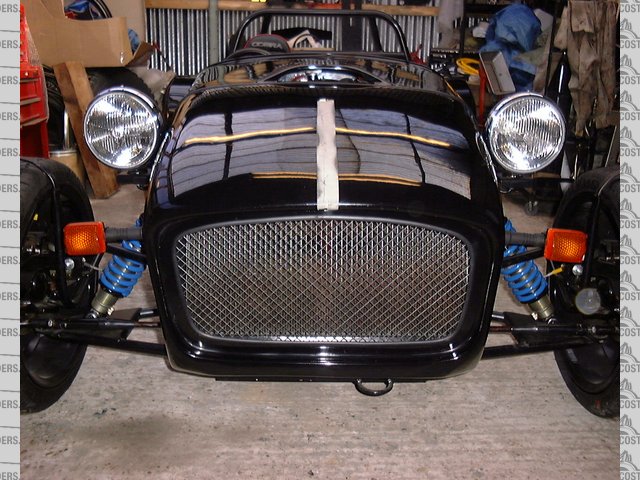
Thanks for all the help.
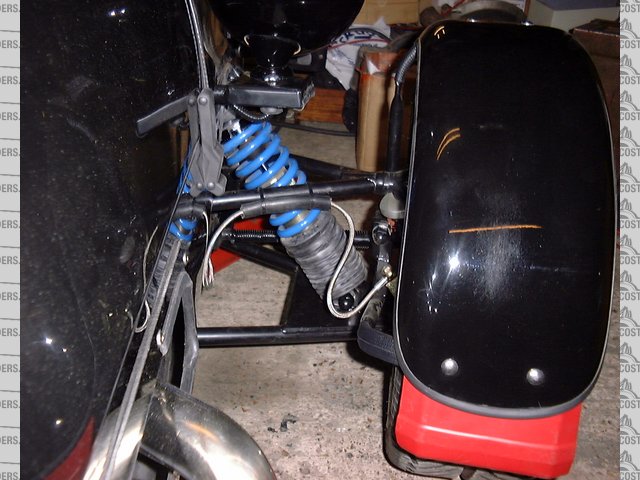
I have done some more work now, so here are a few more piccies.
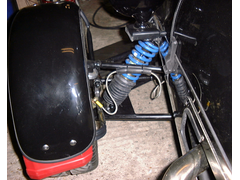
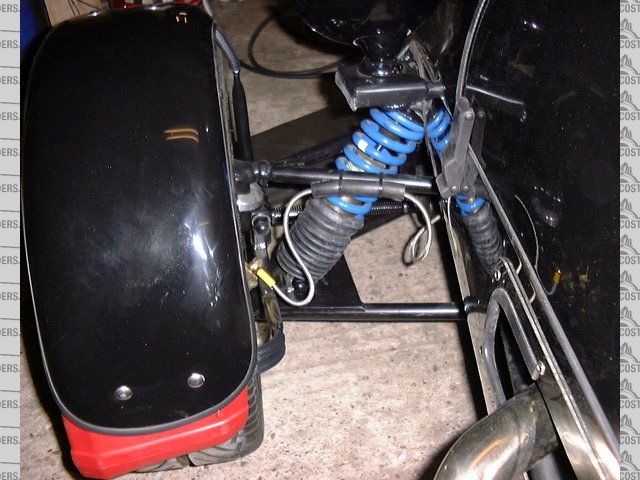
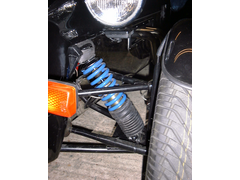
1. Still have to pipe lag under the Scuttle.
2. Hope the bottoms of the Shocks are now OK, although the Gaitor only speads over the brackets. Hopefully enough to deter the dreaded Ball.
3. Have done the Mirror Base.
4. Mudguard outer edge covers the wheel by about 1mm, but barely on the inner side. The guards are short at the back, hence the Red "Mud
Flap" to extend. They are for 15" wheels, and Luego have ceased trading.
All Comments gratefully recieved.
SVA now Next Tuesday.
pics:
Left Front Rear
 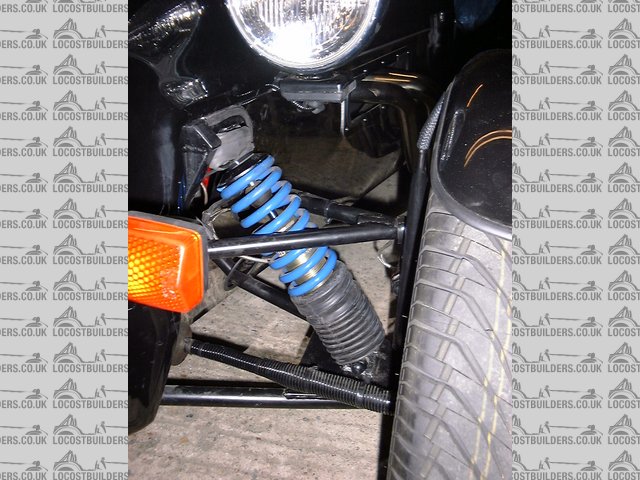
Left Front1
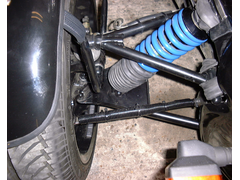 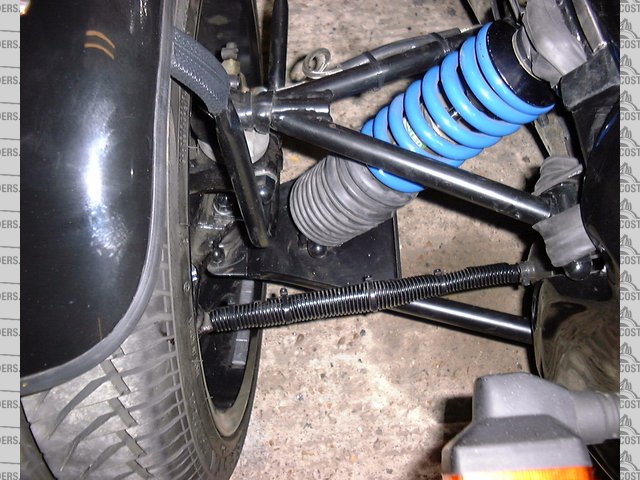
RFront1
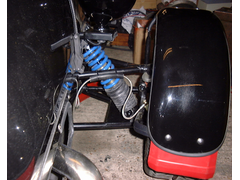 
Right front rear
[Edited on 3/5/2006 by wilkingj]
1. The point of a journey is not to arrive.
2. Never take life seriously. Nobody gets out alive anyway.
Best Regards
Geoff
http://www.v8viento.co.uk
|
|
|
Dave J
|
| posted on 4/5/06 at 03:28 PM |
|
|
Hi Geoff,
On point 4 of your list, you said:
"Mudguard outer edge covers the wheel by about 1mm, but barely on the inner side"
I queried this with the SVA inspector.
Apparently, the inner side is not so important as the outer.
Get a straight edge and stand it vertically against the outer edge of your mudguard and central to your wheel.
The straight edge should only touch the outer edge of your mudguard. If your tyre or any part of your ally wheel touches the straight edge, you may
fail on that point.
The staight edge I used was a 24" spirit level so I could be sure of plumb vertical.
This ruling stems from the fact that should you have the misfortune of hitting a pedestrian, then in theory they will be deflected from the wheel by
the mudguard, instead of hitting the revolving wheel. Yes I know our flimsy mudguards struggle to deflect a gnat, but it's a universal standard
more suited to production vehicles.
Luego also provided me with the 15" mudguards for my 17" x 205 front tyres. They were totally unsuitable. Luckily I managed to get another
set out of them before they went bust.
My alloys slightly dish out further than the tyres, so I still had a right game with this.
The inspector tested this by using his clipboard as the straight edge, so it wasn't exactly scientific.
Just get as much of the mudguard over the outer edge as you can, without making the inner edge too obvious in not covering the wheel and trust to
luck.
Best of luck
Dave
|
|
|


.jpg)