lsdweb
|
| posted on 17/1/15 at 09:57 PM |

|
|
Repanelling tips?
Hi All
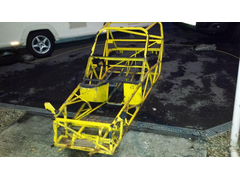
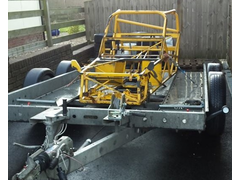
My Striker chassis is now stripped and ready for blasting / repair and mods.
I managed to remove all the ali panels without damage except for the driver's side which was bonded on with masses of sikaflex. Removing it has
kinked it in a few places so I'll probably replace it. I may do the passenger side side panel too as this has a few gouges / marks.
Has anybody got any tips in repanelling a chassis? I'll use the original panels as a template and the original floor panels will let me get the
holes in the right place for the rivets on the underside of the side panels as they use the same holes.
Thanks in advance
Wyn
 
Bare chassis
|
|
|
|
|
Rich J
|
| posted on 17/1/15 at 10:30 PM |

|
|
A PDF of the original build manual is on it's way to you which may give some pointers Wyn 
|
|
|
lsdweb
|
| posted on 17/1/15 at 10:38 PM |

|
|
Thanks Rich! I've got a Fury manual but the Striker one will help immensely!
|
|
|
TimC
|
| posted on 17/1/15 at 11:00 PM |

|
|
Most of the Strikers that I've seen have relatively few rivets holding the panels on. I suspect there's an opportunity to make the panels
more structural.
|
|
|
bi22le
|
| posted on 17/1/15 at 11:04 PM |

|
|
I keep wondering that if i do a back to metal rebuild what can be done about the rivet heads in the chassis rails. It bugs me that they will rattle
around and and the finest of Wight.
I posted about this some time back and people mentioned to spray some sort of rock anti corrosion spray that is sticky into the holes. It will catch
the bits and stop them moving.
Jusy a thought.
Track days ARE the best thing since sliced bread, until I get a supercharger that is!
Please read my ring story:
http://www.locostbuilders.co.uk/forum/13/viewthread.php?tid=139152&page=1
Me doing a sub 56sec lap around Brands Indy. I need a geo set up! http://www.youtube.com/watch?v=EHksfvIGB3I
|
|
|
mark chandler
|
| posted on 18/1/15 at 07:18 AM |

|
|
I would Hammer the old panels flat as a template, hold the new flat panel to the car and dress the edges over with a soft hammer working you way up
and down spreading the blows with a block of wood or even use a lump of 2" x 4" as the hammer!
You will not get the crisp bend that the factory panels would have had but it will be consistent, then use to old panel to estimate the holes and
gentle dress the with a small ball pien hammer to exactly locate the rivit holes.
If you want a factory finish on the bends you will need to visit your local sheet metal folding company to put in the bends or make a tool out of
angle iron to fold over that length.
Spraying waxoil in the tubes will stop rattlng of dead rivit heads.
|
|
|
rusty nuts
|
| posted on 18/1/15 at 08:39 AM |

|
|
I doubt very much if anyone will hear the rivets rattling around inside the chassis over all the other noises from the car. Spraying the inside is a
good idea to slow any rusting but be careful if carrying out any welding on the chassis in the future. While the chassis is bare do any mods /repairs
|
|
|
Smoking Frog
|
| posted on 18/1/15 at 10:27 AM |

|
|
To line up existing rivet holes in a new panel.
If they cannot be measured accurately this may work. Pull the centre out of a rivet and turn it round the other way. Place the rivet in a hole.
Position the panel and tap with a mallet. Remove the panel, drill where the small indents are. Start with the corners. Once these are done hold in
place with glekos. Once mastered, it's possible to do several holes at once, although it is a slow process.
|
|
|
rdodger
|
| posted on 18/1/15 at 10:55 AM |

|
|
Weld them all up and start again?
|
|
|
peter030371
|
| posted on 18/1/15 at 03:31 PM |

|
|
quote:
Originally posted by Smoking Frog
Pull the centre out of a rivet and turn it round the other way. Place the rivet in a hole. Position the panel and tap with a mallet.
I did a very similar thing on mine, only difference was that rather than pull the center out of a rivet I cut it off the center and crimped it into
the rivet to leave a sharp point. OK you waste a few rivets but you pop these in all along the existing chassis holes, line up the new panel and a
gentle tap with a soft faced hammer marks the center point for each hole perfectly 
The build manual for the Striker is on the Raw website and covers this stage reasonably well but the pictures could do with being twice the size and
in focus 
Having said all that I paid Fury to do most of my panels as they are a lot quicker than me, I just had the rear bulkhead, transmission tunnel and
front bulkheads to mark up and fit.
|
|
|
JeffHs
|
| posted on 18/1/15 at 04:21 PM |

|
|
Make a rivet finder - dead easy as attached
http://www.zenith.aero/forum/topics/rivet-hole-finder-you-can
|
|
|
Smoking Frog
|
| posted on 18/1/15 at 04:59 PM |

|
|
quote:
Originally posted by JeffHs
Make a rivet finder - dead easy as attached
http://www.zenith.aero/forum/topics/rivet-hole-finder-you-can
Like it! Looks like a good idea.
|
|
|
lsdweb
|
| posted on 18/1/15 at 08:28 PM |

|
|
Thanks all!
Some great ideas there. I've looked at the old panels again this afternoon and they're not that bad! The only damage is behind the rear
wheel arch so could be easy to get away with it. It just seems daft to do a bare chassis rebuild and put old panels back on!
Ta
Wyn
 
Description
|
|
|


