02GF74
|
| posted on 15/8/09 at 05:34 PM |

|
|
... and 5 hours later ....
.... sorted. 
front of the rail taken to where the top rail is doubled up, triangulation taken back to top rail where it meets vertical side rail.
Should hold, whaddya reckon?
[Edited on 15/8/09 by 02GF74]
 
Rescued attachment DSC04823.JPG
|
|
|
|
|
mookaloid
|
| posted on 15/8/09 at 05:42 PM |
|
|
Very odd - but if it makes you happy
"That thing you're thinking - it wont be that."

|
|
|
oldtimer
|
| posted on 15/8/09 at 05:45 PM |
|
|
I don't mean to be negative, but is it the photograph that makes the top rail look bent?
|
|
|
02GF74
|
| posted on 15/8/09 at 05:48 PM |
|
|
quote:
Originally posted by oldtimer
I don't mean to be negative, but is it the photograph that makes the top rail look bent?
aahh see what you mean. that is the rubber trim - had to lift that up as well as some of the aluminium that is folder over in order to get at the top
rail to weld to it.
top outer rail is straighter than a unbent straight thing.
|
|
|
RAYLEE29
|
| posted on 15/8/09 at 05:49 PM |
|
|
Is it me or perhaps the picture but it looks like the top chassis rail has got distorted from what youve done
also was it actually necessary?
im sure theres a simpler solution
|
|
|
RAYLEE29
|
| posted on 15/8/09 at 05:53 PM |
|
|
sorry looks like im just the slowest typer in the world
|
|
|
Richard Quinn
|
| posted on 15/8/09 at 06:04 PM |
|
|
Why not just a single piece from the end of the doubled bit back to the bulkhead?
|
|
|
RichieW
|
| posted on 15/8/09 at 06:25 PM |
|
|
I'm not sure that mod is actually adding anything to the stiffness of the engine bay. Looks like a bit of a waste of time really.
As hicost says the bracing needs to run the length of the bay and be triangulated.
Try and picture where the forces are coming from and going to. I'm no engineer but I can't see any forces going through that mod at all
so I don't think its doing very much other than adding weight.
|
|
|
zilspeed
|
| posted on 15/8/09 at 06:55 PM |
|
|
This would have been my solution I reckon.
Rescued attachment engine.jpg
|
|
|
iscmatt
|
| posted on 15/8/09 at 07:08 PM |
|
|
quote:
Originally posted by zilspeed
This would have been my solution I reckon.
This exactly what i was thinking you should do. What zilspeed has done adds strength, being honest i think what you have done will not add anything to
the integrity and strength of the chassis
imo
|
|
|
rusty nuts
|
| posted on 15/8/09 at 07:16 PM |
|
|
Have to agree with the above. Neater and stronger!
|
|
|
02GF74
|
| posted on 15/8/09 at 09:11 PM |
|
|
there is one flaw with that and that is the radiator sits behind the front rail - so in the diagram above, it is not possible to run the left arm of
the V as shown.
aslo to redirect the irght hand arm would require either cutting the rail and fiotting a new one or put in a noth, bending then welding it up.
I am not pulling the engine out again and access is tight to weld in that area
thanks for suggestions btw - I realise it is not ideal but no worse than what was there before.
|
|
|
scutter
|
| posted on 16/8/09 at 09:07 AM |
|
|
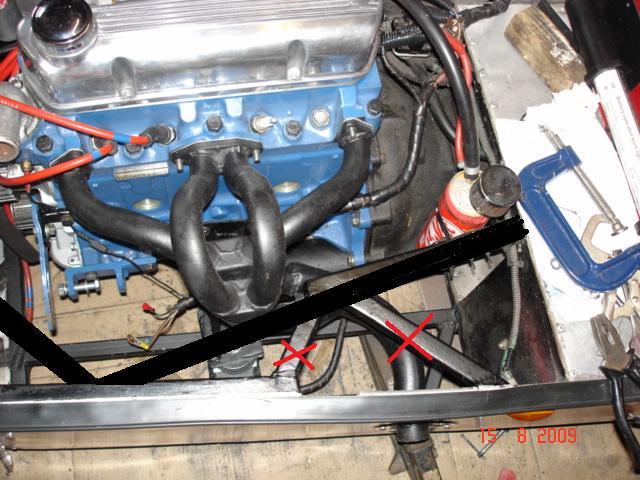
I'd try this,
 
Sorry, but I think it's worth removing all you've done run the left end to as close as possible to the orginal mounting point and the
right side outboard enough to clear the exhaust, the shorter link in red may not even be needed. You'll be looking at it for the rest of the
time you own the car thinking I could have done something better. run the left end to as close as possible to the orginal mounting point and the
right side outboard enough to clear the exhaust, the shorter link in red may not even be needed. You'll be looking at it for the rest of the
time you own the car thinking I could have done something better.
ATB Dan
The less I worked, the more i liked it.
|
|
|


.jpg)


